|

|
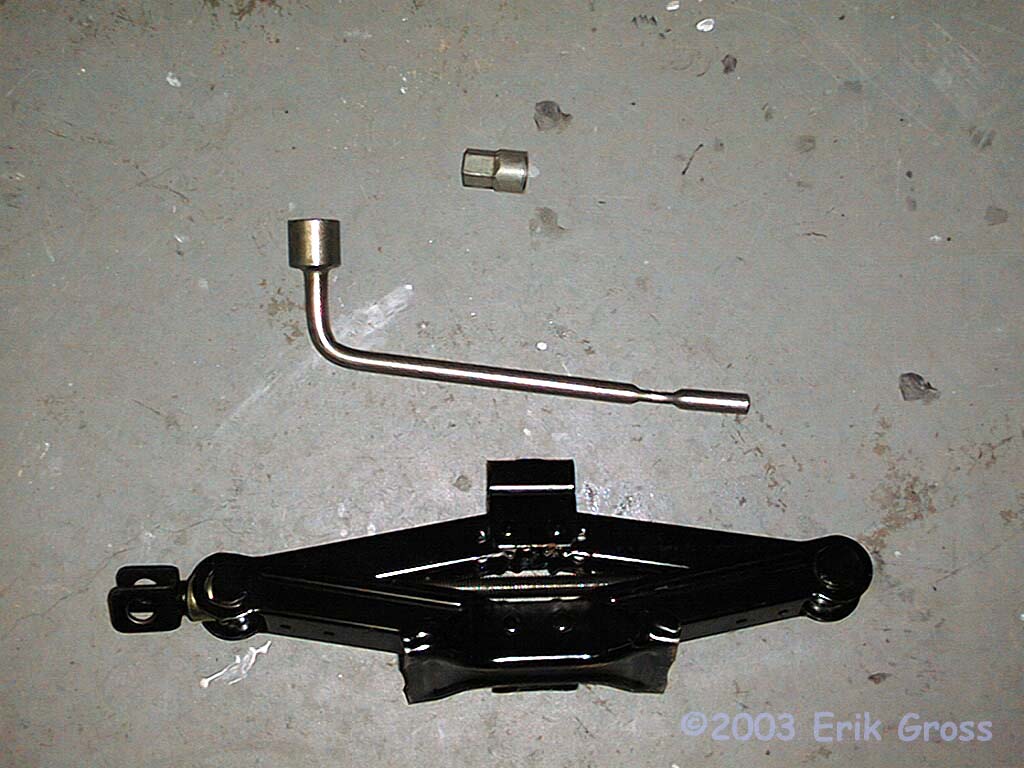
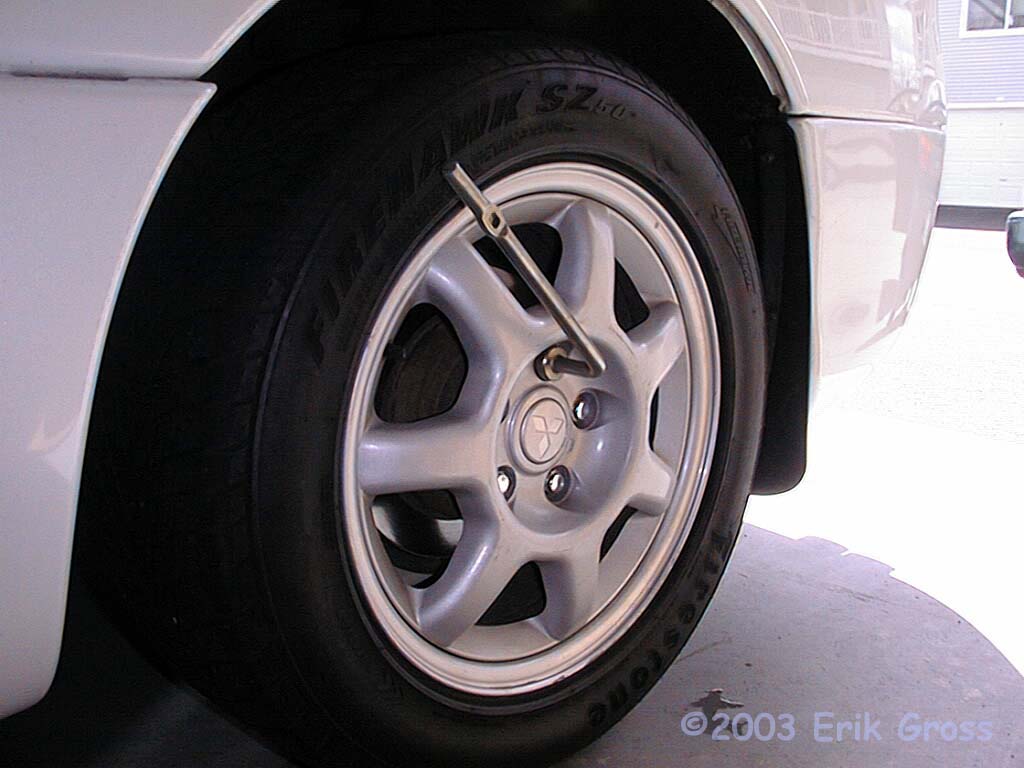
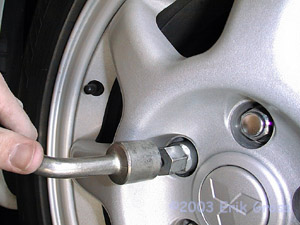
Make Sure You Have The Correct Wheel Lock Key
|
|
|
|
|
|
If you have anti-theft lugnuts, make sure you have the necessary key.
|
|
|
|
Chock the Rear Tires
|
|
|

|
|
|
You need to brace the rear tires so the car can't roll backward.
If you don't have actual wheel chocks, a 2x4 will do. You'll
also want to set the emergency brake.
|
|
|
|
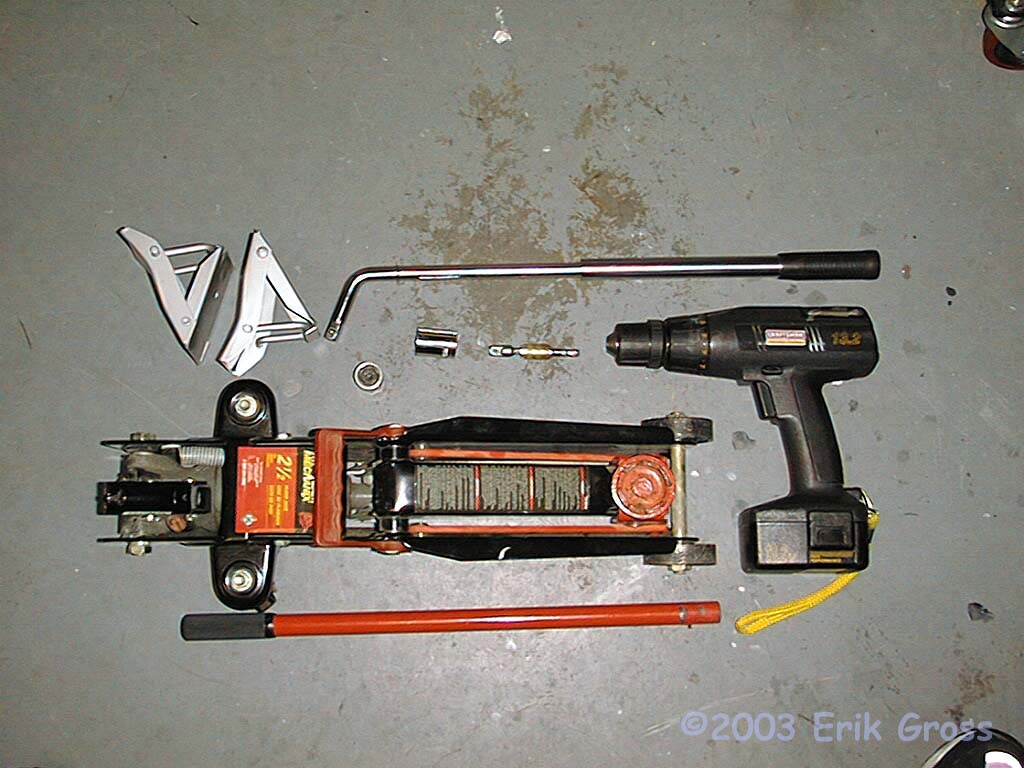
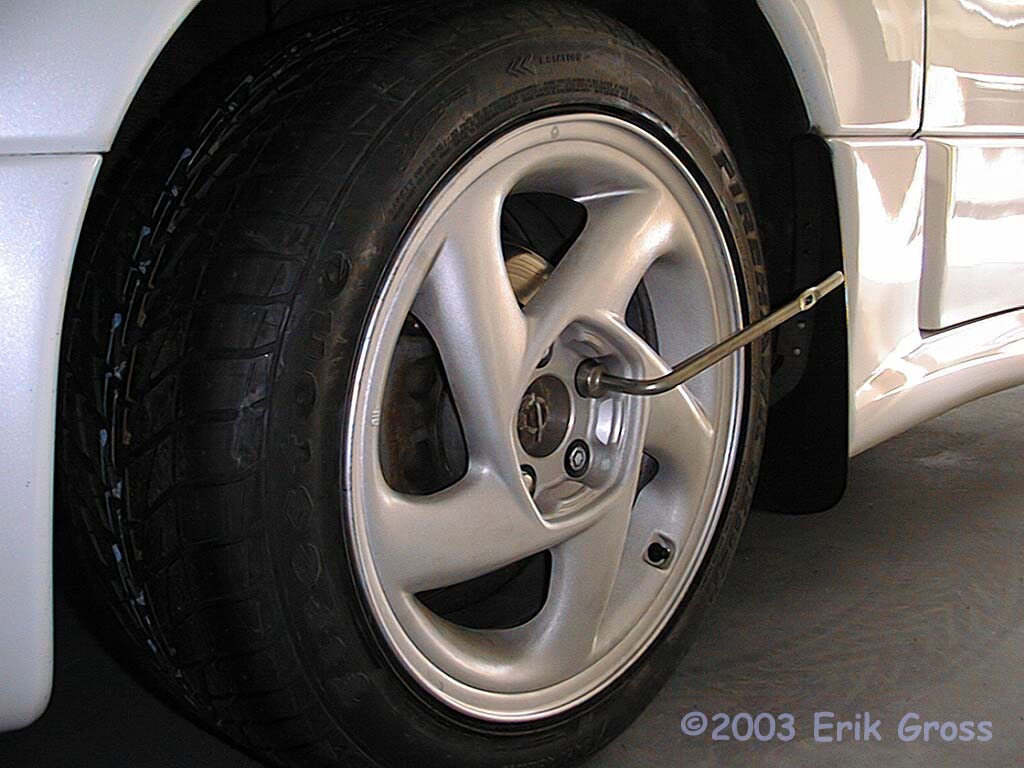
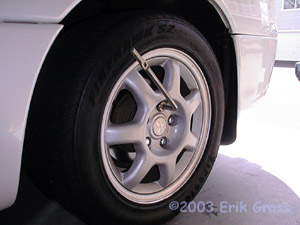
Loosen Front Lug Nuts
|
|
|
|
|
|
Using your lug wrench, turn each of the lug nuts on the front wheels
one turn, or whatever
is required to loosen them so that it takes little force to continue
turning them. Use the anti-theft wheel lock key on the lug nut
that a 21mm socket doesn't fit on. Do not completely remove the lug nuts at this time.
|
|
|
|
Raise the Front of the Car
|
|
|

|
|
|
Using a floor jack, raise the front of the car so that the
front wheels are about 1" of the ground. If you're using
your scissor jack, jack from the recommended jacking points
behind the front wheels and only raise one corner at a time.
Note that you don't need to use jack stands to support the car
since you won't be getting under the car and it will only
be raised for a brief time.
|
|
|
|
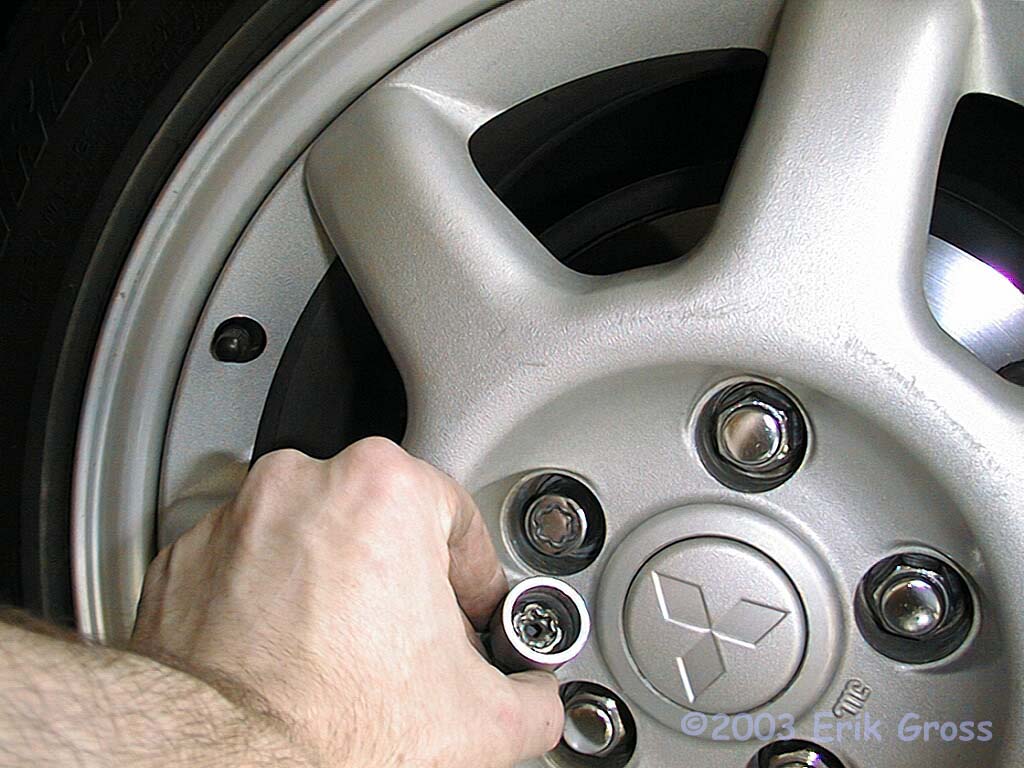
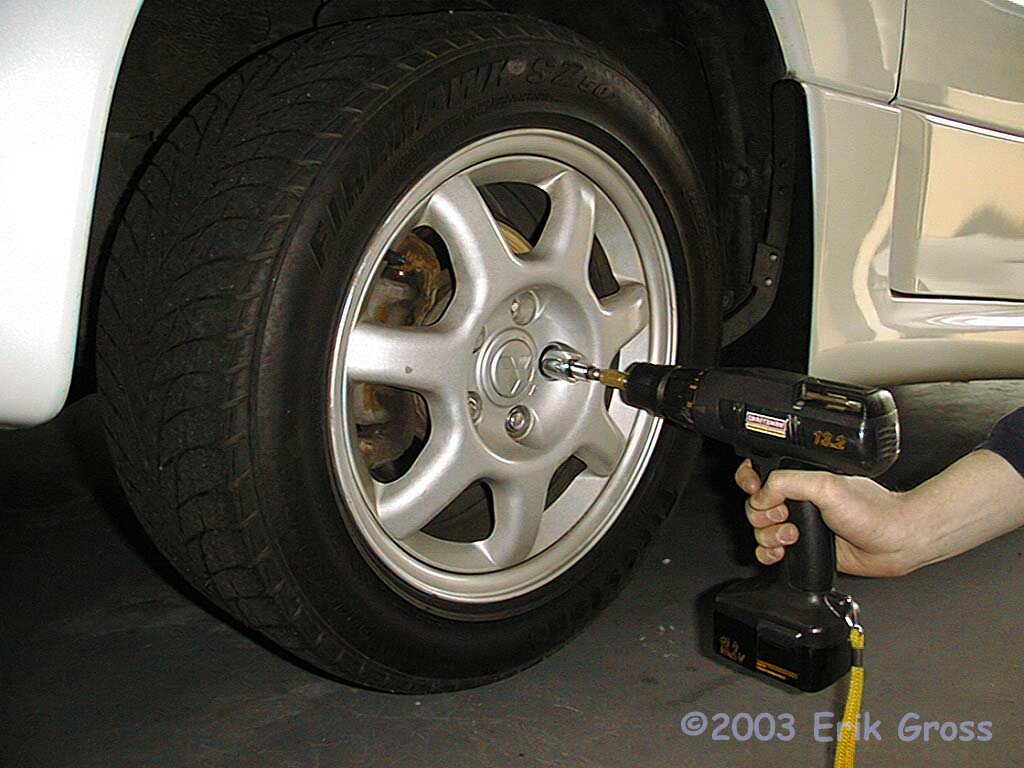
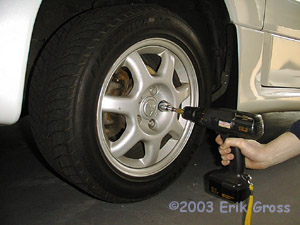
Completely Remove the Lug Nuts
|
|
|
|
|
|
Remove the 5 lug nuts from the front wheels (or wheel if you're using
the scissor jack) by turning them counter-clockwise. You can use your
lug wrench, but I like using my drill with a socket adapter because it's
quicker. If you have air tools and an air ratchet or impact wrench,
that'll work great, too.
|
|
|
|
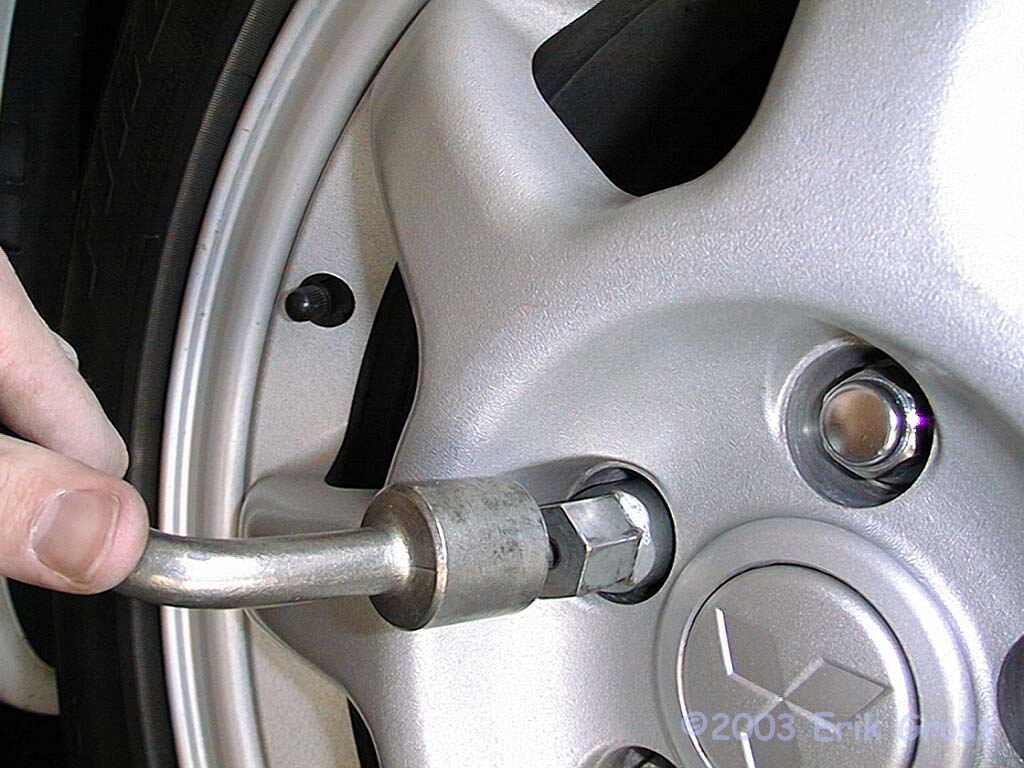
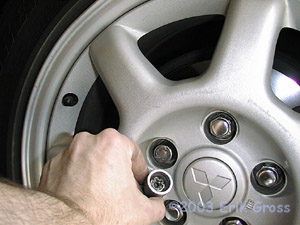
Remove the Wheel Lock
|
|
|
|
|
|
Using the special key, remove the locking lug nut if your car
is so equipped. With all the wheel-swapping I do when I go to
driving events, I strongly dislike the locking lugnuts, so I
chose to buy 4 regular lug nuts from Mitsubishi. Thus I don't have
to do this step anymore. If you live in a high-theft area,
you probably want to keep your locking lug nuts.
|
|
|
|
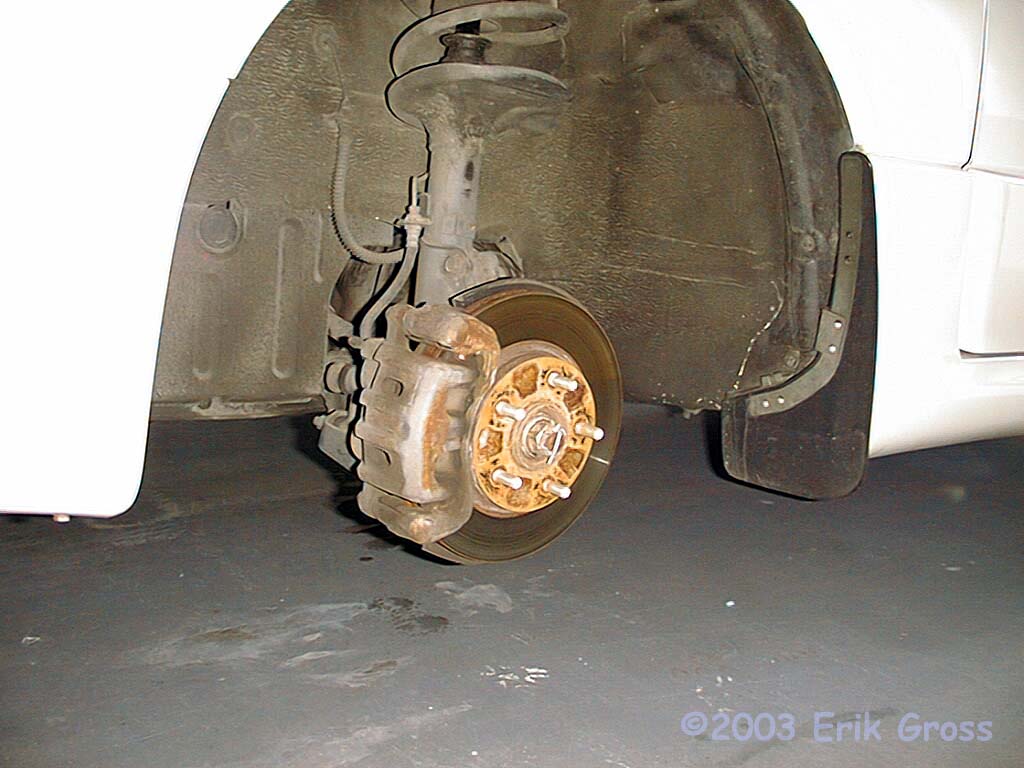
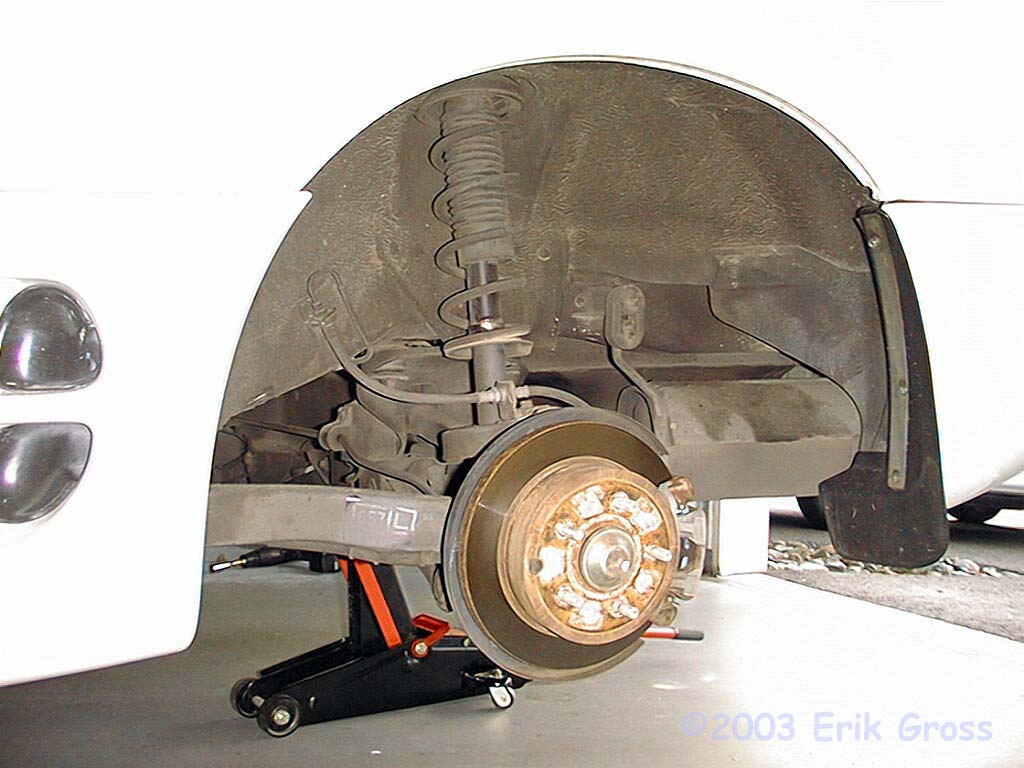
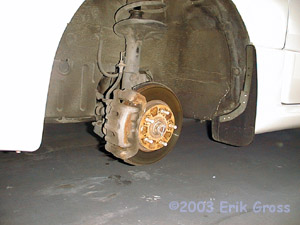
Remove the Front Wheel(s)
|
|
|
|
|
|
Now that the lug nuts are off of the car, you can remove the wheel.
It may be "stuck" to the rotor hat, so it may require a bit of
force or smacking it with your hand a bit to loosen it. If it's really
stuck and you can't get the wheel off, you can try the following: put your
lug nuts back on, but don't fully tighten them on the wheel that gave you
problems. Leave each lug nut about 1-2 turns from being fully tight. Then
lower the car back to the ground. Sometimes that will do it, but if not,
then carefully roll the car forward and backward a few feet to break the
wheel free from the brake rotor.
|
|
|
|
[optional] Install Anti-Sieze Lubricant
|
|
|
If you're going to do this, now is the time. It's useful to
put a light coating of anti-sieze compound on the
rotor hat surface (the part that the wheel touches and often
gets a little rust buildup) and on the threads of the studs
themselves. Don't put a ton of it everywhere or you'll
make a mess as that stuff is pretty hard to clean up. Typically,
I'll put anti-sieze compound on my hats/studs once per year
and that seems to last just fine.
|
|
|
|
Install new Front Wheel/Tire
|
|
|

|
|
|
If you're swapping wheels, then grab your new wheel/tire, line up the studs
with the holes in the wheel, and place the wheel on the car. Carefully
thread the lug nuts on the studs by hand for at least a turn or two to
make sure you don't cross-thread them.
Never install lug nuts with
an impact wrench or power tool until you've partially threaded them
on by hand.
If you're rotating
your tires and the wheel you want to put on this corner is still installed
on another part of the car, then get your spare tire out of the trunk
and temporarily install it on this corner of the car so you can remove the wheel
you want to install at this location.
|
|
|
|
Partially Tighten Lug Nuts
|
|
|

|
|
|
Tighten the lug nuts so that they are snug, but not
fully tightened. Also, you'll want to tighten them in a "star" pattern,
always selecting the nut "across" from the current one as the next one to
tighten. The numbers on the above picture illustrate one example
of this "star" pattern. It doesn't matter which one you start with,
just make sure you follow the pattern.
|
|
|
|
Lower Car Back to the Ground
|
|
|
Gently lower the car back to the ground so that it once again
rests on its tires.
|
|
|
|
Fully Tighten the Lug Nuts
|
|
|
|
|
|
Tighten the lug nuts to the torque spec in the same "star" pattern.
The spec for OEM wheels is 87-101 ft*lbs (120-140 Nm). If you put
anti-sieze lubricant on your studs, the best recommendation I've
read is to use 85% of the recommended torque. I use 85 ft*lbs
for my wheels. If you don't have a torque wrench handy, you can
use your normal lug wrench. One ft*lb of torque is generated by
exerting 1lb of force on the wrench at a distance of 1 ft from
the nut. Since your lug wrench is about 12" long, you'll need to
exert 87-101 lbs of force on the end of the wrench to properly tighten
the lug nut.
|
|
|
|
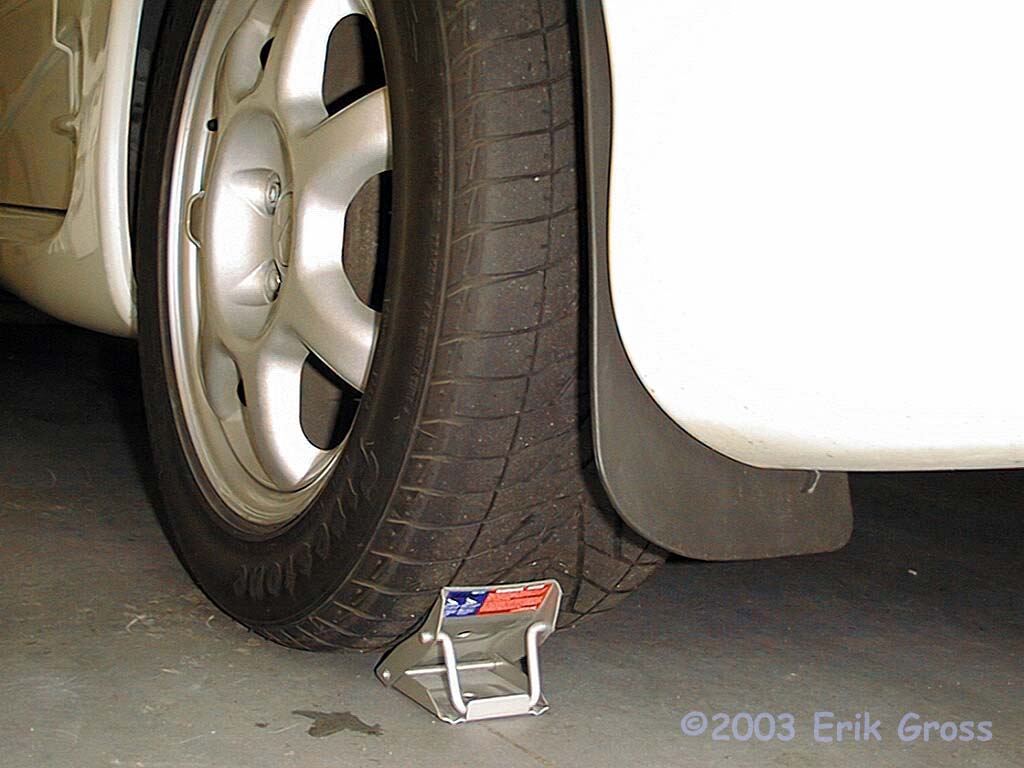
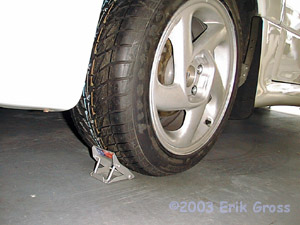
Chock the Front Wheels
|
|
|
|
|
|
Now, in preparation for changing the rear wheels, you need to
brace the front tires so the car can't roll foreward.
If you don't have actual wheel chocks, a 2x4 will do.
|
|
|
|
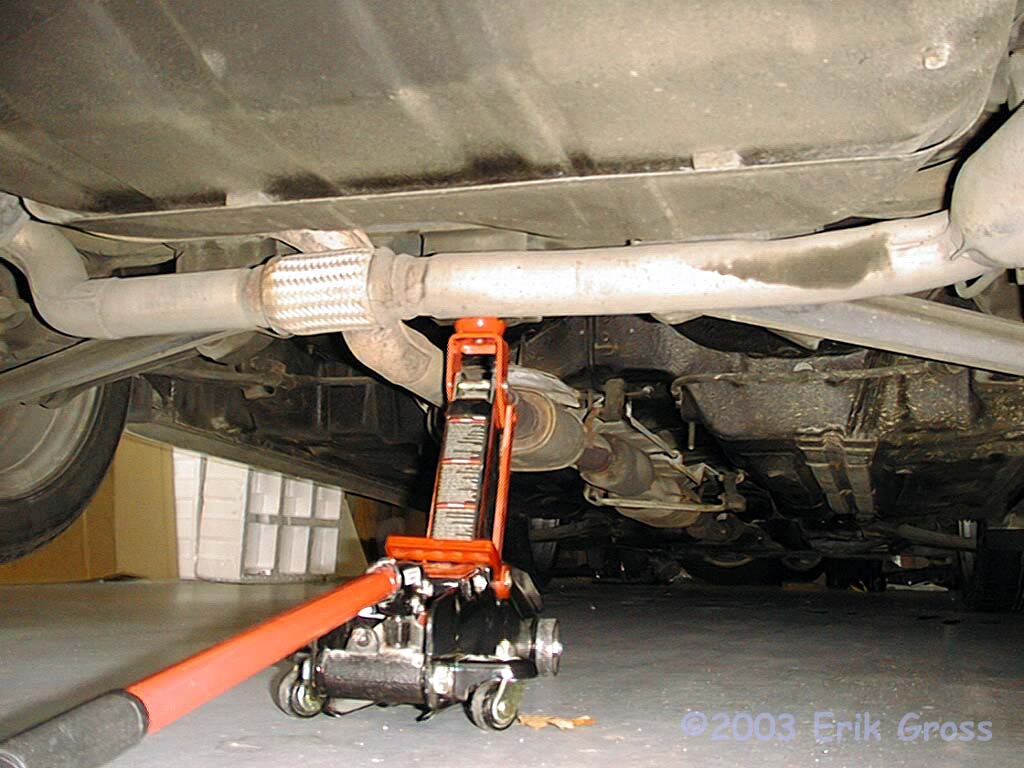
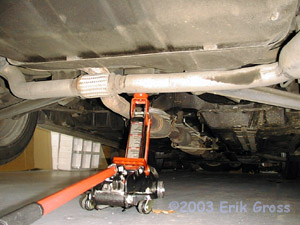
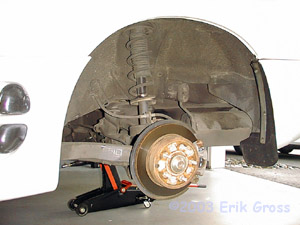
Raise the Rear of the Car
|
|
|
|
|
|
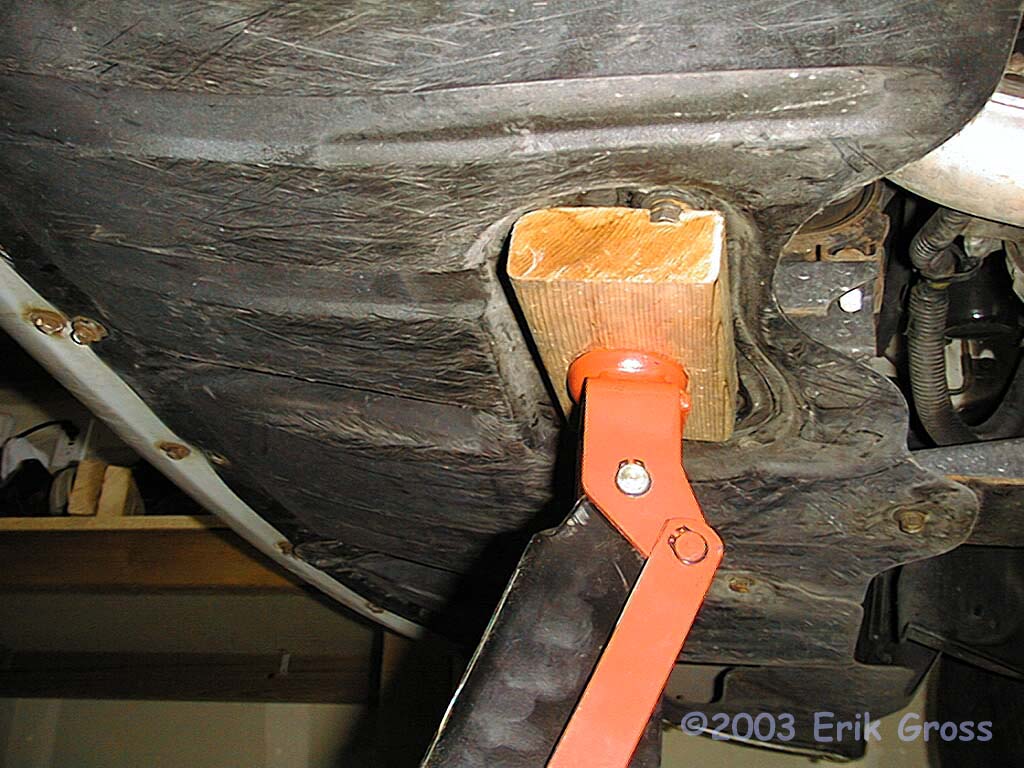
The FWD models have a nice bracket for raising the whole rear of the car,
while the AWD models can be supported by placing the jack under the
rear differential.
|
|
|
|
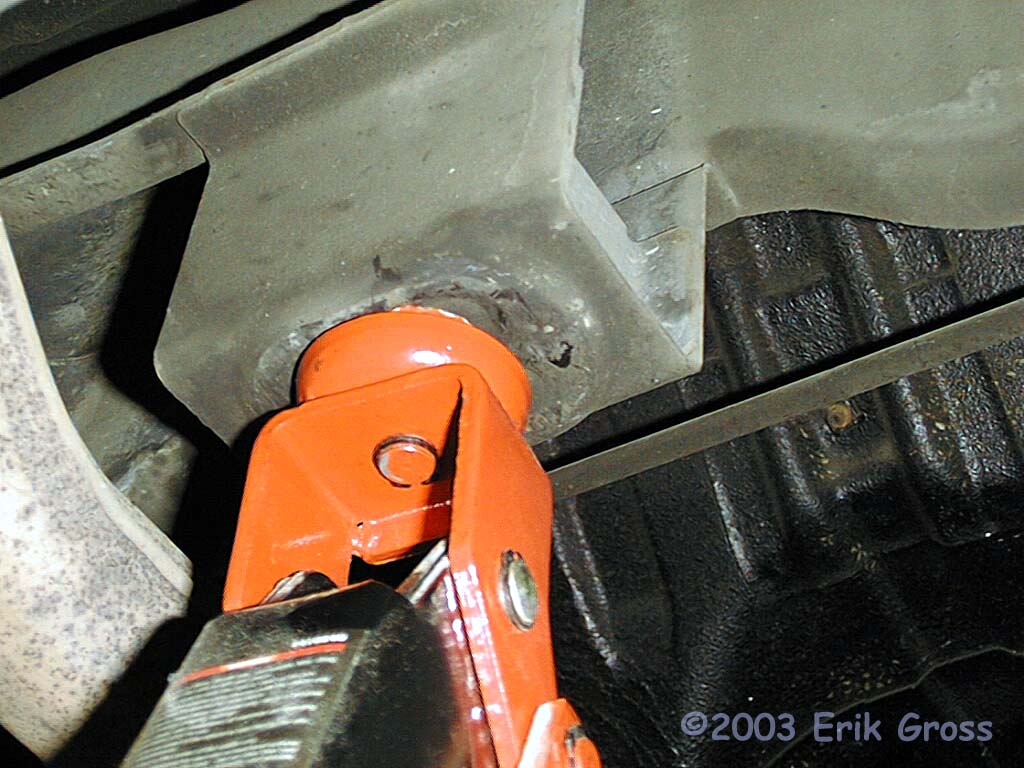
Closeup of FWD Rear Jacking Bracket
|
|
|

|
|
|
Here's where you want your jack...
|
|
|
|
Repeat Process for Rear Wheels
|
|
|
|
|
|
From here, it's exactly the same as you just did it for the
front wheels. That's it...
|