Why Do I Want To Do This?
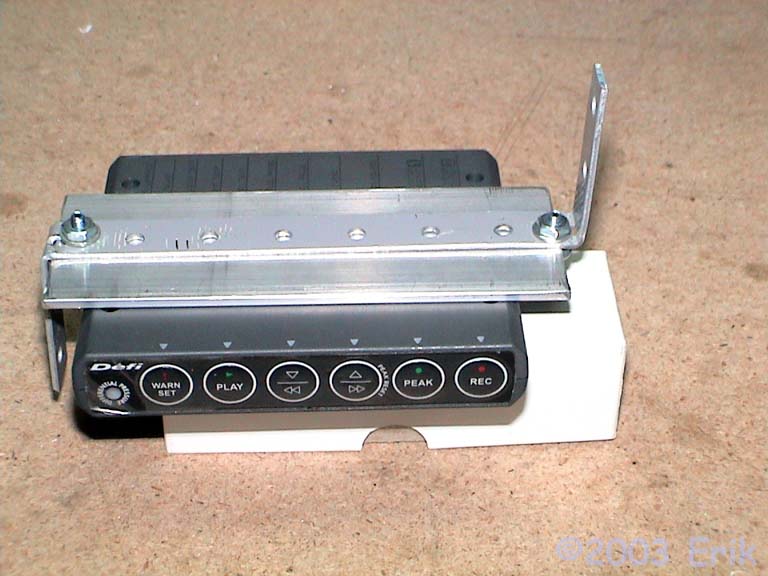
- Defi makes some pretty cool gauges with excellent features. This control unit is the "brain" of the system, and should be mounted in a conveniently accessible place that is out of harm's way.
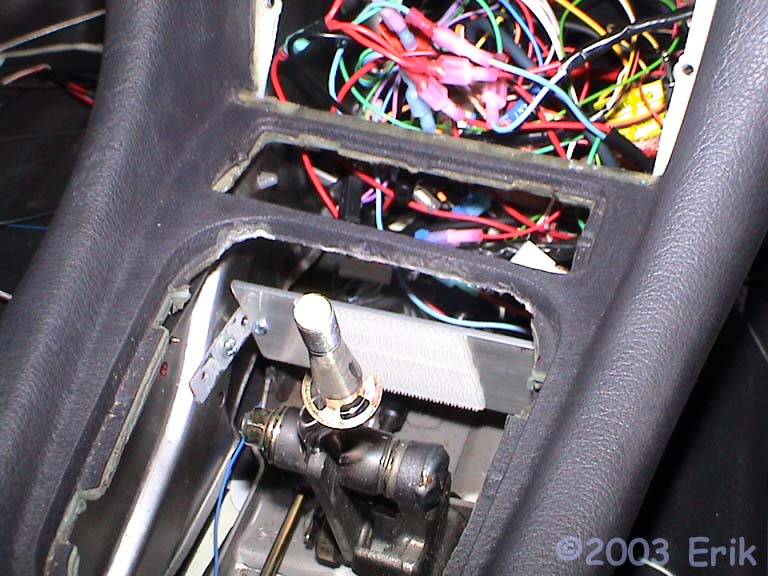
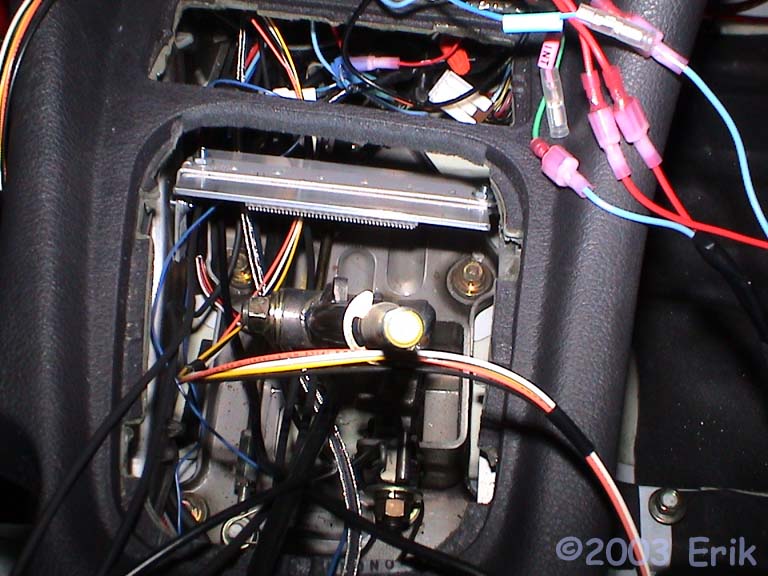
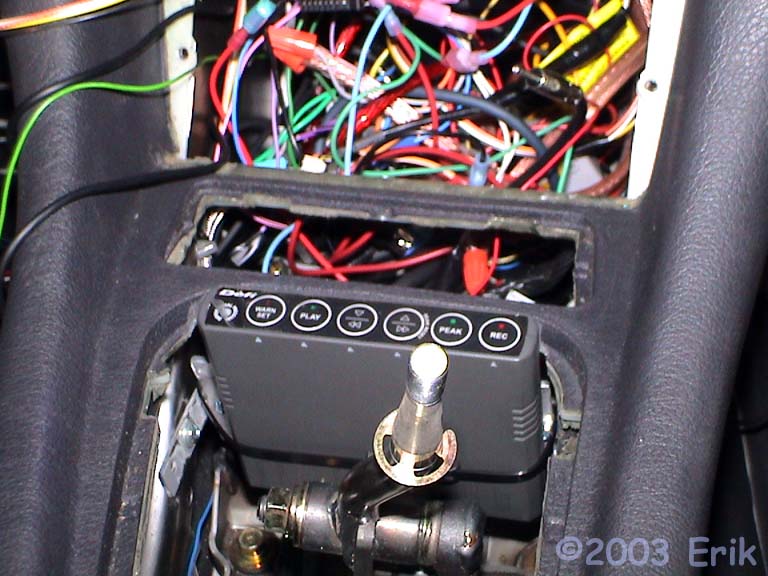
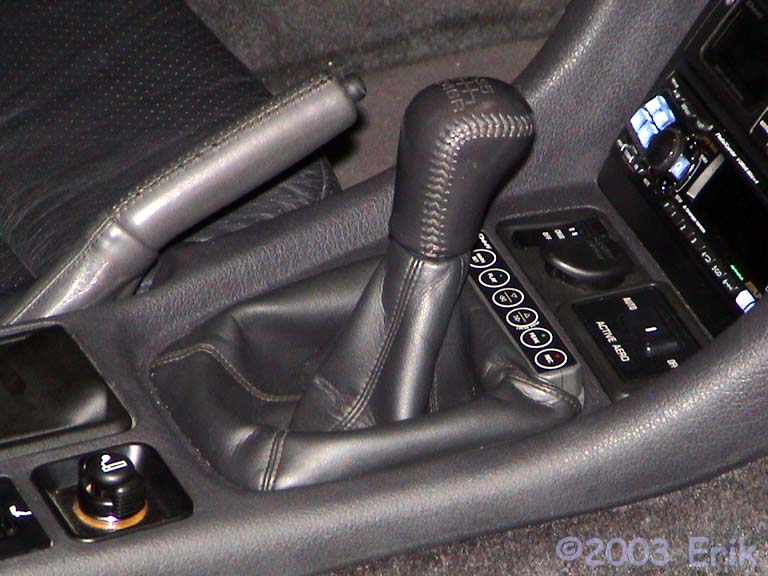
- There's plenty of completely unused room near the front of the shift boot in the 3000GT, so why not put it there? It's out of the way, but accessible, and it protects the unit. The only downside is that the two buttons on the far right (REC and PEAK) are sometimes blocked from view by the shifter knob. I have not found this be be a significant inconvenience.
How Long Will It Take Me To Do This?
- If you're good at this kind of stuff, and have the right tools, plan on a couple hours. If not, then you could still get through it in a half-day.
Anything I Should Do Prior To Attempting This Procedure?
- If you want instant gratification when you get the control unit installed, you probably want to install your sensors and gauges before installing the control unit. Doing so also makes connecting the sensors much easier, and I'd recommend doing it this way.
- Depending on where you're routing wires and how small your fingers are, you may want to pull out your radio. I already had it out when I did this, and it did make it easier.
- You also may want to remove the carpeted panels on the sides of the center console as that will make mounting things easier.
What Mitsubishi Parts Will I Need?
- None.
What Other Parts Will I Need?
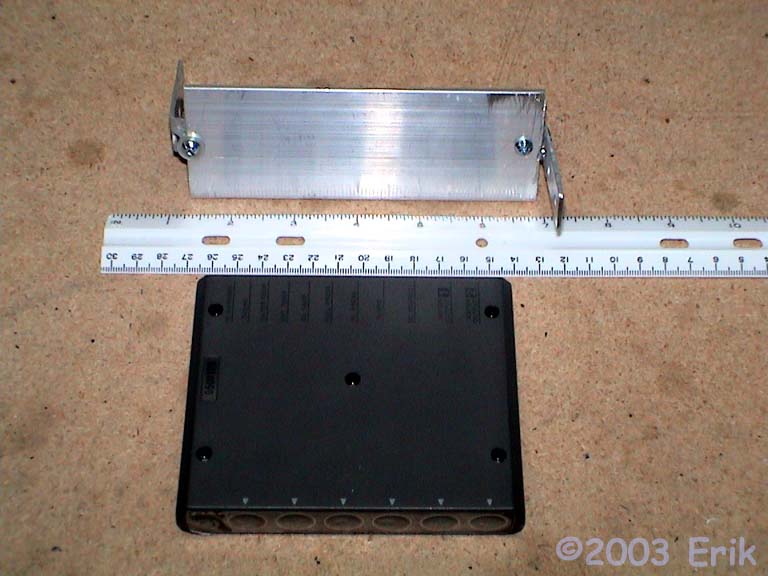
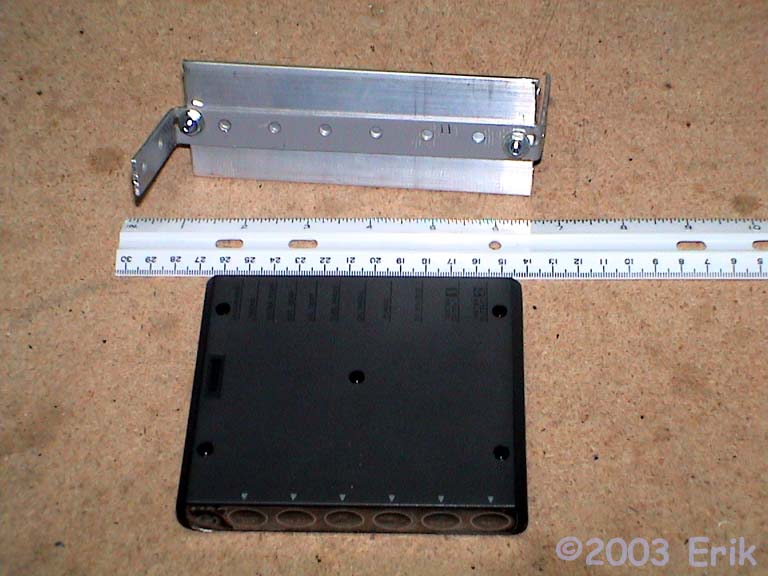
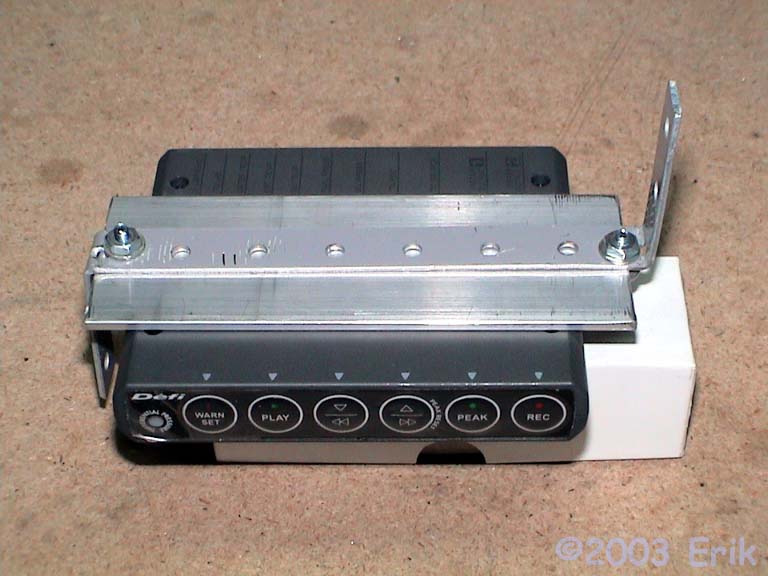
- Defi Control Unit II
- Aluminum Stock (2" x 1/8")
- Adjustable Pipe-Hanging Bracket
- Misc small bolts, washers, and nuts
- Velcro or something similar
- Zip Ties
Where Can I Get the Stuff To Do This?
| Part | Company/Contact | Part Number | |
|---|---|---|---|
|
|
Defi Control Unit II | MVP Motorsports | De DF05001 |
|
|
Aluminum Stock (2" x 1/8") |
Home Depot
or any Hardware Store |
N/A |
|
|
Adjustable Pipe-Hanging Bracket |
Home Depot
or any Hardware Store |
N/A |
|
|
Misc small bolts, washers, and nuts |
Home Depot
or any Hardware Store |
N/A |
|
|
Velcro or something similar | Radio Shack | 64-2360 |
|
|
Zip Ties |
Home Depot
or any Hardware Store |
N/A |
What Tools May/Will I Need?
- Phillips Screwdriver (#2)
- Slotted Screwdriver
- Drill
- Hacksaw or something to cut aluminum
- File or grinding wheel
- Dremel Tool
- Tapered Cone Sanding Bit for Dremel
- Drill (Drill Press is nice)
- A Couple of Small Wrenches to Hold Above Nuts
Erik's Review
- I really like my Defi gauges and I am also very happy with this mounting location for the control unit. After almost a year of having it installed here, I've had no problems at all.