|
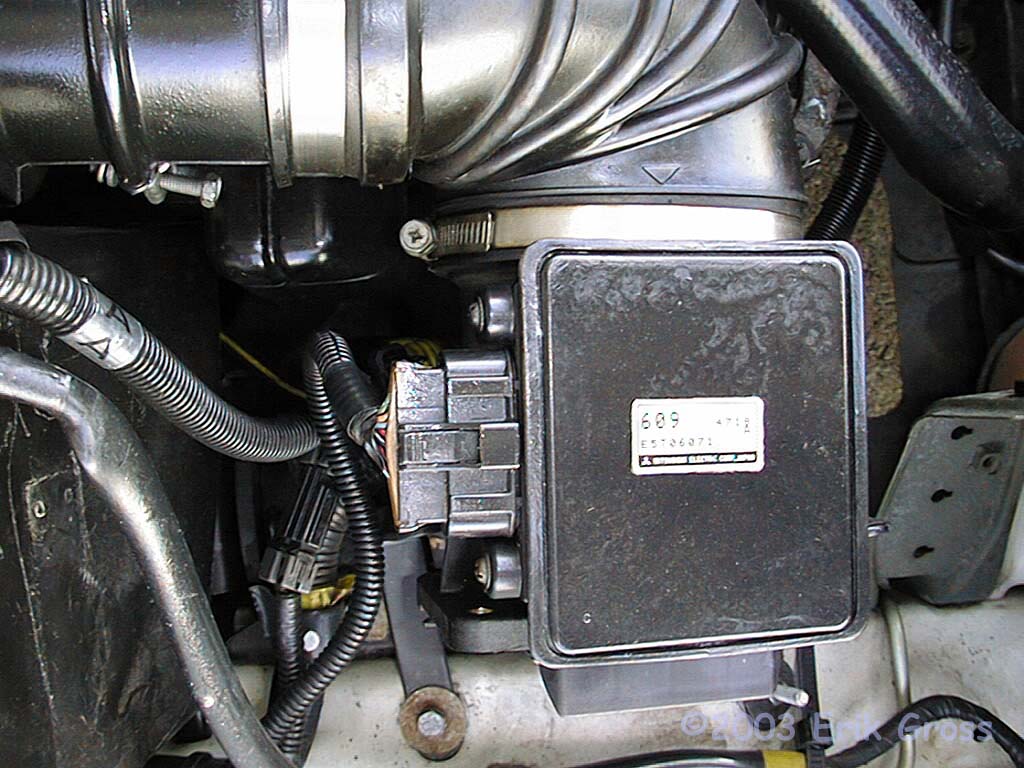
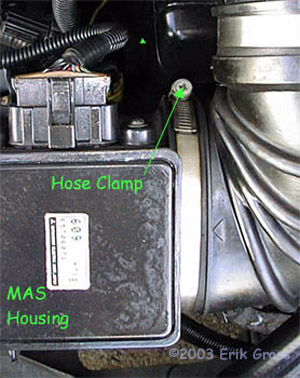
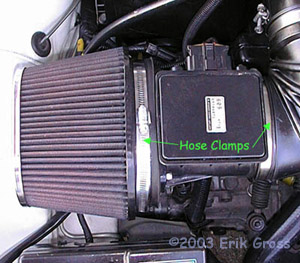
Loosen Hose Clamp and Disconnect the MAS Harness
|
|
|
|
|
|
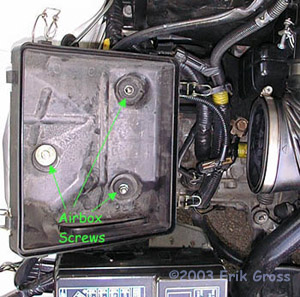
Loosen the hose clamp on the lower portion of the intake as
labeled in the picture. Also unplug the Mass Airflow Sensor
(MAS) electrical connector and move it out of the way.
|
|
|
|
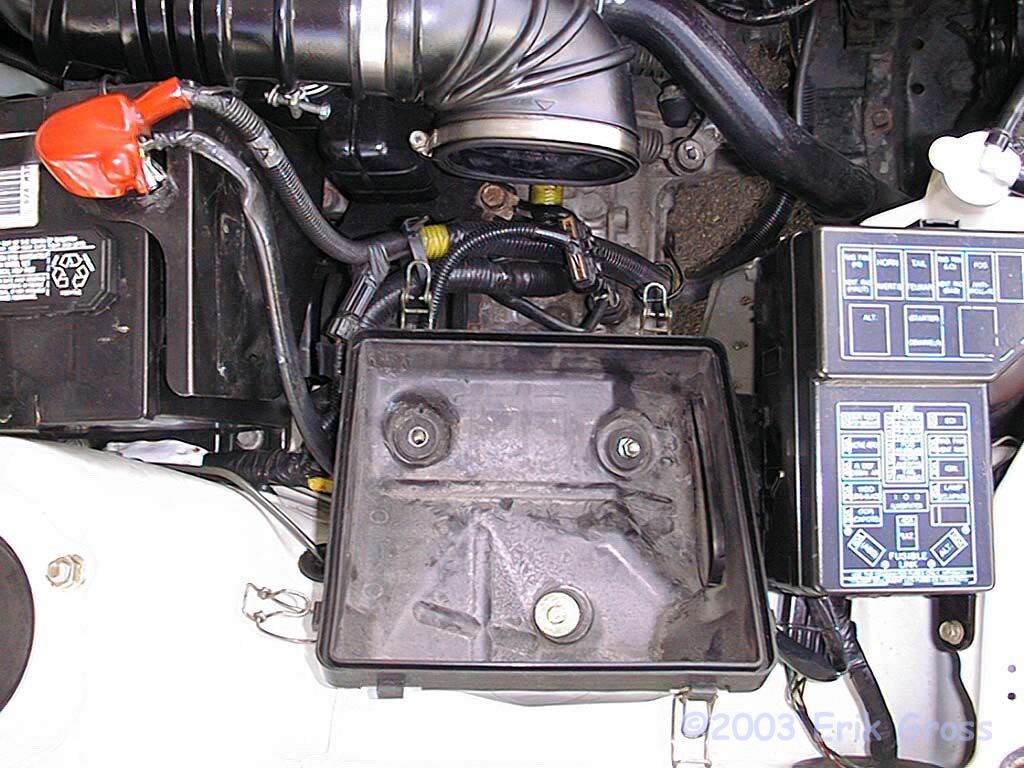
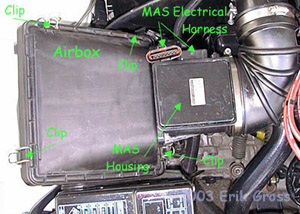
Remove Airbox Lid Clips
|
|
|
|
|
|
At each of the four corners of the airbox is a clip that attaches the
airbox lid to the airbox. Pop these clips off so the airbox lid can
be removed.
|
|
|
|
Remove Airbox Lid and MAS Housing
|
|
|
|
|
|
Now you should be able to remove the airbox lid completely from the
engine bay. Note that the MAS housing will be attached to the airbox
lid at this point. Also, remove the 3 10mm bolts/nuts that secure the
airbox bottom to the chassis. Then remove the airbox bottom.
|
|
|
|
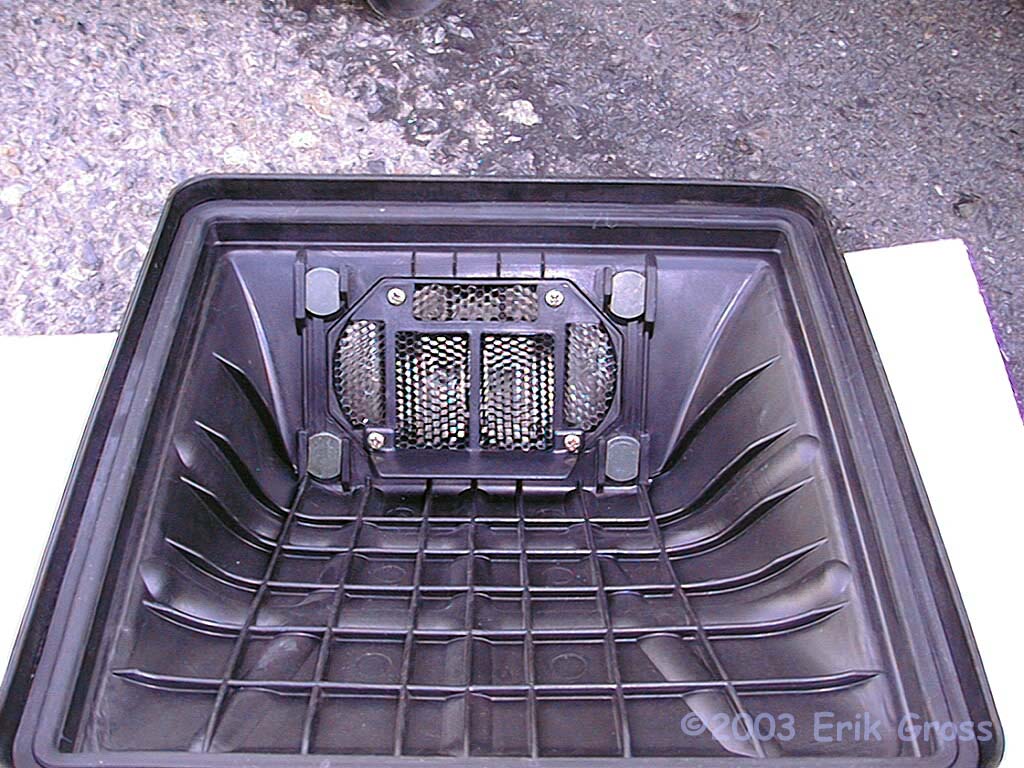
Unbolt the MAS Housing From the Airbox Lid
|
|
|
|
|
|
Update: If you use an impact wrench (or simulate one by placing a socket wrench
on the nuts and tapping the wrench with a fist or hammer) rather than gradually increasing
pressure on the nut to break it loose, the nuts seem to pop off without damaging the airbox
lid! Try this as it even worked on a 10 year old 3000GT that had never had the stock
airbox lid removed. It will save you a lot of frustration.
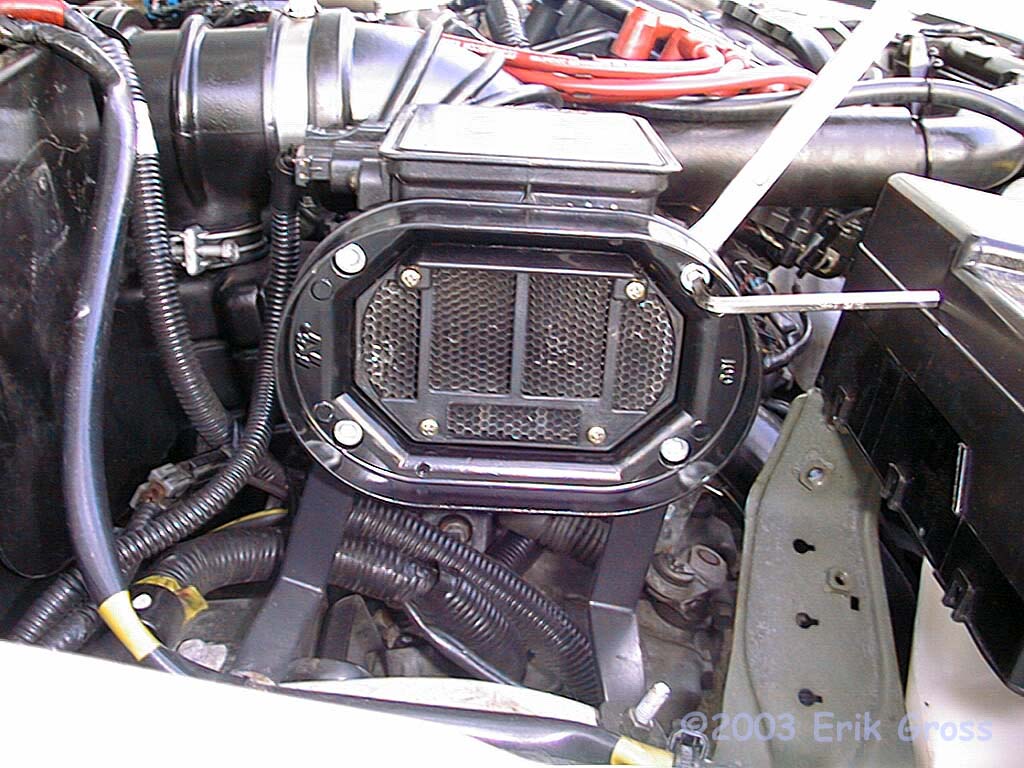
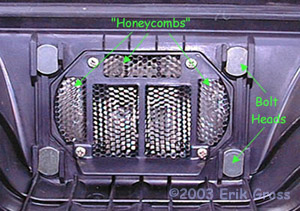
This is where all the fun begins (unless you're lucky). Each of the 4 bolts in the
picture have a 10mm nut on the other side. Usually this nut is stuck on the bolt
extremely tightly. This means that as you turn the nut on the other side, it will
deform the plastic on the side in the picture such that the bolt head will simply
spin as you turn the nut. If this happens, you have 2 options: 1) find something
that will hold the bolt head still while you remove the nut or 2) destroy your airbox
lid and resolve to not care about ever putting it back on.
|
|
|
|
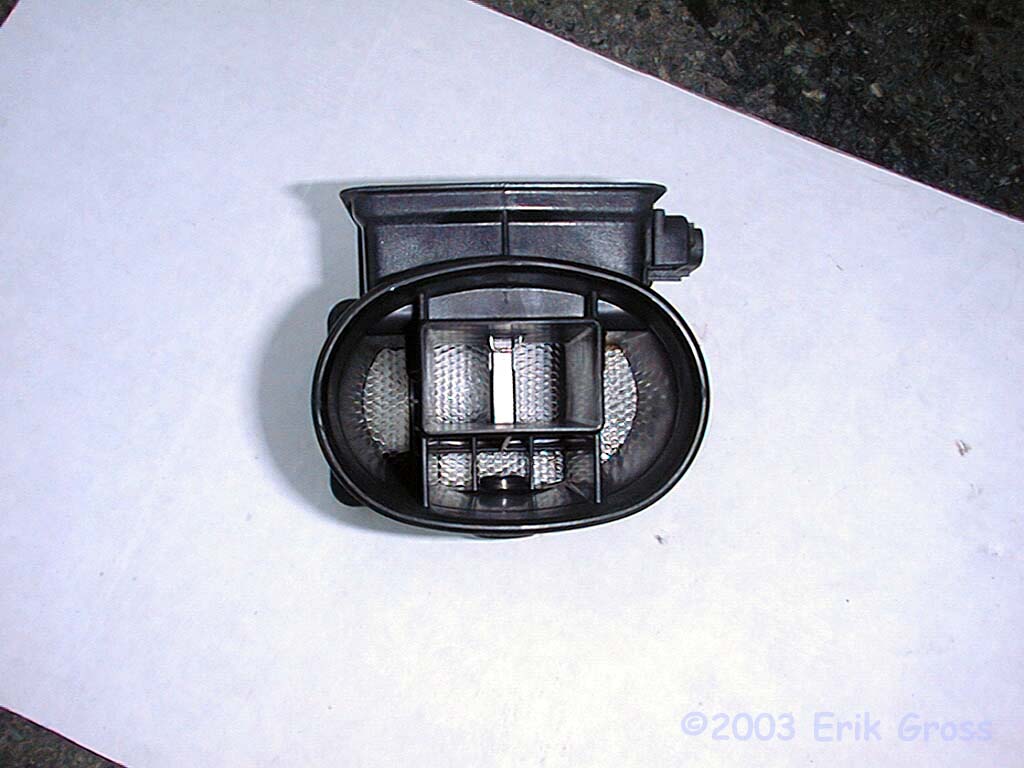
Separate the MAS Housing
|
|
|
|
|
|
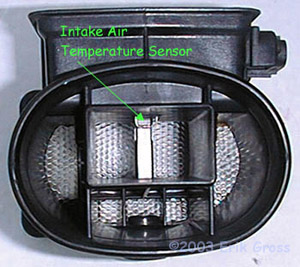
The MAS Housing will now separate easily from the airbox lid. This would be a good
time to straighten any of the "honeycombs" you bent when the pliers you were using
to hold the bolt heads slipped and gouged the honeycombs. A needle-nose pliers works
well.
|
|
|
|
Attach the Filter Adapter
|
|
|
|
|
|
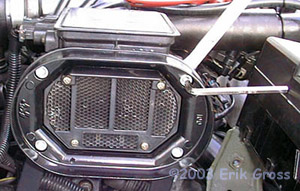
The FIPK comes with a metal adapter that attaches to the MAS housing and allows
the FIPK filter to clamp to it. Use the supplied allen screws (3/16") and nuts to attach
the adapter to the MAS housing. Note that the "L" brackets that come with the FIPK
should be attached to the lower two screws on the MAS housing and then attached to
the stock airbox mounting locations to secure the filter assembly.
|
|
|
|
Install the New Filter
|
|
|
|
|
|
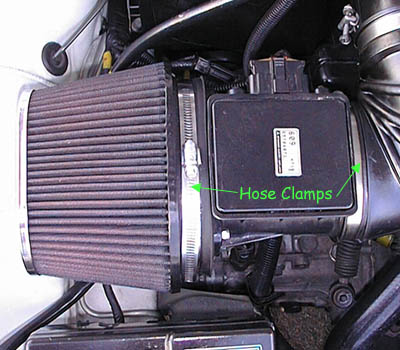
Slide the filter over the adapter and tighten the hose clamp (5/16") securely.
Also tighten the hose clamp on the other side of the MAS housing (10mm). Finally,
don't forget to reconnect the MAS electrical harness, or your car will not idle
properly and will run extremely rich.
|
|