1995 3000GT VR-4: Click-Start Fix
These instructions apply to a 1995 Mitsubishi 3000GT VR-4, but are easily transferable to any model/year of 3000GT or Dodge Stealth.| Note: This fix is not an original idea of mine; it is based in information from RickyN29 on 3SI. Further, thanks are due to to Mike Elliott (vr4swoosh) for bringing this idea to my attention. My contribution to this fix is that I have not yet seen anyone use the stock wiring harness in an unmodified form to implement this fix. The method described below is very quick to implement, and it's 100% reversible if you ever want to return things to their stock form. Also, here is the 3SI Thread where I first saw this information posted. | |||||
| Part | Company/Contact | Part Number | |
|---|---|---|---|
|
|
Relay | Hosfelt Electronics | 45-287 |
|
|
Relay Harness | Hosfelt Electronics | 21-193 |
|
|
Fuse Holder (10AWG) | Hosfelt Electronics | 43-180 |
|
|
10A Fuse | Hosfelt Electronics | 31-772 |
|
|
18-22ga (Red) Male Partially-Insulated Quick-Disconnect Terminals | McMaster-Carr | 7060K26 |
|
|
14-16ga (Blue) Female Fully-Insulated Quick-Disconnect Terminals | McMaster-Carr | 7243K21 |
|
|
18-22ga (Red) 5/16" Insulated Ring Terminal | McMaster-Carr | 7113K748 |
|
|
Electrical Tape, Zip Ties |
Home Depot, Auto Parts Stores |
N/A |
|
|
Wiring Loom | PartsExpress |
080-523 080-525 |
What Tools May/Will I Need?
- 10mm Nut Driver (or wrench and socket)
- Wire Crimping/Stripping Tool
- Wire Cutters
Erik's Review
- This has fixed my click-start problems 100%. Done. Fixed. No more messing with it. My car starts quickly on the first attempt, every time. No more worrying about being stranded by a finicky starter!
- On principle, I don't really like adding an extra relay to the starting circuit of my car. However, it's way easier than digging through the dash to inspect the ignition switch harness and wires. It's also far cheaper than a new ignition switch, if that is the root of the problem. I think I'll just leave things this way unless I have more problems in the future.
The Procedure
|
|
Remove Air Filter or Air Box Lid |
| Using a 10mm nut driver or a #2 Philips screwdriver, loosen the hose clamp that secures your MAS housing to the air intake piping. Disconnect the MAS wiring harness, and move the air filter or airbox lid (with the MAS attached) out of the way. | |
|
|
|
|
|
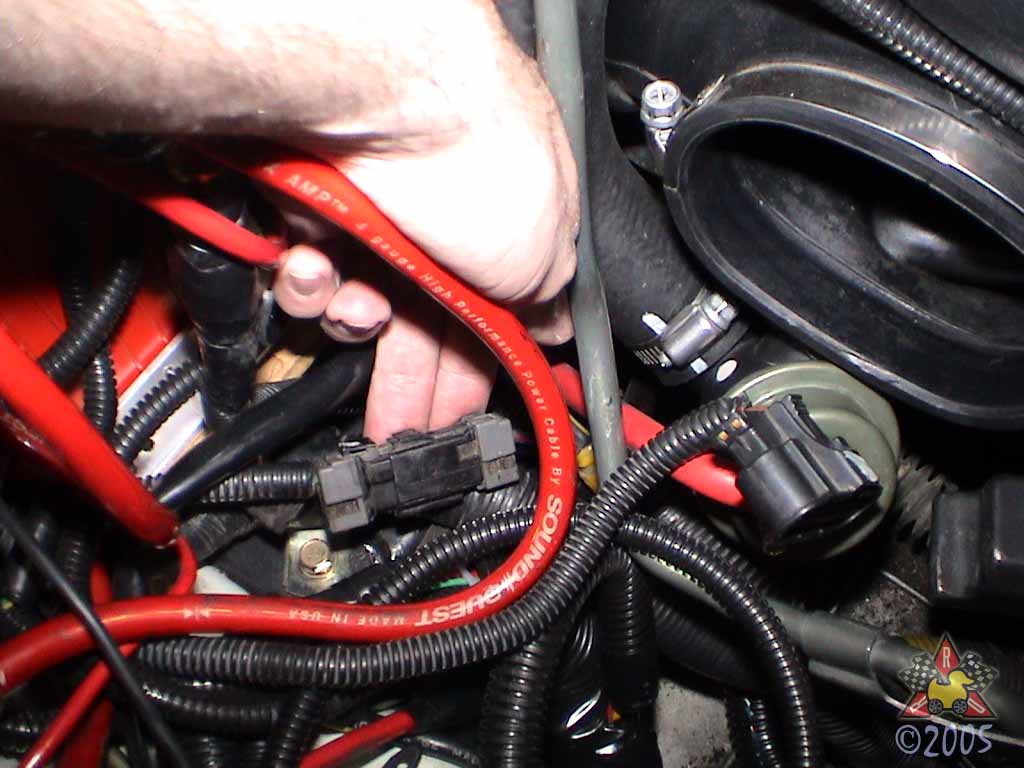
Locate Starter Solenoid Wire |
|
|
| There is a black wiring harness for the starter solenoid wire, which located in front of the battery. It has a black wire with a red stripe. | |
|
|
|
|
|
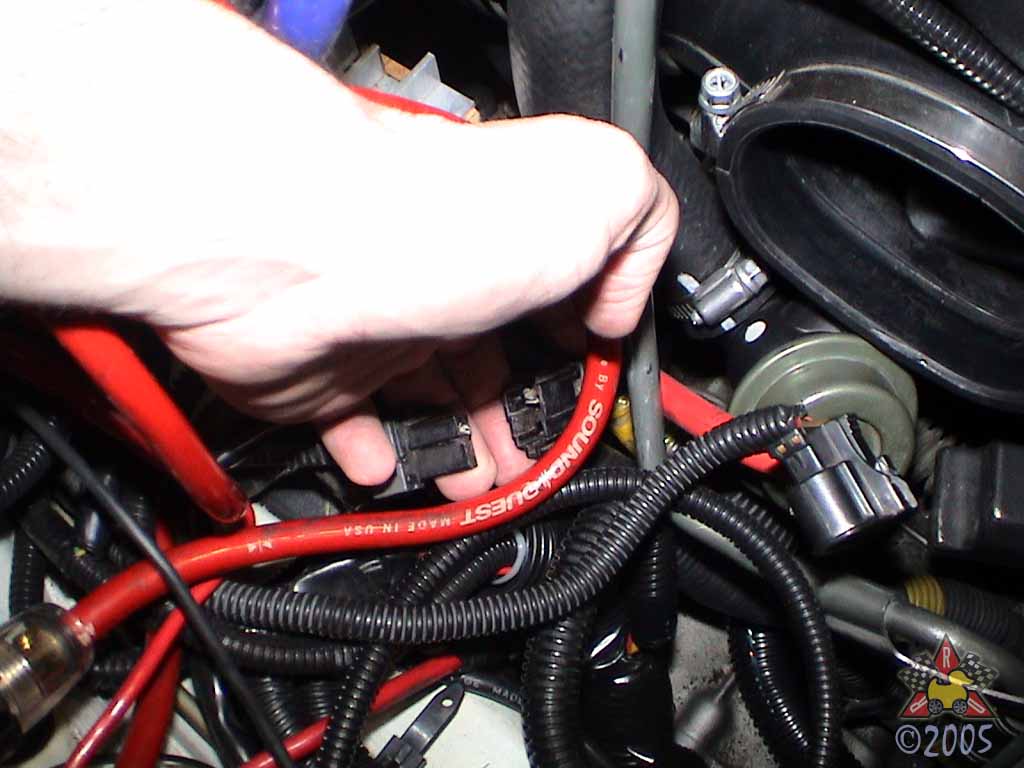
Disconnect Starter Solenoid Wiring Harness |
|
|
| Disconnect this wiring harness so you can splice in your relay. | |
|
|
|
|
|
Assemble Relay and Harness |

|
|
In the upper right of the picture, you can see how the relay and harness come
when you buy them. The left/bottom of the picture shows how the assembly looks
after it's ready for installation.
|
|
|
|
|
|
|
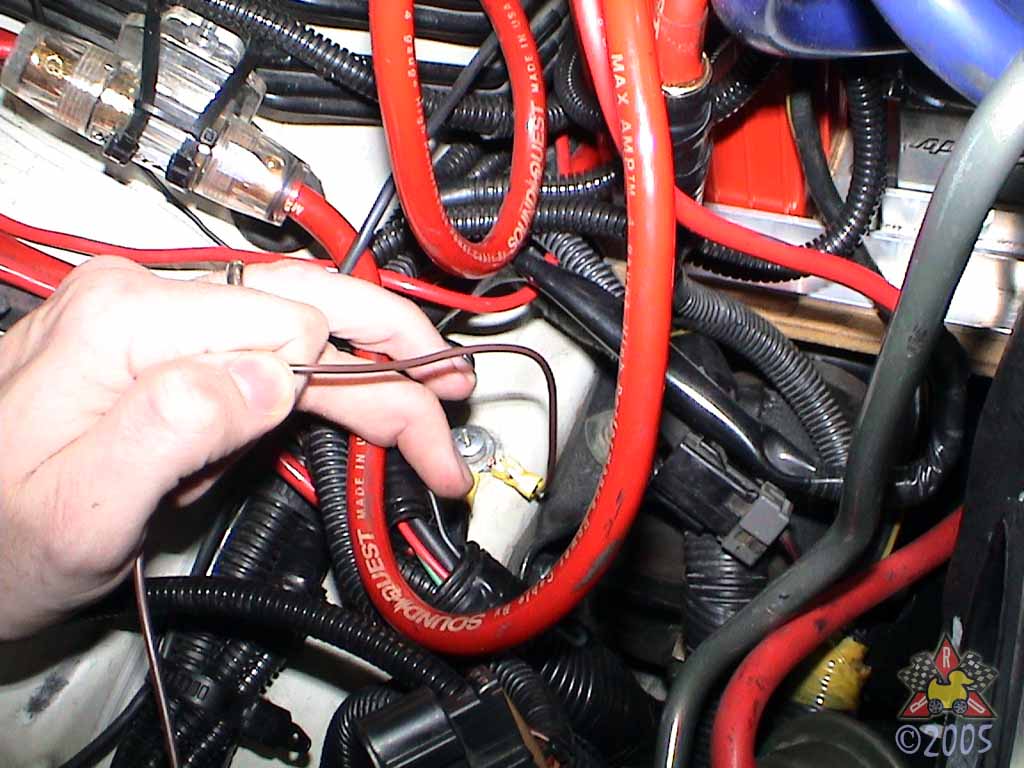
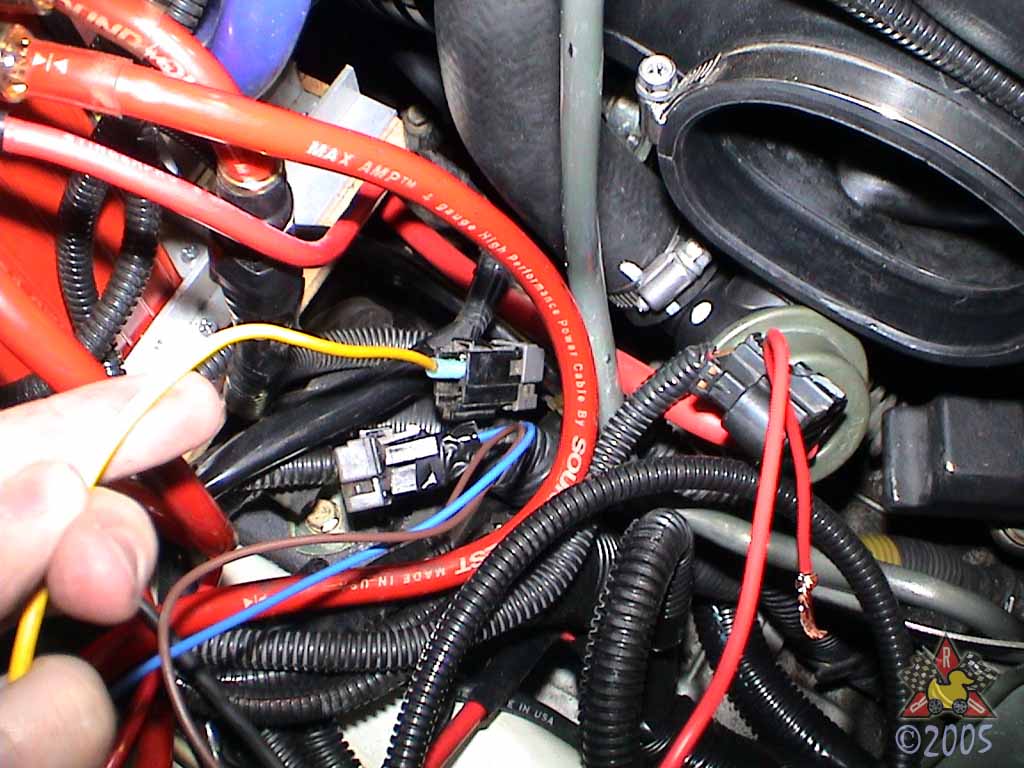
Attach Brown (85) Wire |
|
|
| Find a good place to ground this wire I used a ring terminal and attached it to this screw. The front of the car is toward the bottom of the picture. | |
|
|
|
|
|
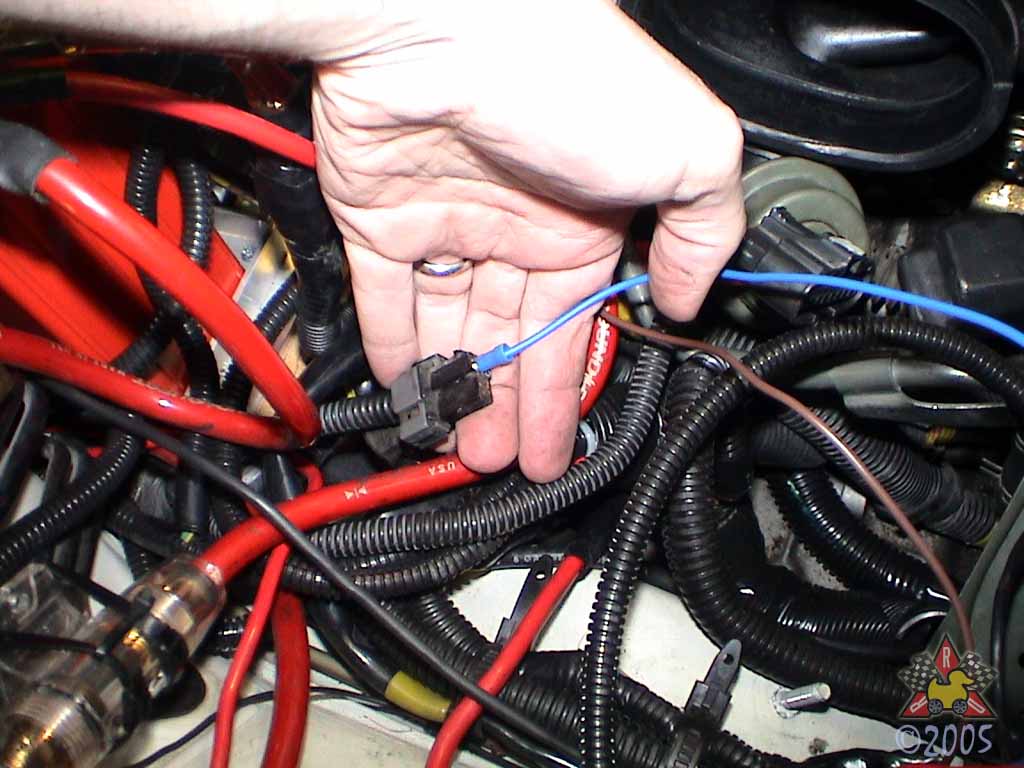
Attach Blue (86) Wire |
|
|
| This wire should have a male quick-disconnect fitting on it. Insert the fitting into the side of the harness that heads toward the firewall (as opposed to toward the transaxle). The male fitting will only fit into one side of the harness, so it should be pretty obvious which side to connect it to. | |
|
|
|
|
|
Attach Yellow (30) Wire |
|
|
| This wire should have a female quick-disconnect fitting on it. Insert the fitting into the side of the harness that heads toward the transaxle (as opposed to toward the firewall). Again, the female fitting will only fit into one side of the harness, so it should be pretty obvious which side to connect it to. | |
|
|
|
|
|
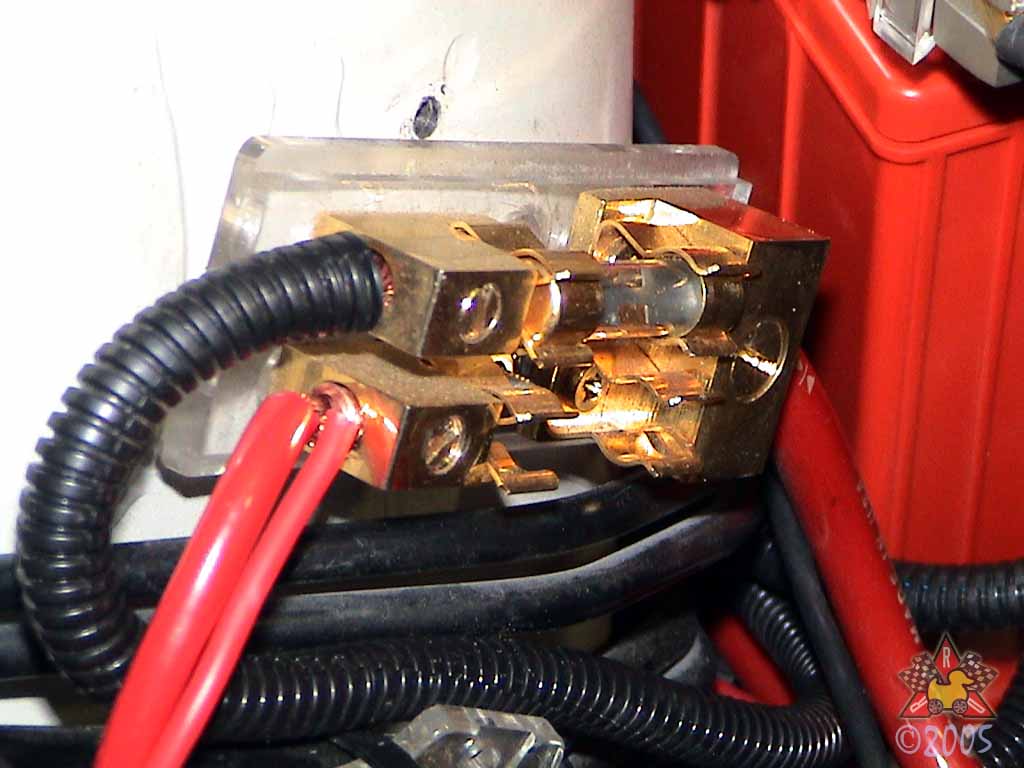
Connect Red (87) Wire |
|
|
| This wire needs to go to the positive terminal of your battery, and it needs to be fused. I already had a fused terminal (shown) for my water injection system, so all I did was remove the fuse and insert the new wire into the fuse block. If you need to install an additional fuse, you can use the fuse and holder suggested above. If you need to attach this wire directly to the positive terminal of your battery, REMEMBER to disconnect the negative terminal of the battery before touching the positive terminal!!! | |
|
|
|
|
|
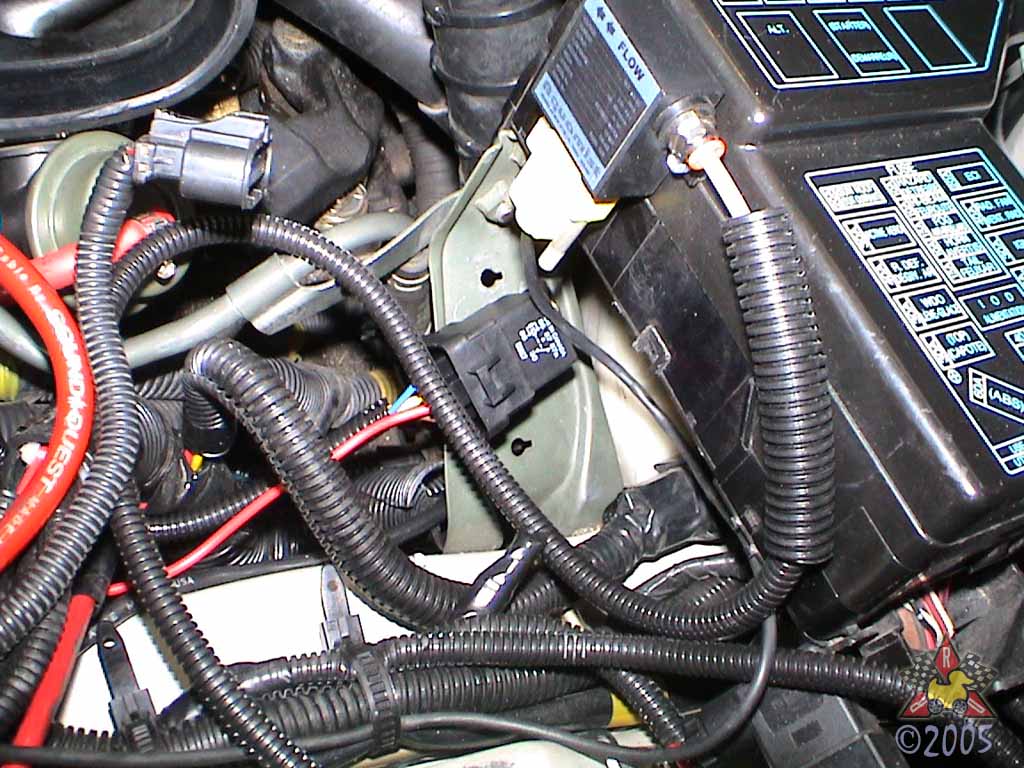
Mount Relay |
|
|
|
Find a safe and secure place to mount the relay. I chose to mount
it onto the threads of the bolt that holds the fuel pump relay from below.
You also could zip-tie it somewhere if you like. I also chose
to install wire loom around some of the relay wires for protection. And yes, I'm all too aware that I have entirely too much electrical junk installed in my car. This rat's nest of wiring and wiring loom is pretty good proof of that... |
|
|
|
|
|
|
Protect Wiring Connections |

|
|
| To make sure that the connections to the starter wiring harness are secure, I wrapped them with some electrical tape. | |
|
|
|
|
This website brought to you by picture_page, and the letter 4. A good buddy of mine put it well: "Unauthorized duplication, while sometimes necessary, is never as good as the real thing. And it could be bad for the pixels." As I've put a lot of time and effort into creating this webpage and website, I would prefer that you not redistribute, sell, or claim as yours any of the content of this site. I know I can't stop you if that's what you're going to do, but I'm asking nicely. If you would like to publish some of the content of this site in your own work (printed, electronic, or otherwise), please e-mail me and we can work something out. |
|