|
Install AN Adapters
|
|
|
|
|
|
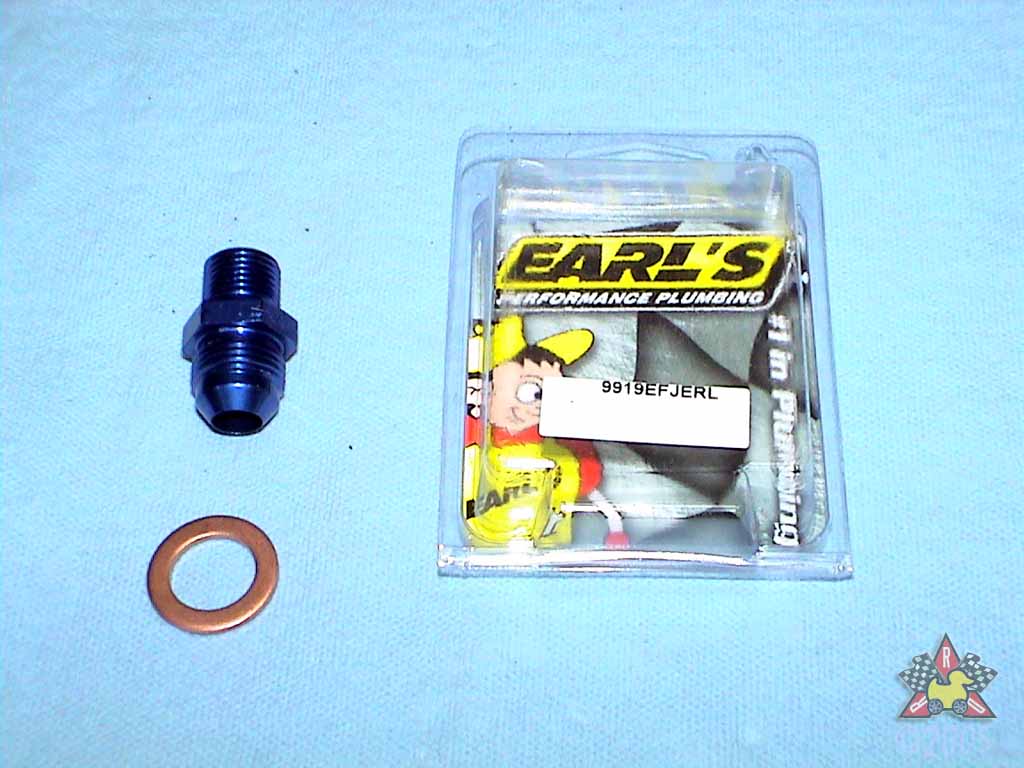
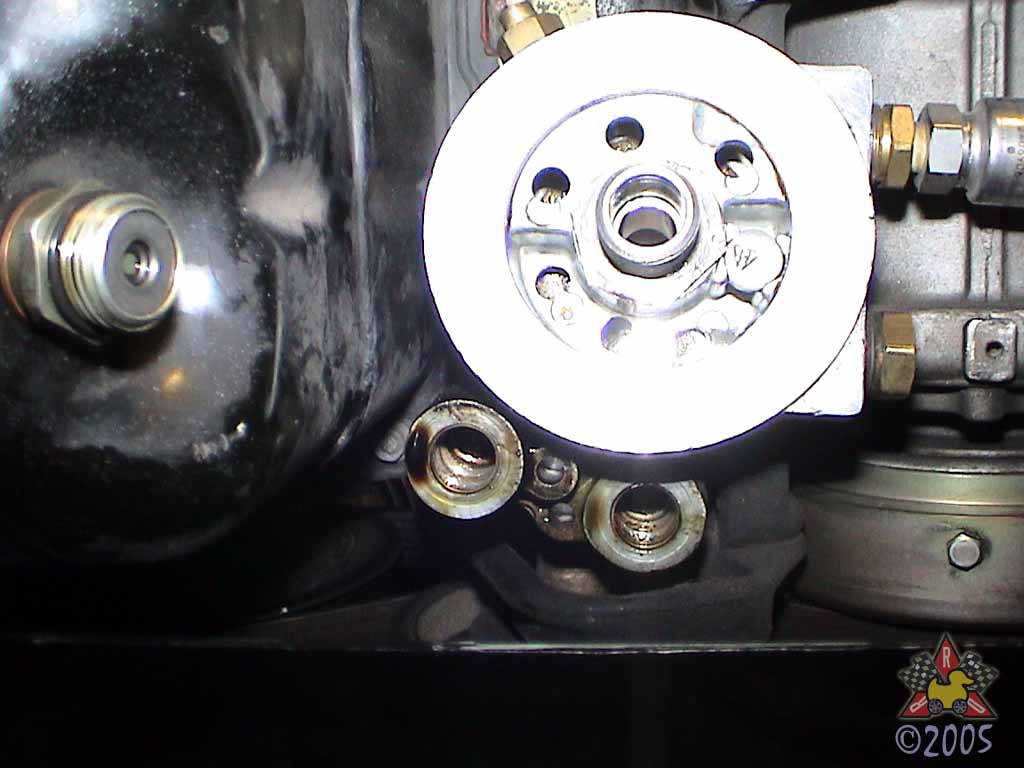
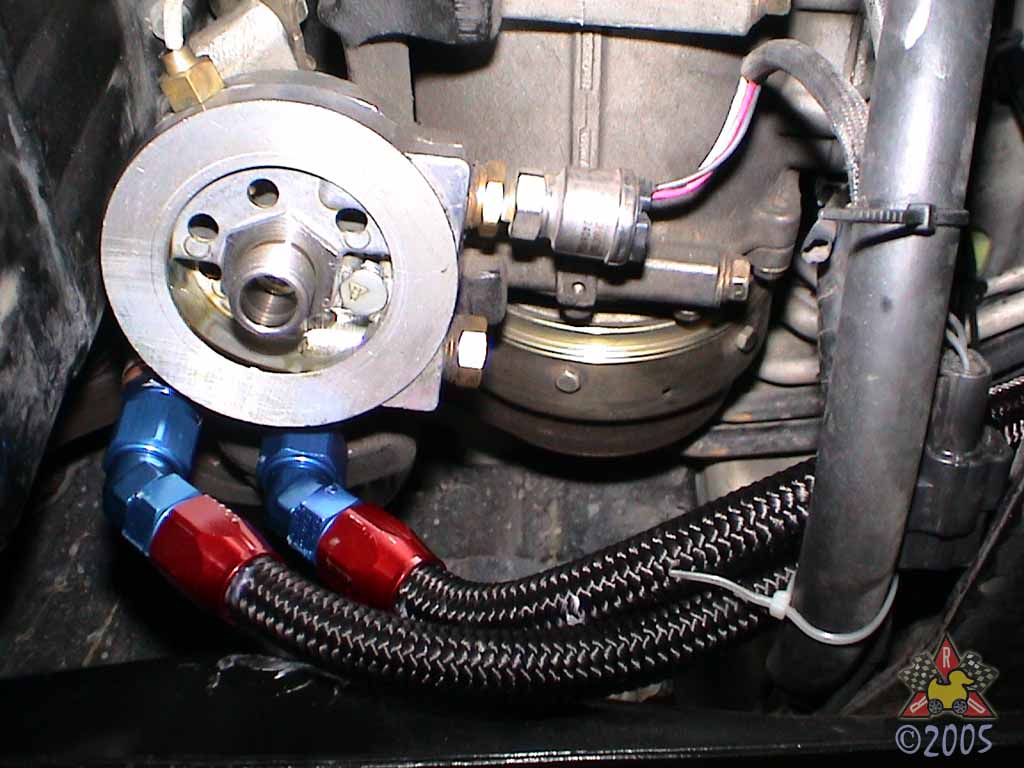
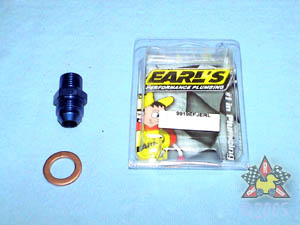
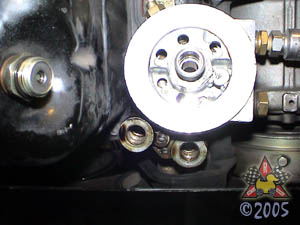
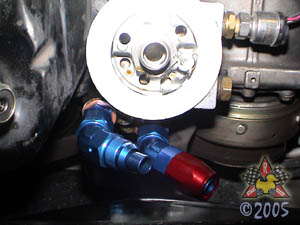
After disconnecting the OEM oil cooler lines (banjo bolts), install the M16-to-AN
adapters into the holes in the oil filter housing. You'll want to install new
crush washers (M16) between the adapters and the filter housing to prevent leaking.
If you don't have any handy, you should be able to find them at any auto parts
store in the section where they have drainplugs and drainplug gaskets.
You'll probably want to tighten these adapters to the same specs as most drainplugs
of this size, which is 18-22 lbf-ft.
|
|
|
|
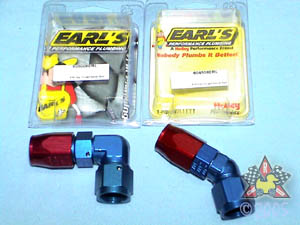
Test-fit AN Fittings
|
|
|
|
|
|
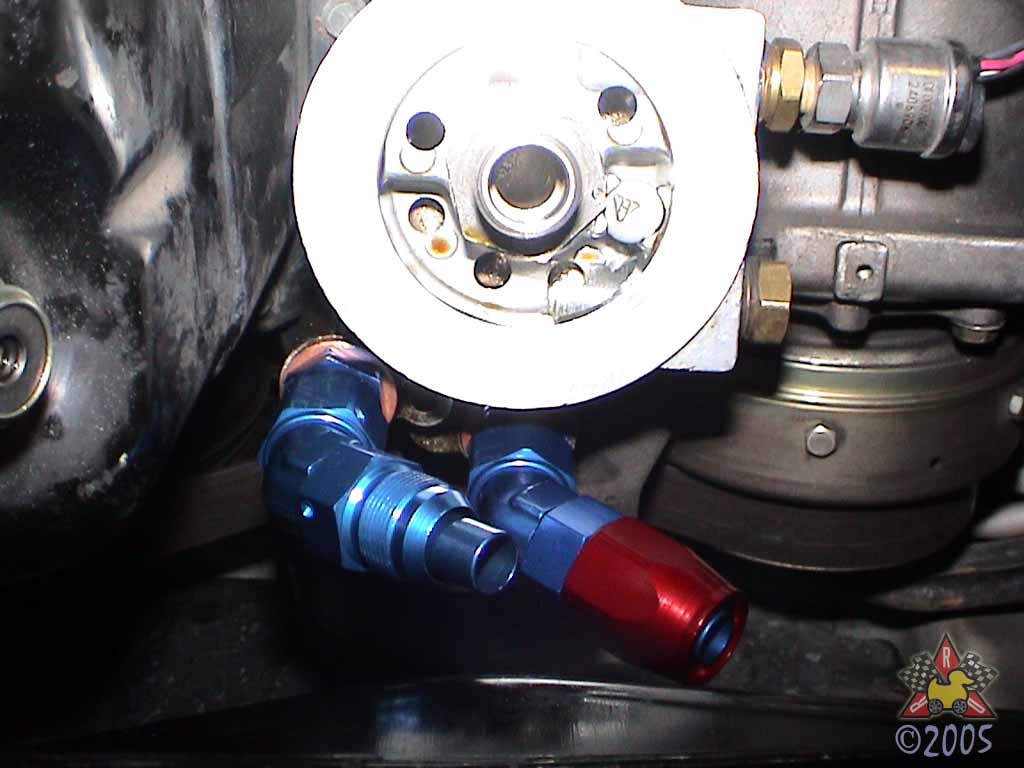
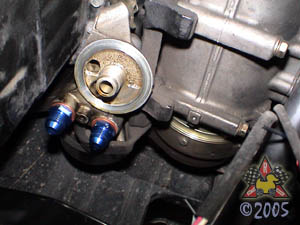
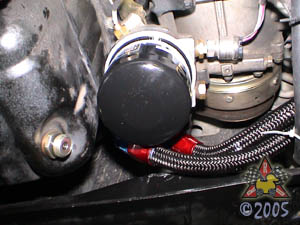
I chose to use 45-degree fittings near the oil filter and 90-degree
fittings at the cooler. In any case, check that the fittings you have
clear everything on *your* car.
|
|
|
|
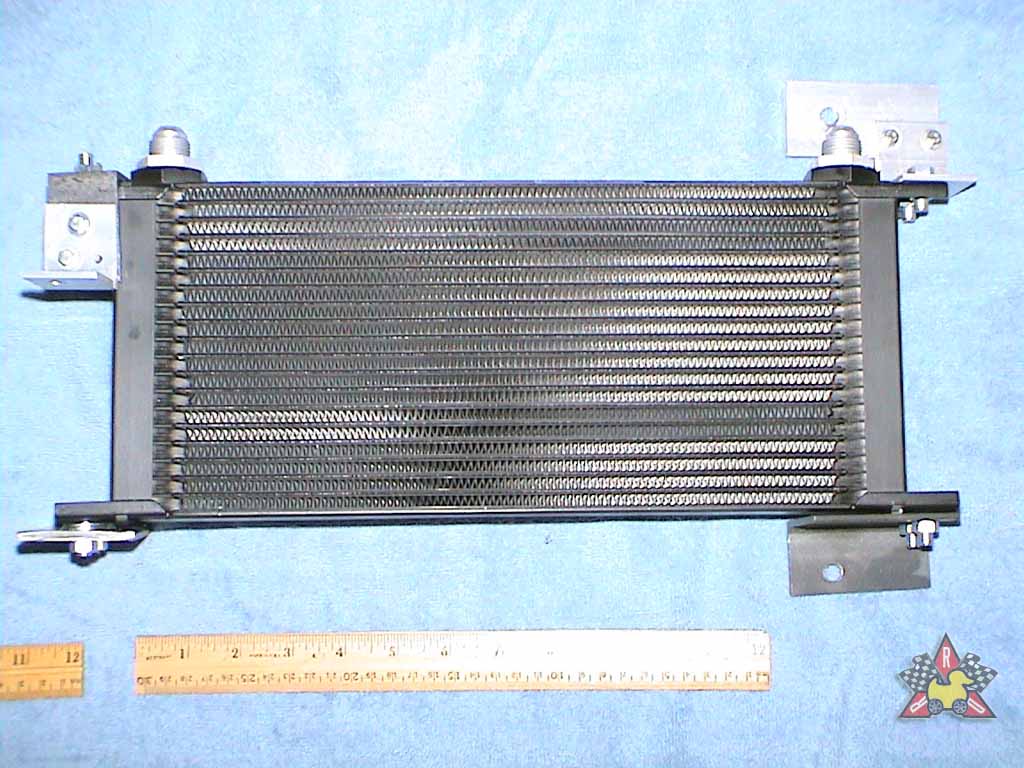
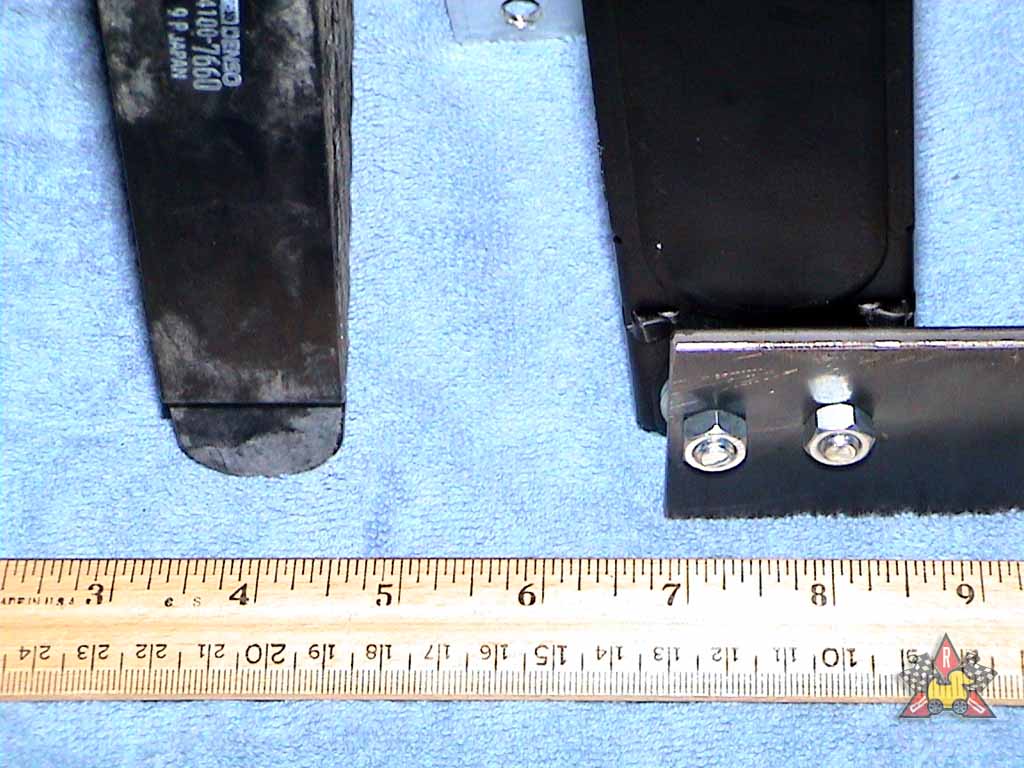
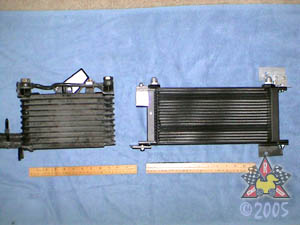
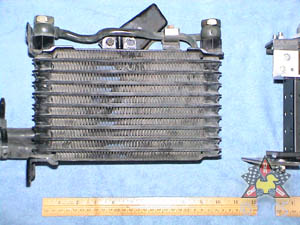
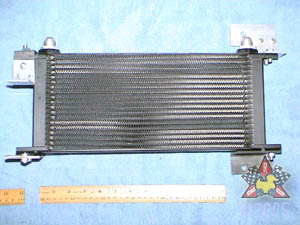
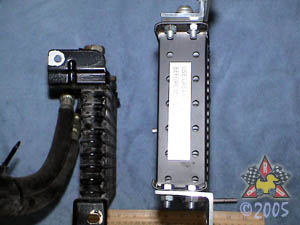
Comparison of Old and New Oil Coolers
|
|
|

|
|
|
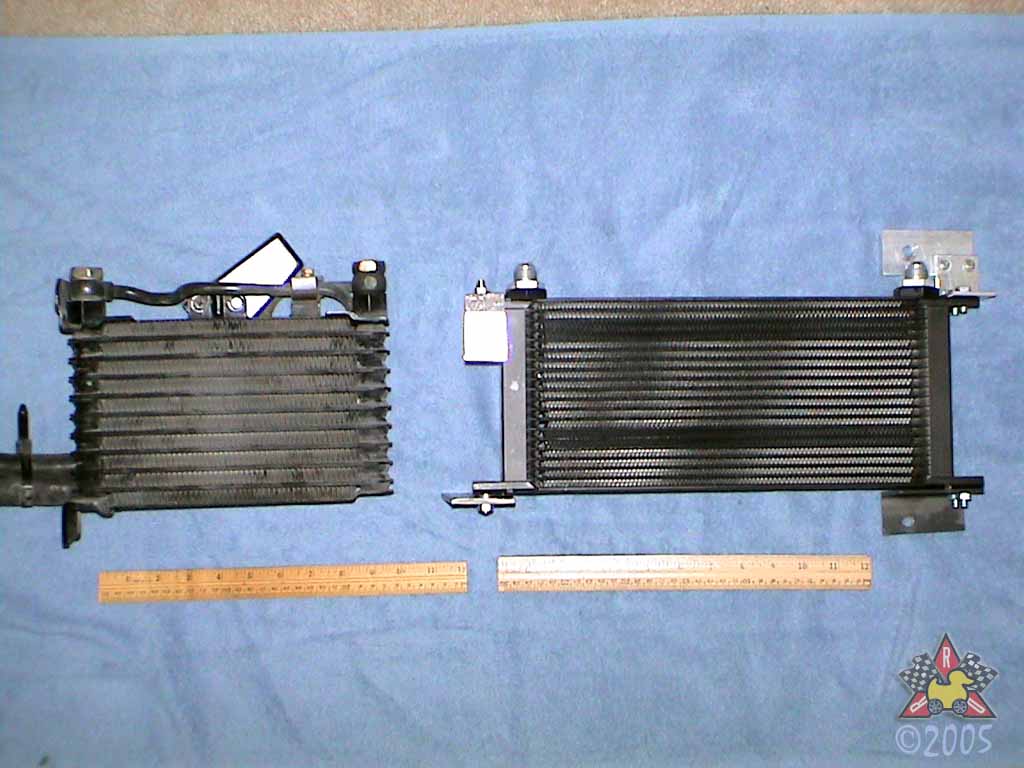
left: OEM Oil Cooler; right: New Setrab Oil Cooler
The new cooler is about the same height as the stock one, but it's almost twice
as long and almost twice as thick.
|
|
|
|
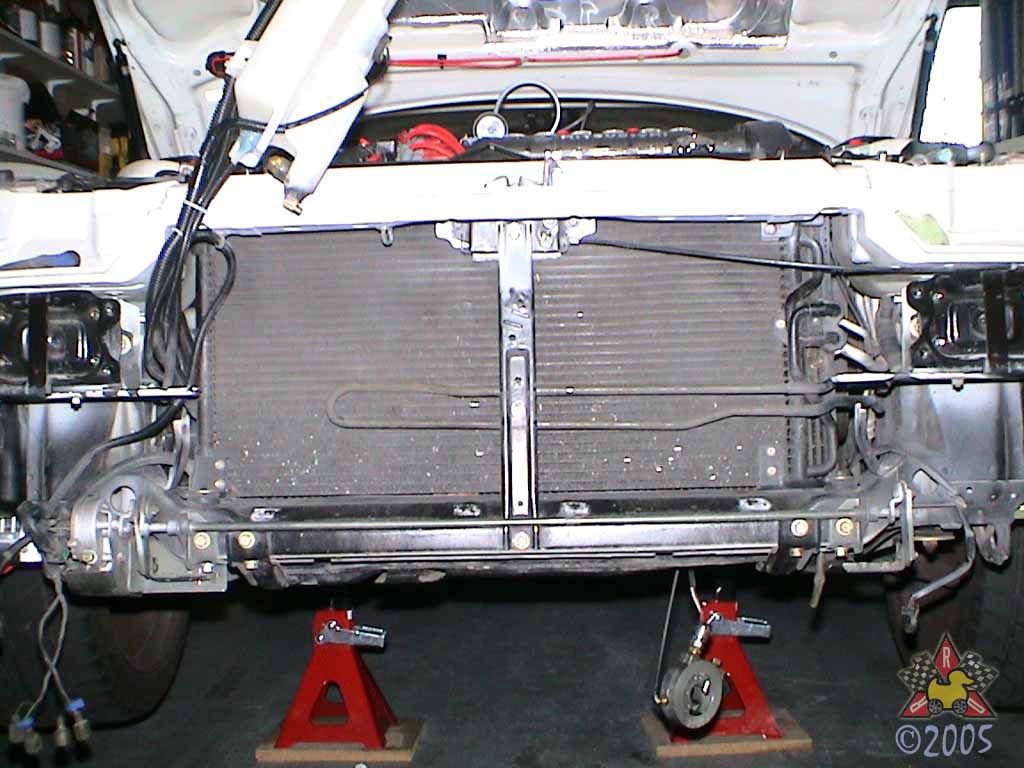
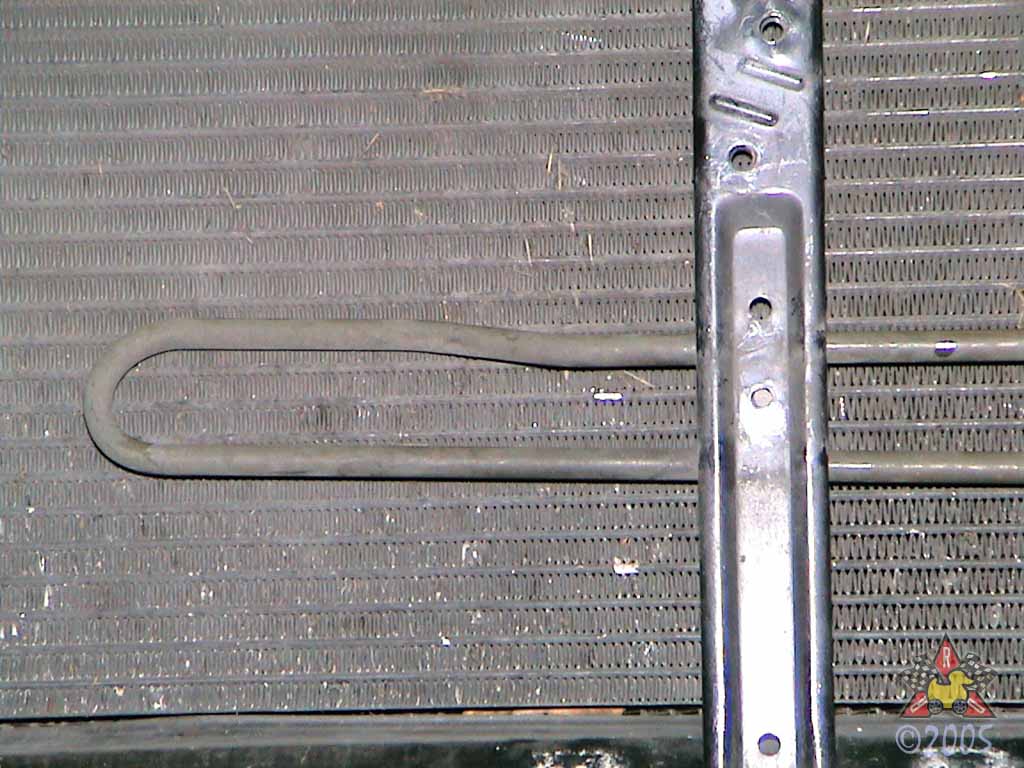
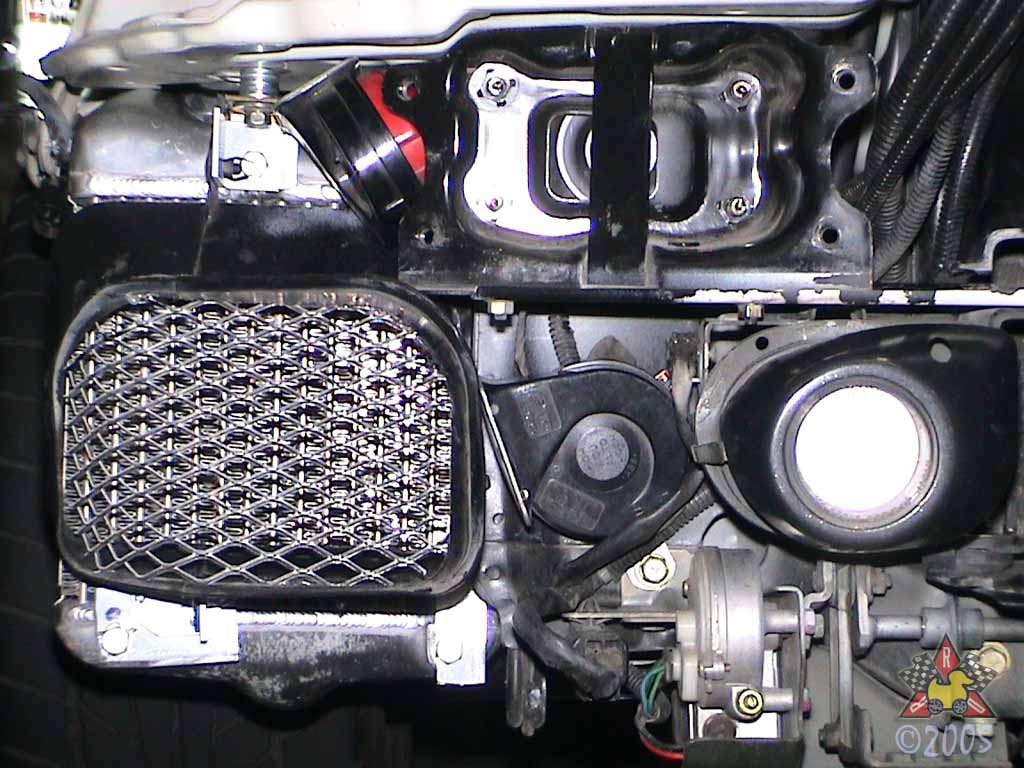
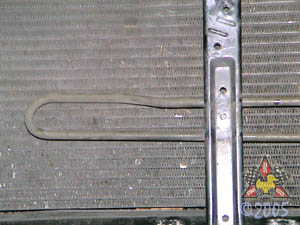
Relocate Power Steering Cooling Line
|
|
|
|
|
|
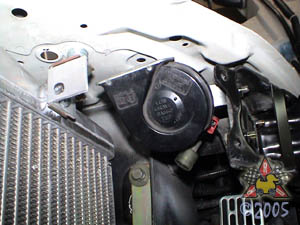
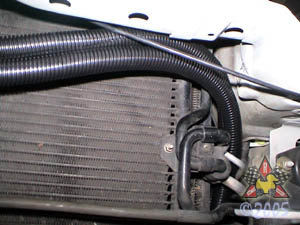
The OEM setup has the power steering line running in front of the
hood latch support bar. There's plenty of room for the cooling
line behind the bar, so remove the bar and relocate the cooling line
behind the bar. You can reuse the "M" shaped bracket and just bolt it
in from behind.
|
|
|
|
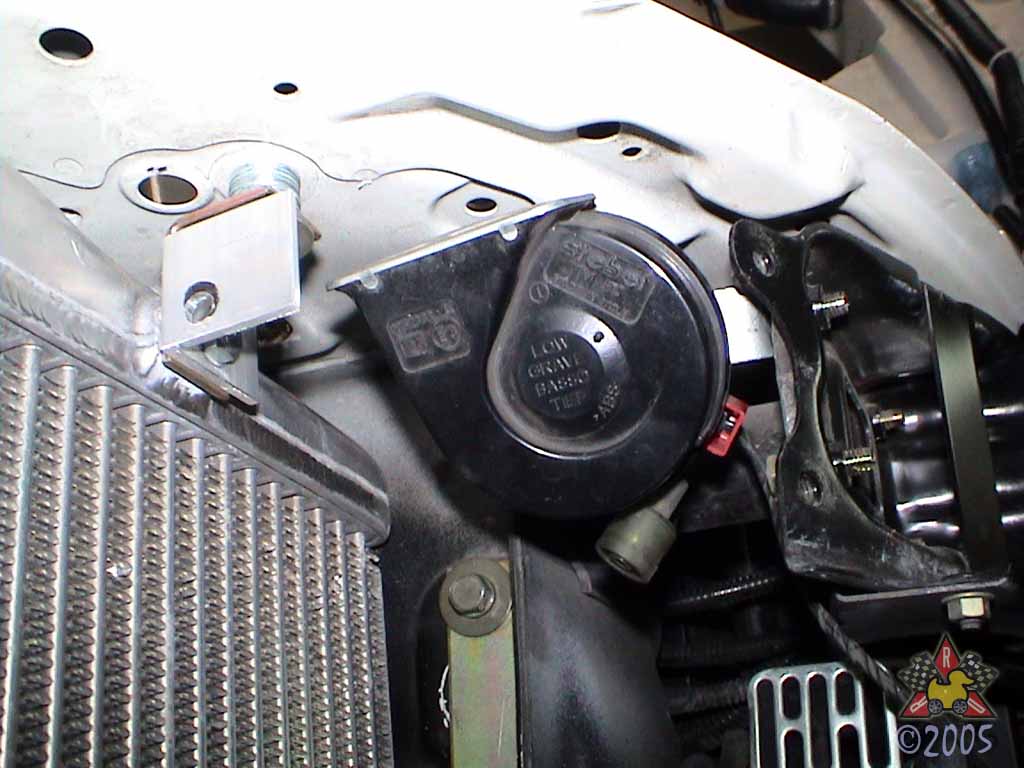
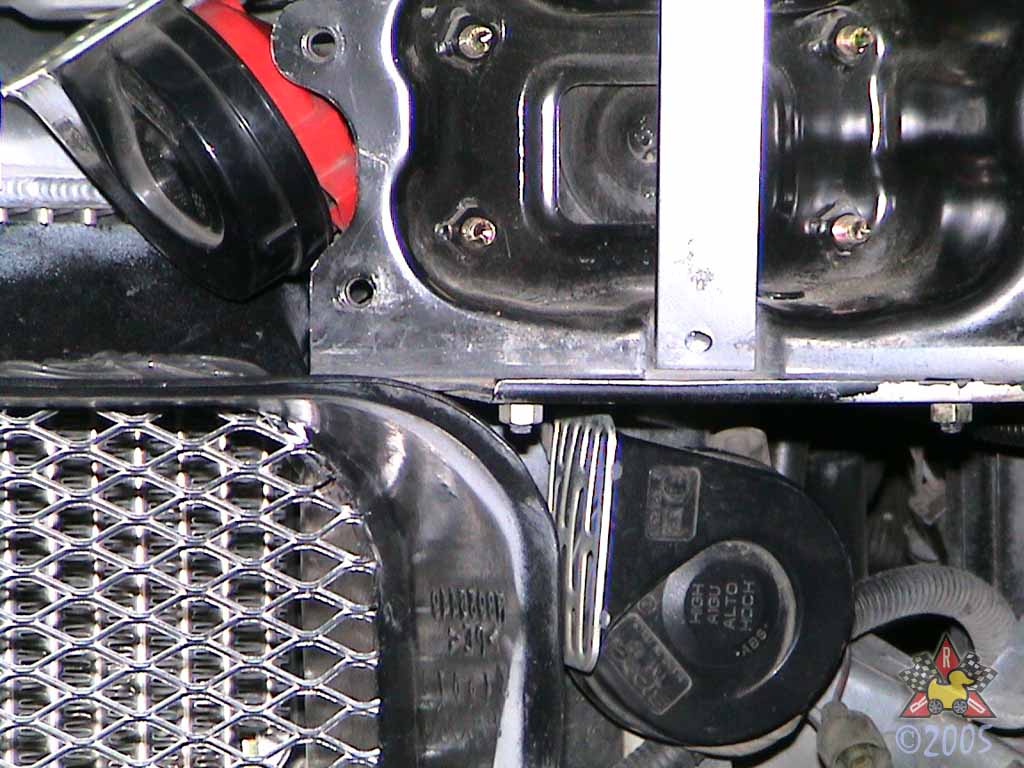
Relocate Horns
|
|
|
|
|
|
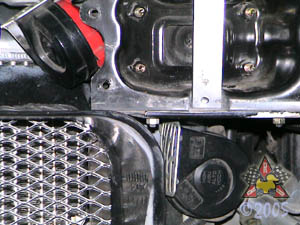
My car didn't have the factory horns to begin with, but the OEM ones
are pretty similar. There's plenty of space to relocate the
horns to somewhere that doesn't interfere with the new oil cooler.
I mounted mine near the passenger's side intercooler using some
bolts originally used to secure other stuff in that area.
|
|
|
|
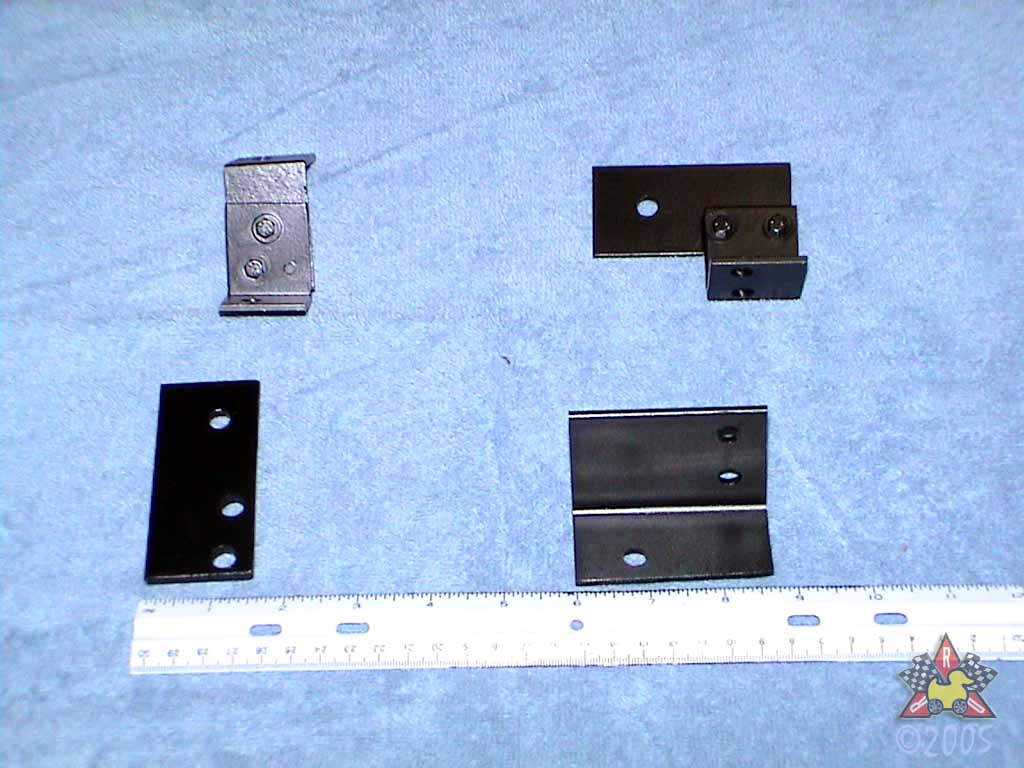
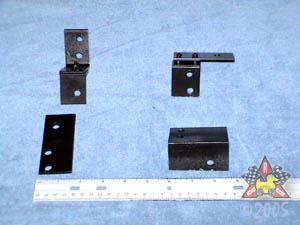
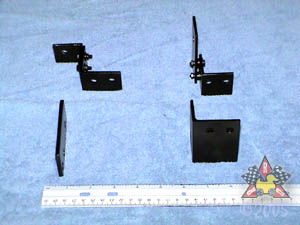
Fabricate Mounting Brackets
|
|
|
|
|
|
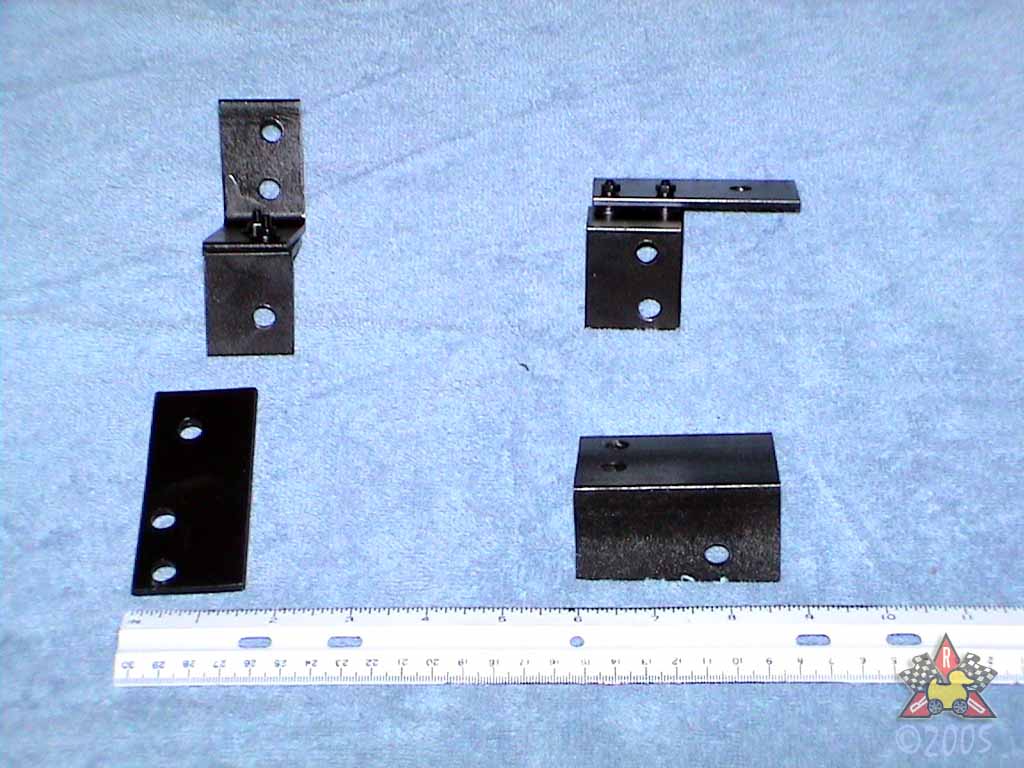
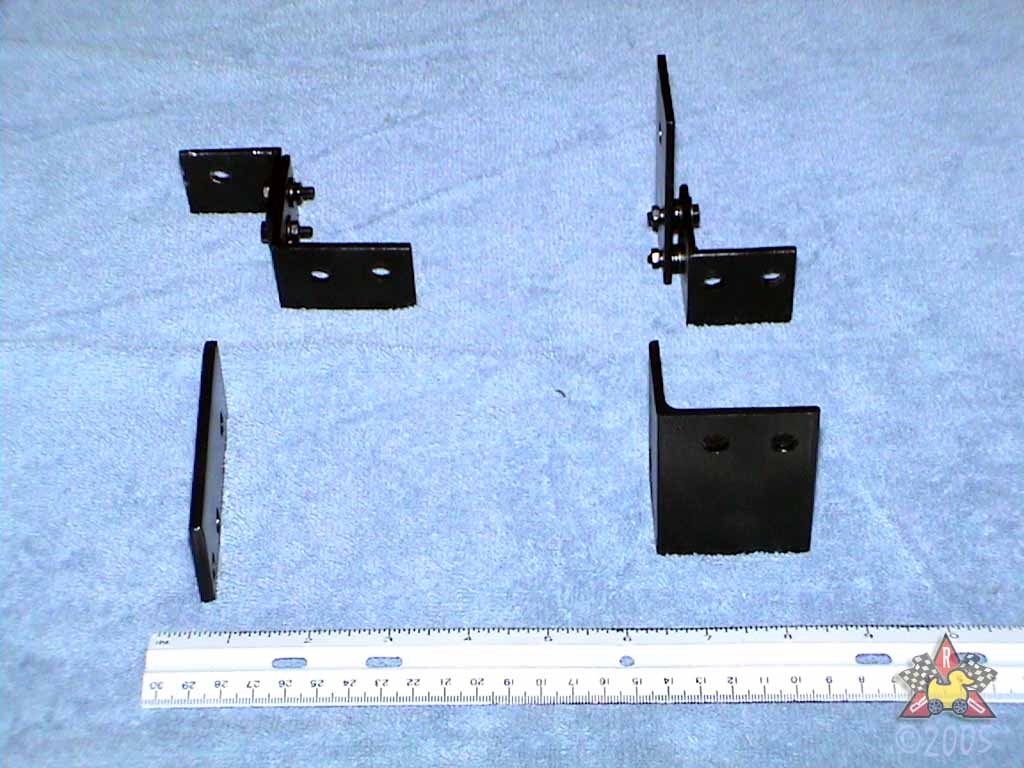
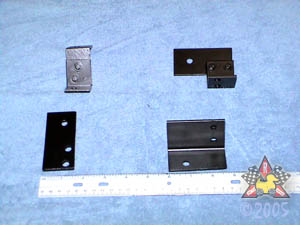
You get to decide what kind of brackets to make and how many to make. I wanted
to have all four corners of the oil cooler secured, so I made 4 brackets. I used
a combination of 2" aluminum and steel angle irons and 2" straight stock. Since I
don't have a welder, I used some nuts and bolts to connect some the pieces. I then
painted all of the assembled brackets with a rust-resistant semi-gloss black primer.
I chose to fabricate the brackets such that I could use existing bolts or threaded
holes on the car to secure the brackets to the car. They are shown in the same
relative positions as they are installed on the car, from the perspective
of a person standing in front of the car.
The locations I used for attaching the brackets to the car are as follows:
-
Upper Left: There is a stud for the fog light that sticks through
the crash bar support. The stud is long enough that you can
attach the oil cooler bracket and still get full engagement on the
threads with the OEM nut.
-
Upper Right: There are some threaded holes in the hood latch
support bar where the OEM horns are mounted. You can use one
of the OEM bolts to secure the oil cooler bracket to the hood
latch support.
-
Lower Right: There is a hole (not threaded) in the lower part of the
hood latch support bar. You can insert a bolt through the oil cooler
bracket and through this hole in the support bar. Then place a nut
on the other side of the support bar, and you're set.
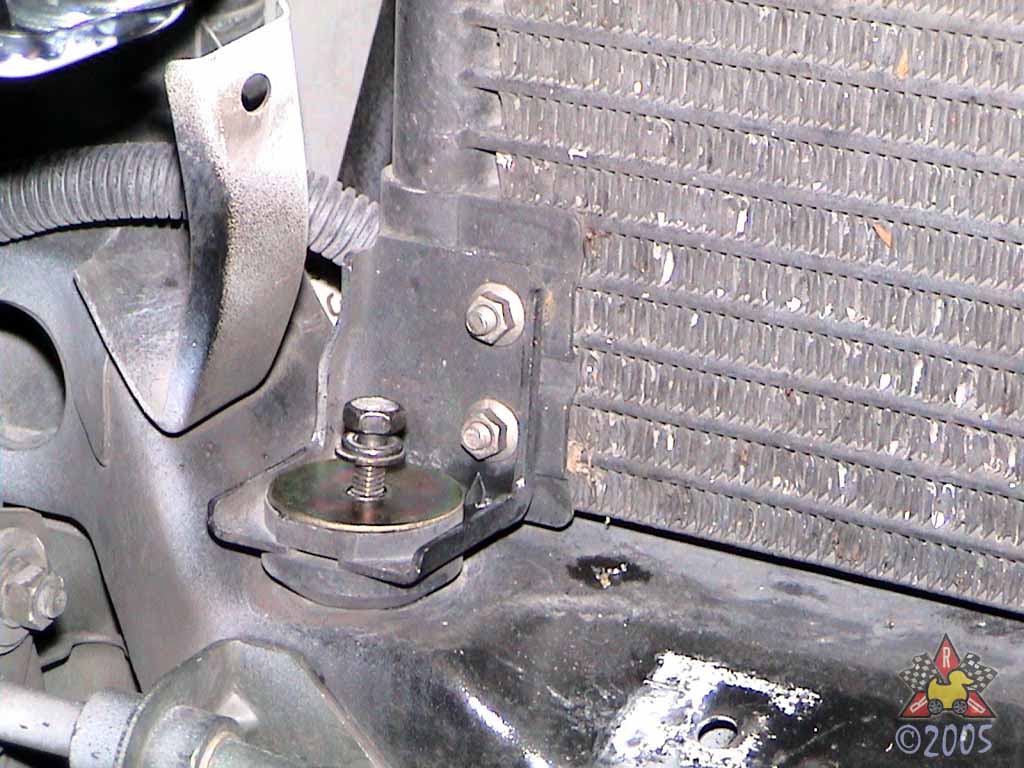
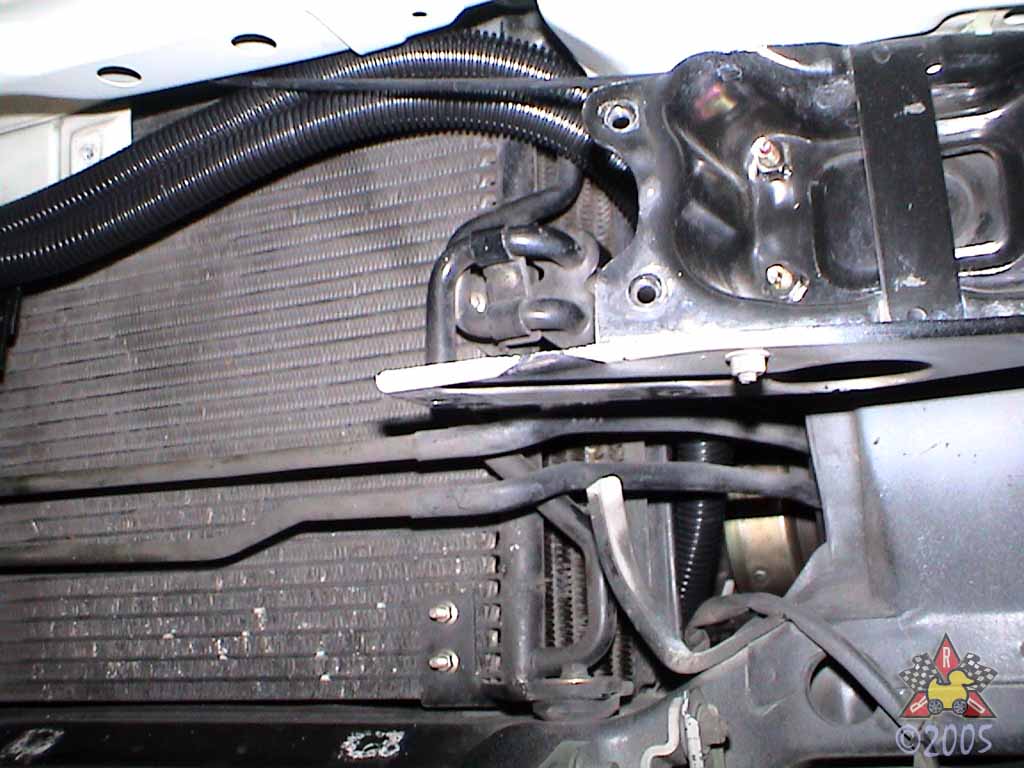
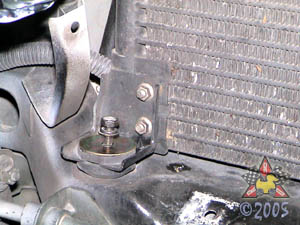
-
Lower Left: The bolt that secures the lower corner of the
AC condenser (passenger's side) is really long and can accommodate
the extra width of a bracket. Shown below...
|
|
|
|
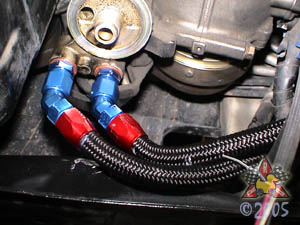
Assemble Hose Ends and Test Fitment
|
|
|

|
|
|
After measuring the length of hose needed to connect the cooler to the
adapters on the oil filter housing, cut the 10 ft. length into 2 appropriately-sized
pieces. Attach the 45-degree hose ends to one end of each of the hoses. Test-fit
the hose ends on the adapters and make sure your oil filter (and sandwich plate, if applicable)
will clear everything.
|
|
|
|
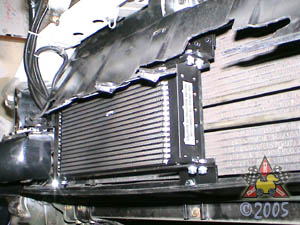
Mount Oil Cooler and Attach Lines
|
|
|
|
|
|
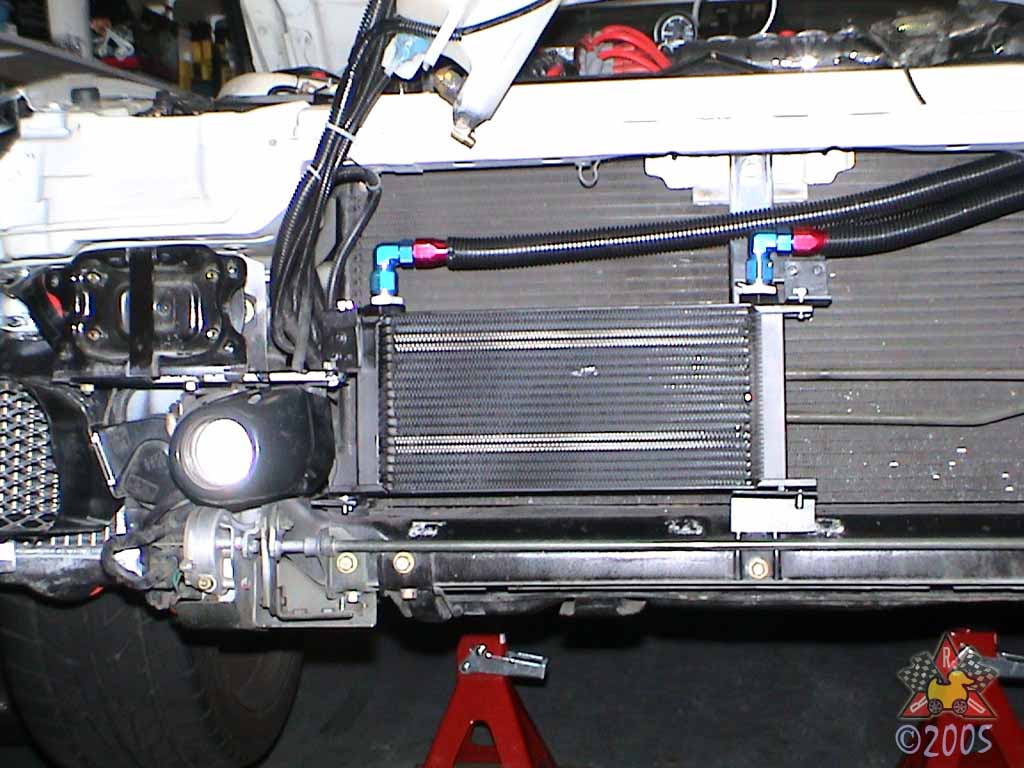
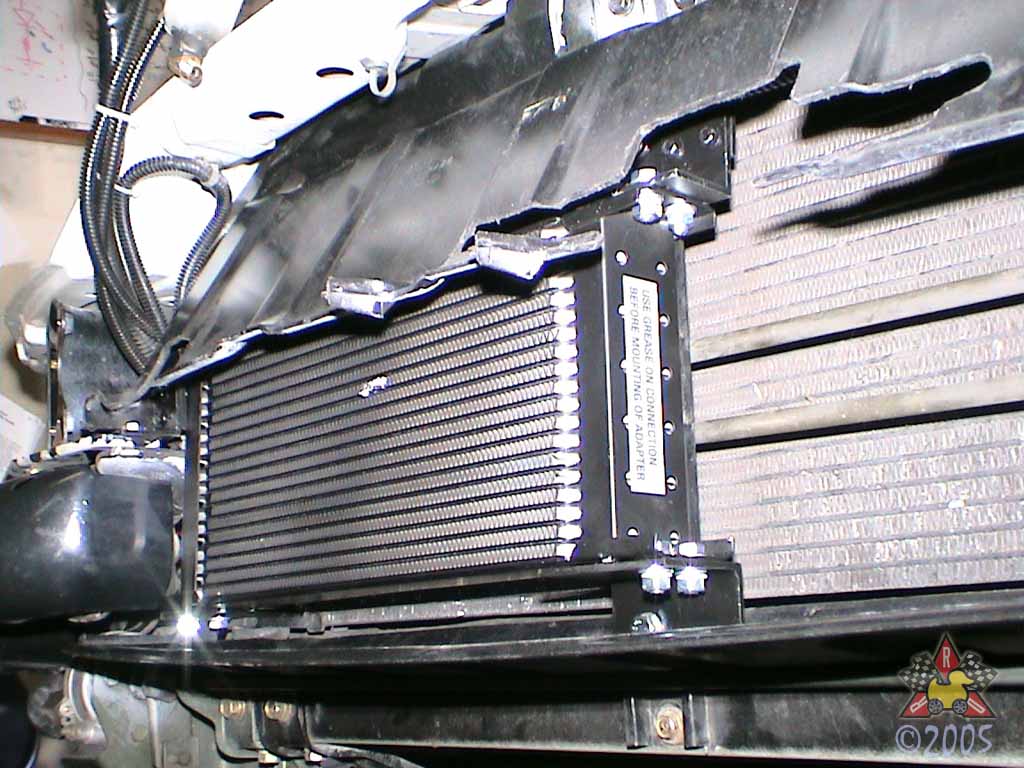
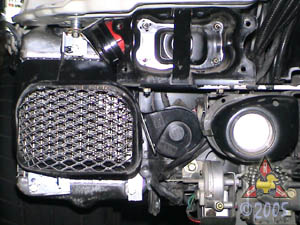
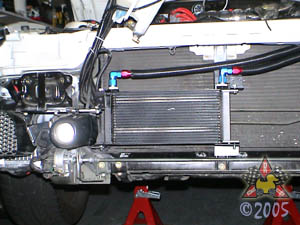
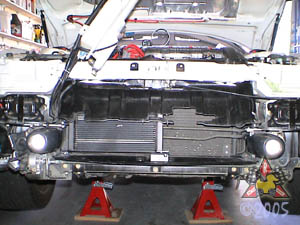
Using the brackets you fabricated, secure the oil cooler in the position
where it will be permanently mounted. After checking that your hoses are the
right length (again), attach the 90-degree hose ends to the hoses, as described
in the instructions included with the Earl's hose.
|
|
|
|
[optional] Protect Oil Cooler Lines
|
|
|
|
|
|
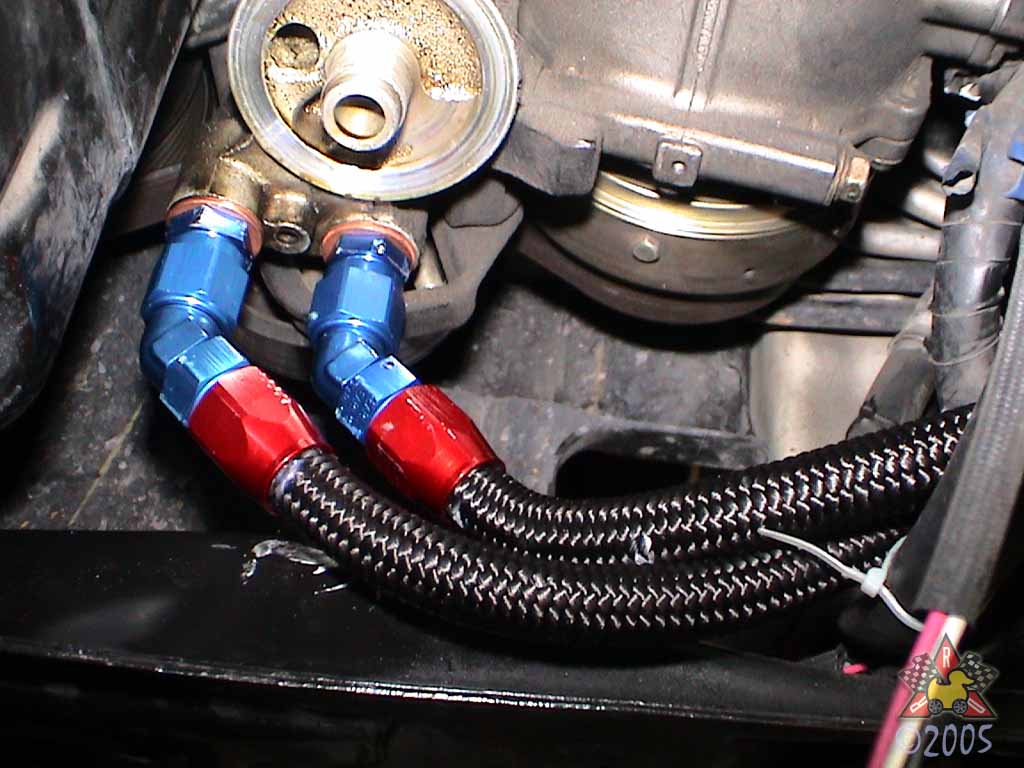
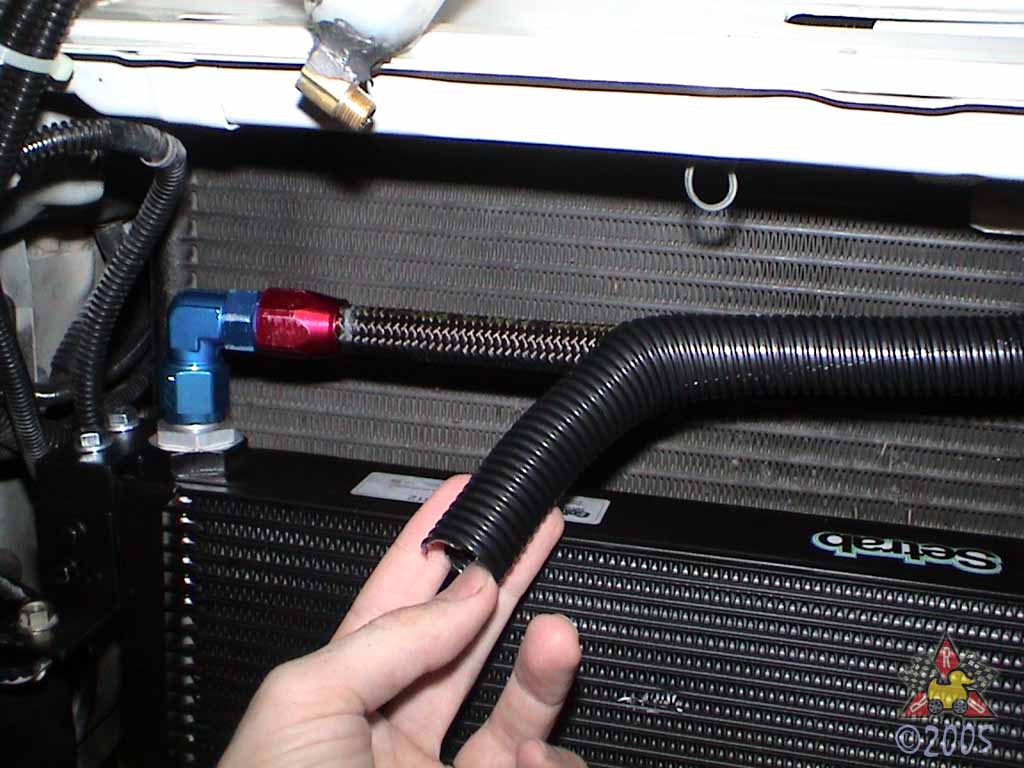
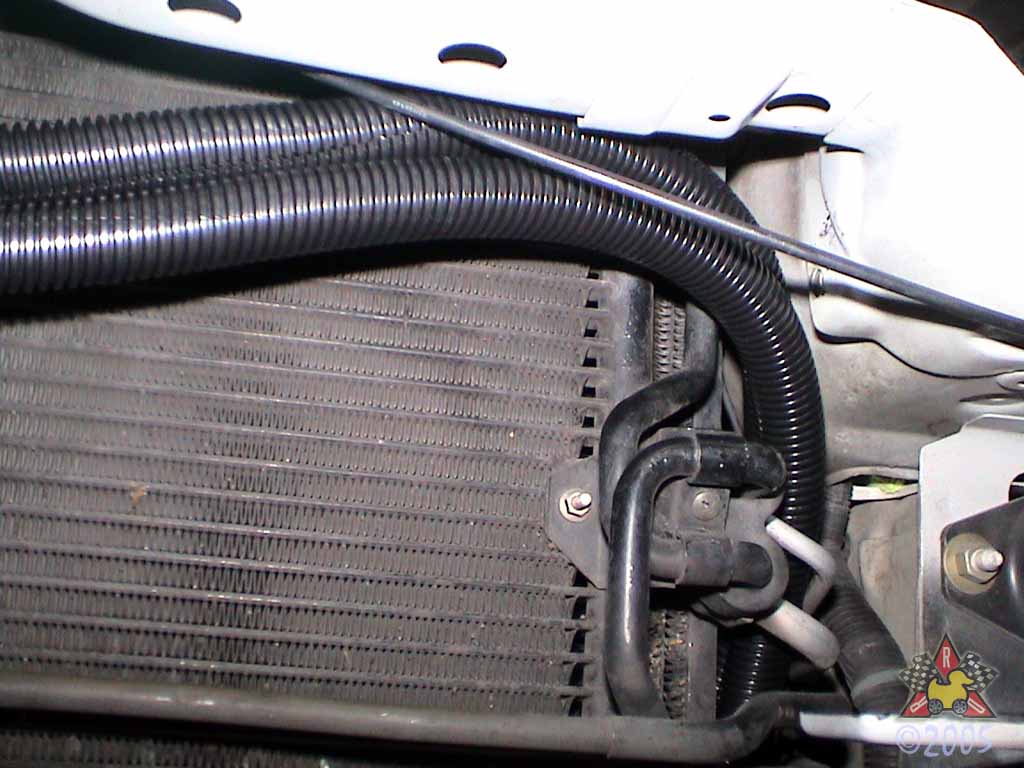
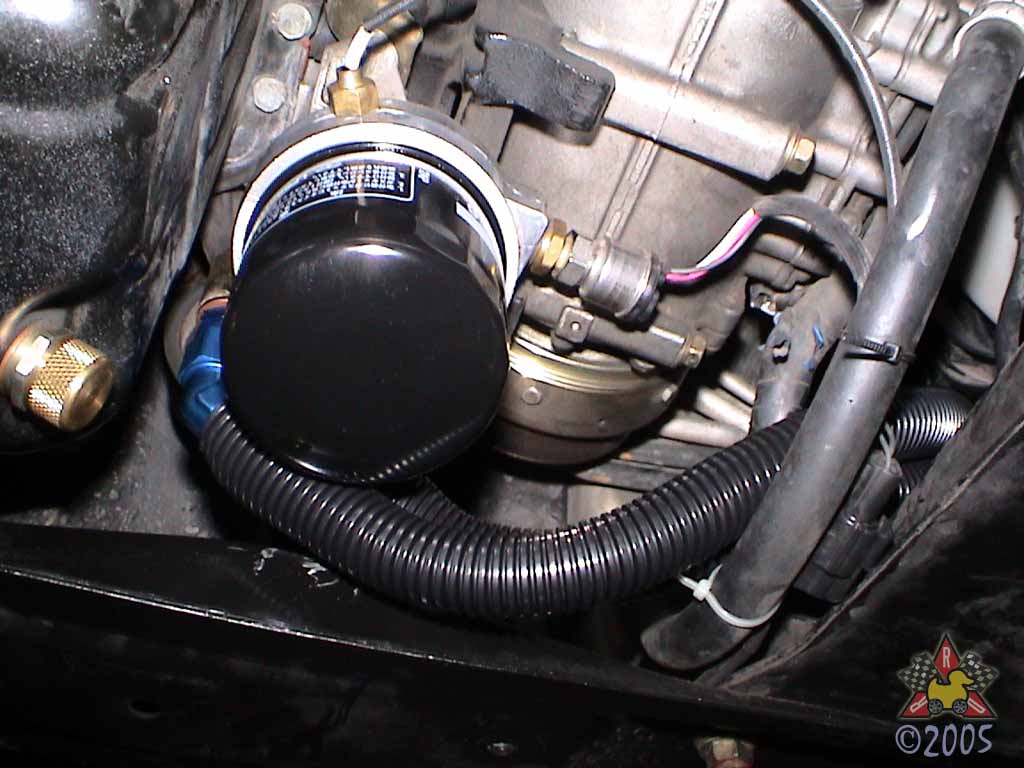
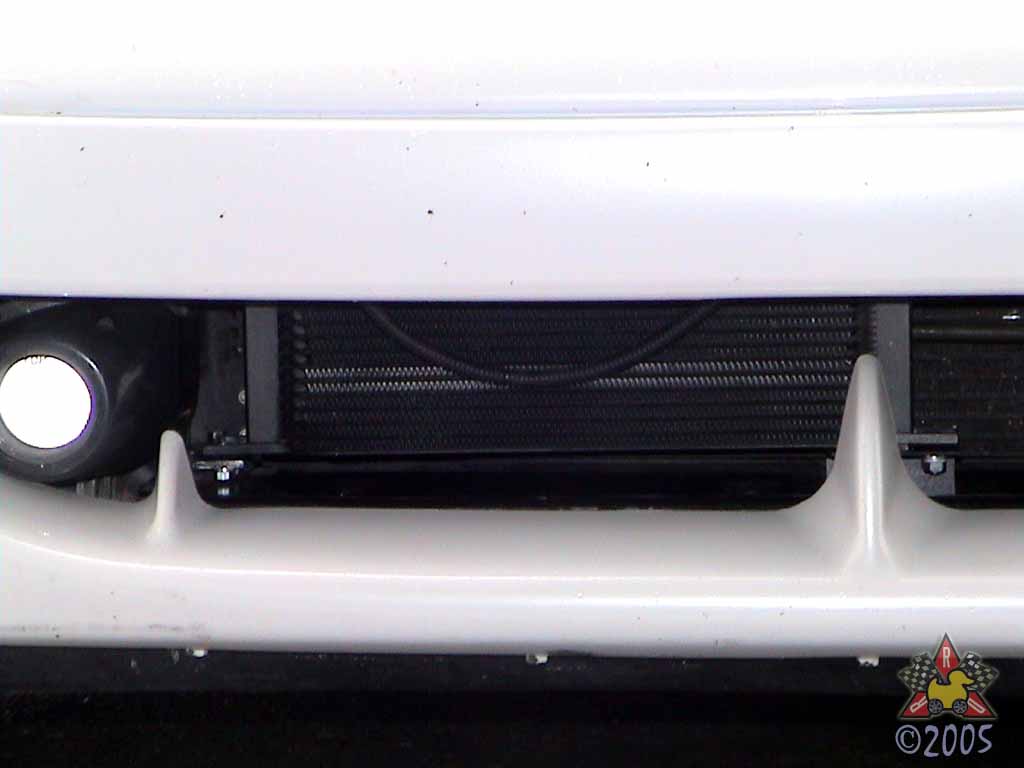
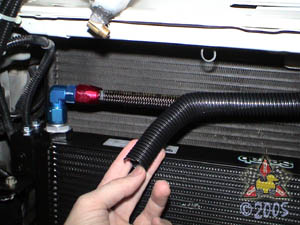
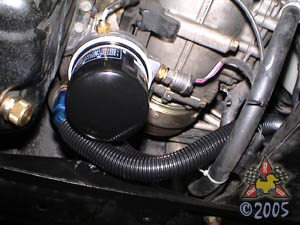
I specifically chose not to use stainless-steel braided hoses because they
tend to act like a hacksaw if they rub against anything. These hoses run
in pretty tight quarters, so rubbing could be an issue. I also wanted
to give the hoses themselves a little extra protection, so I enclosed them
in plastic split-loom tubing, as shown in the pictures above.
|
|
|
|
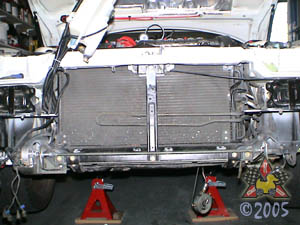
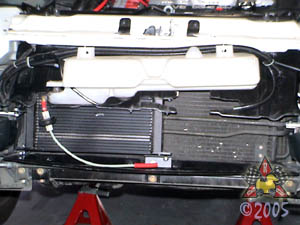
Secure Oil Cooler and Button Everything Back Up
|
|
|
|
|
|
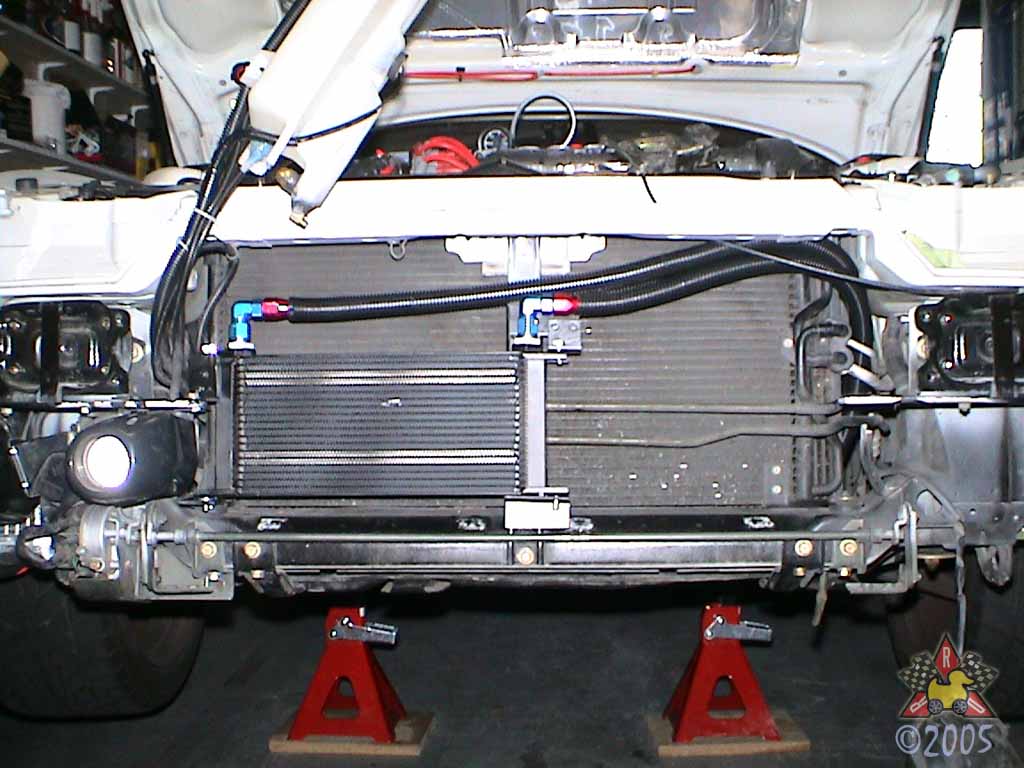
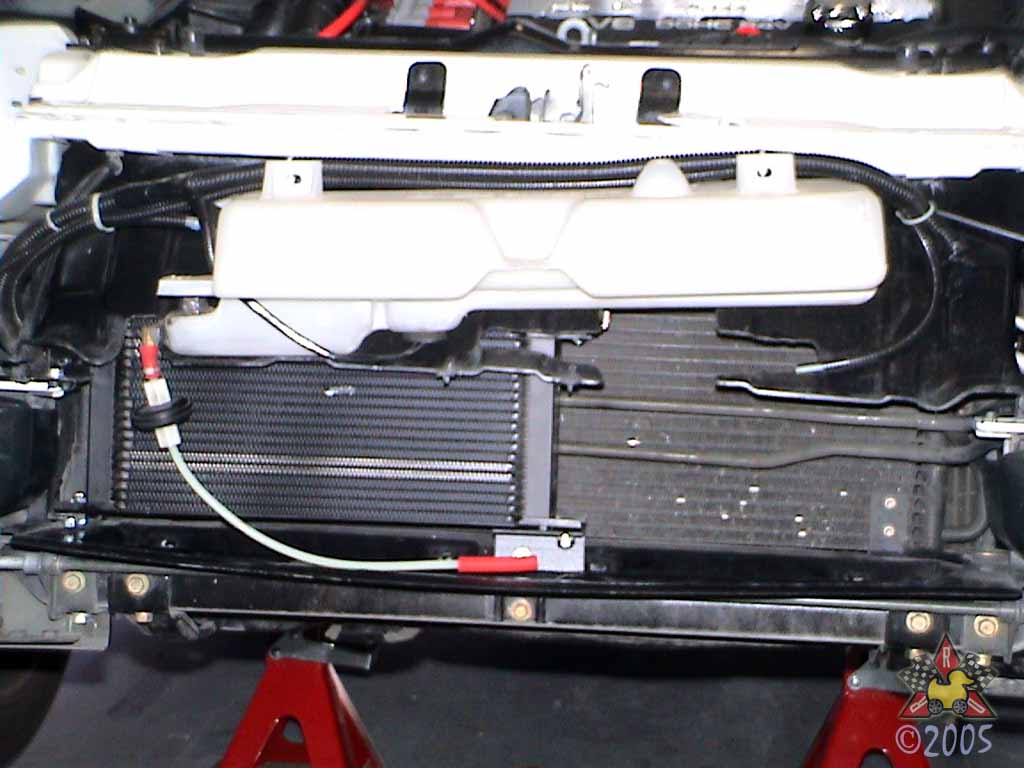
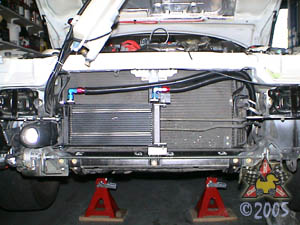
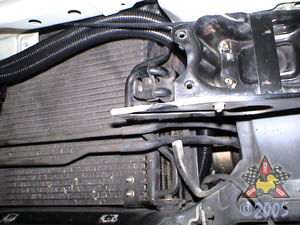
Shown is the replacement of the radiator shroud, the water injection
tank (not stock), and the front crash bar.
|
|
|
|
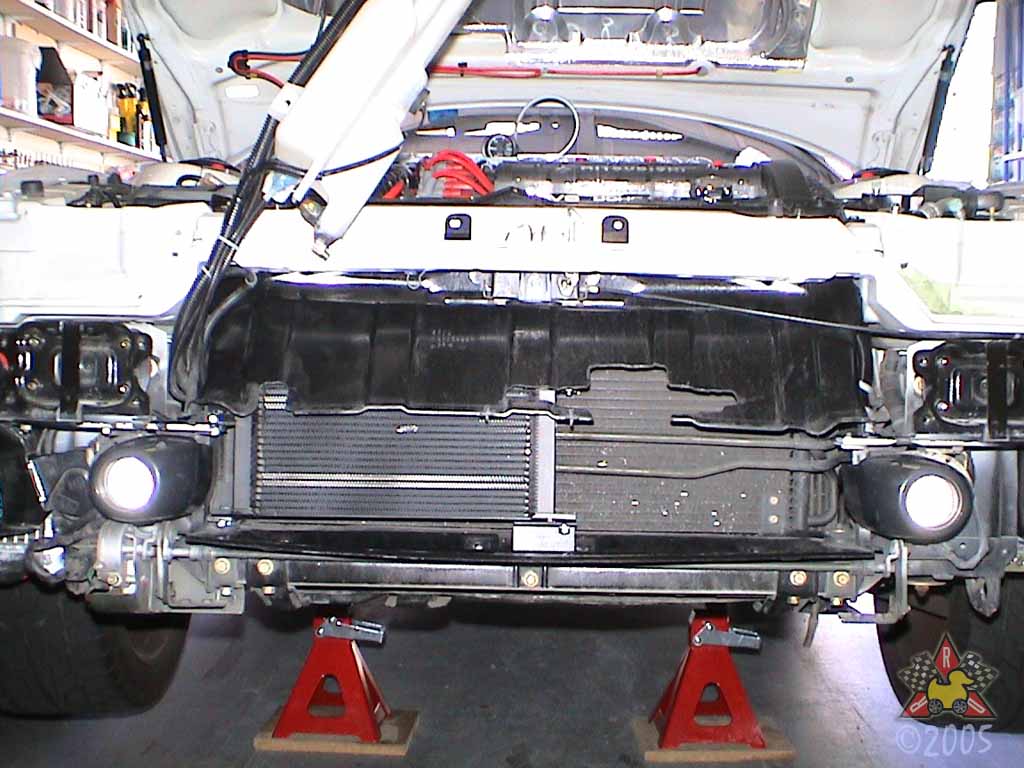
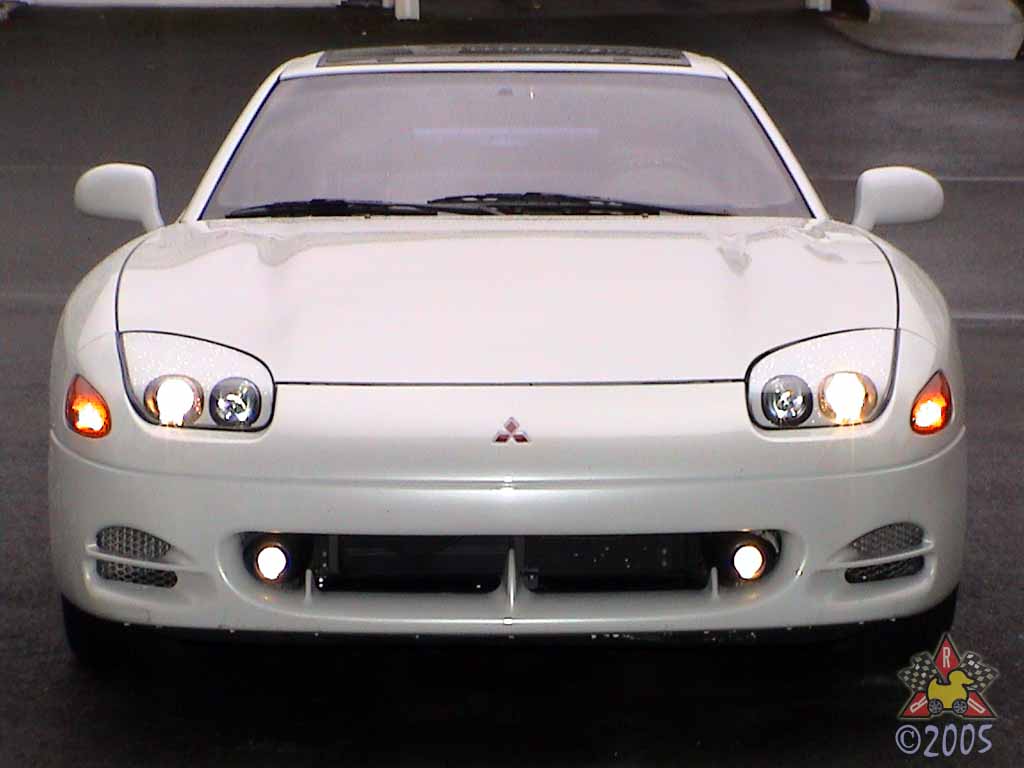
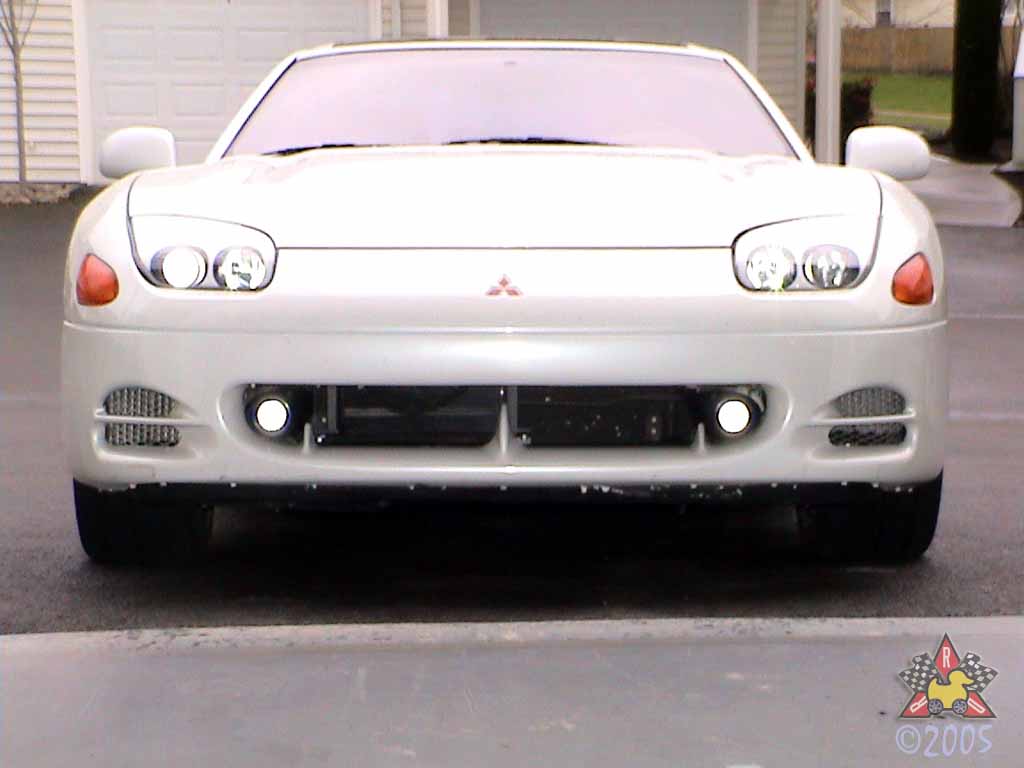
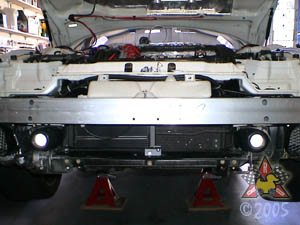
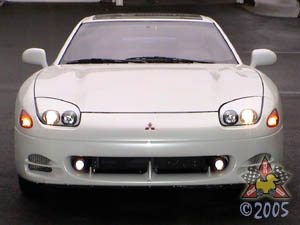
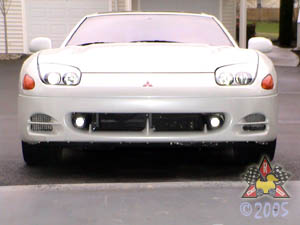
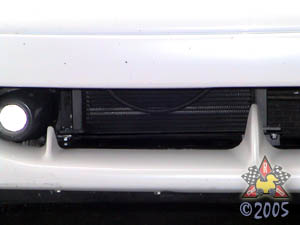
Finished Installation Pictures
|
|
|
|
|
|
|
|