|
|
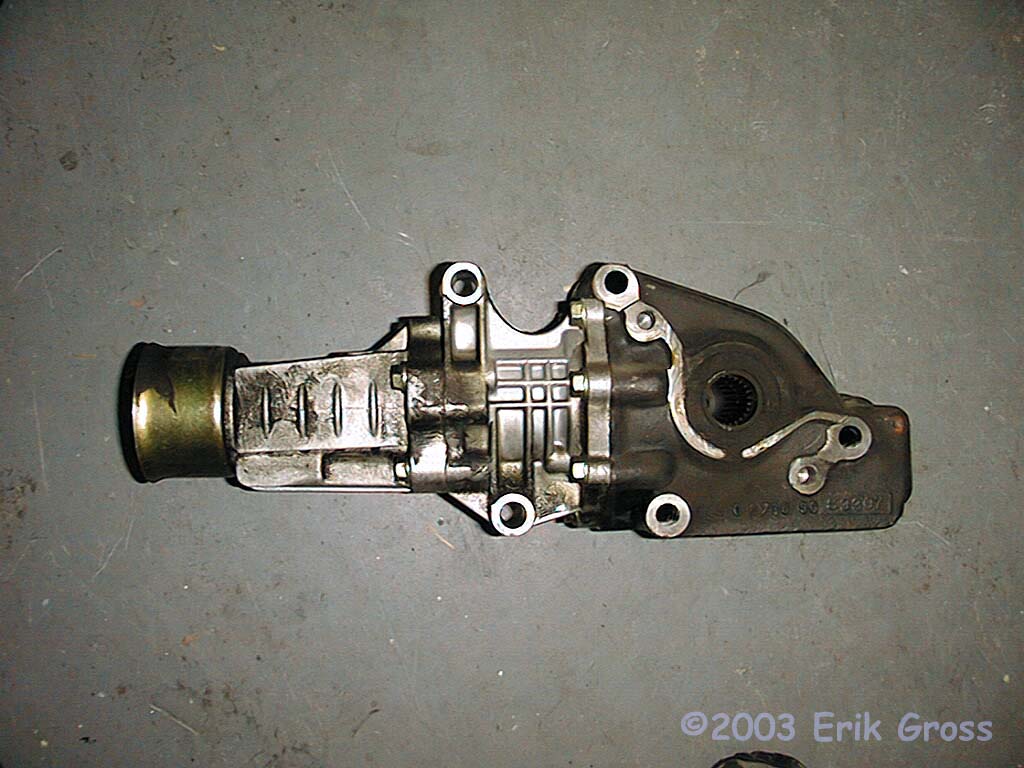
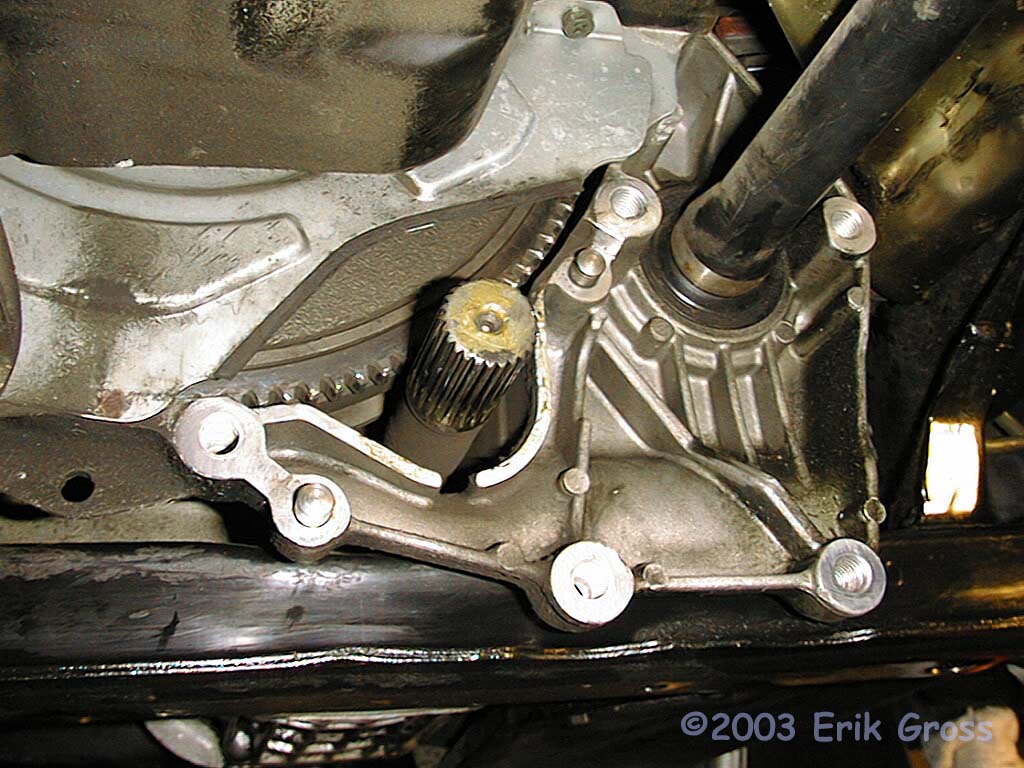
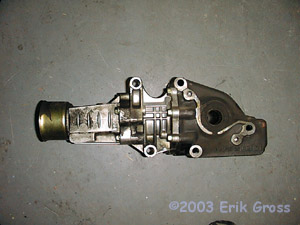
The above are pictures of a transfer case from a 1995 3000GT VR-4
(second-generation, 6-speed transaxle). The purpose of the transfer
case is to take the torque transmitted by the center differential
(inside the transaxle housing) through the transaxle output shaft
and rotate that motion 90 degrees so that the rear driveshaft
is turned. Thus 50% or more of the engine's torque is transmitted
through the shafts and gears in this casing.
Further, if the
transfer case were to run dry (no oil), the gears, shafts, and
bearings inside would rapidly get very hot and damage would occur.
In the extreme case, the bearings may cease to function and
the transfer case shafts could lock up (stop spinning). This would
cause all 4 wheels of the car to stop rotating, sending the car into
an uncontrollable skid. As you can imagine, this a little bit of
a safety hazard.
In 2002, Mitsubishi officially recognized that some transfer cases
on 3000GTs leaked oil from the seals and could eventually run dry;
thus there is an outstanding recall on these seals. If you notice
any oil on the outside of your transfer case, please at least check
the oil level in your transfer case. If you suspect that oil is
leaking from your transfer case seals or you notice a puddle of
gear oil under your transfer case, Do Not drive the car until
you resolve the problem.
|

|
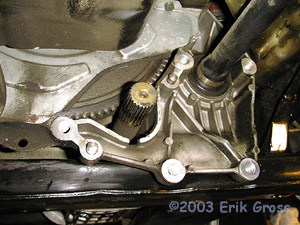
Support the Driveshaft
|
|
|

|
|
|
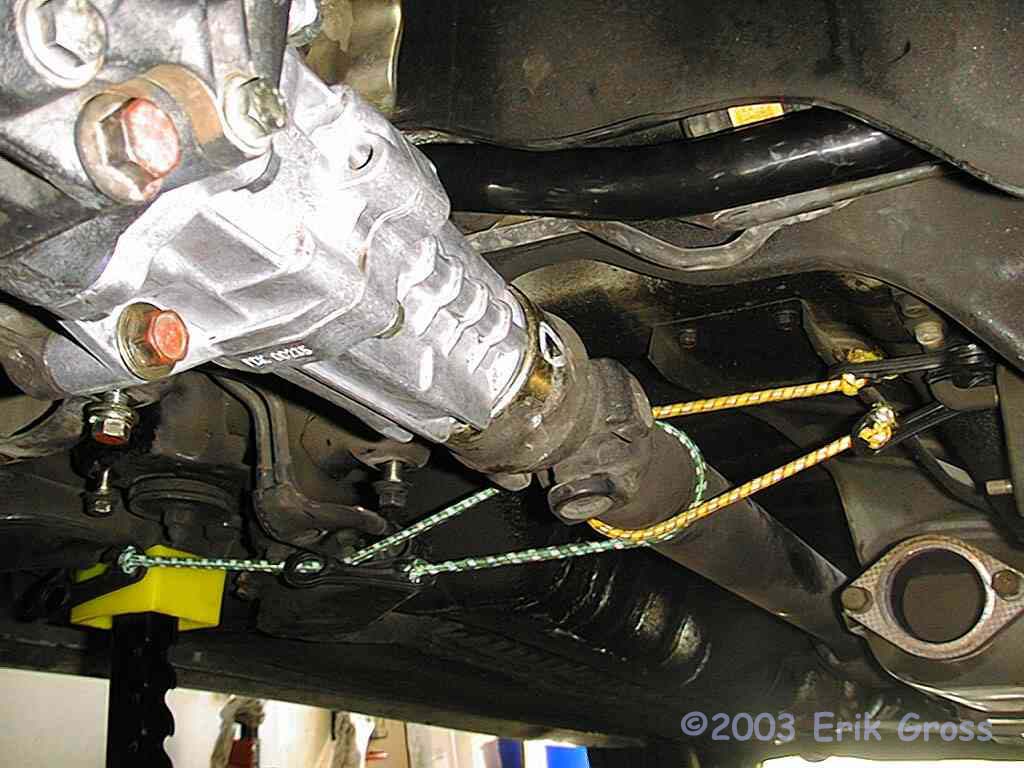
Since you'll be removing the transfer case, you need to support
the front end of the driveshaft so as not to put unnecessary stress
on the universal joint. You can use string, rope, a jack stand,
or anything else that's safe, so long as the driveshaft is supported.
I used two bungee cords as shown in the picture and attached
them to various non-moving parts under the car. This worked
great for me.
|
|
|
|
Drain Transfer Case Fluid
|
|
|
|
|
|
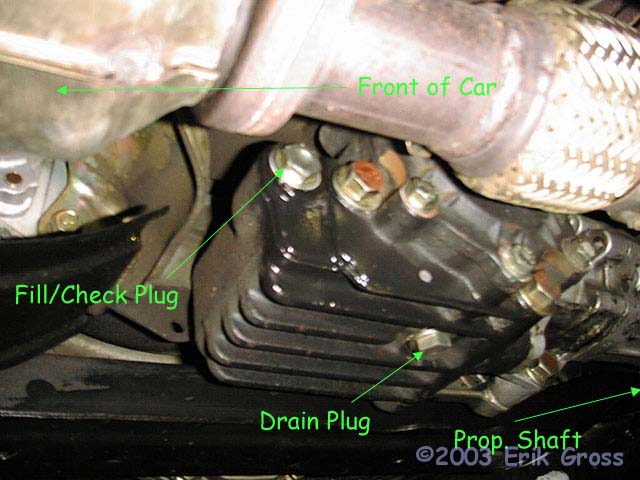
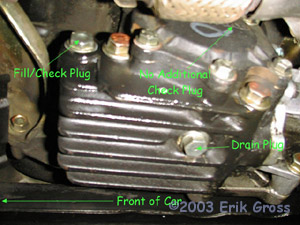
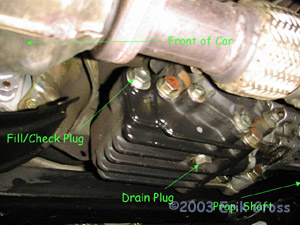
You need to drain the transfer case fluid before you remove
the transfer case, lest you let transfer fluid leak all over
your floor from the output shaft housing. The drain plug
is located on the bottom of the transfer case, toward the
front of the car. This is a
17mm drain plug (22 ft*lbs) and you MUST use a new crush
washer (gasket) when reinstalling it.
|
|
|
|
Unbolt Transfer Case
|
|
|
|
|
|
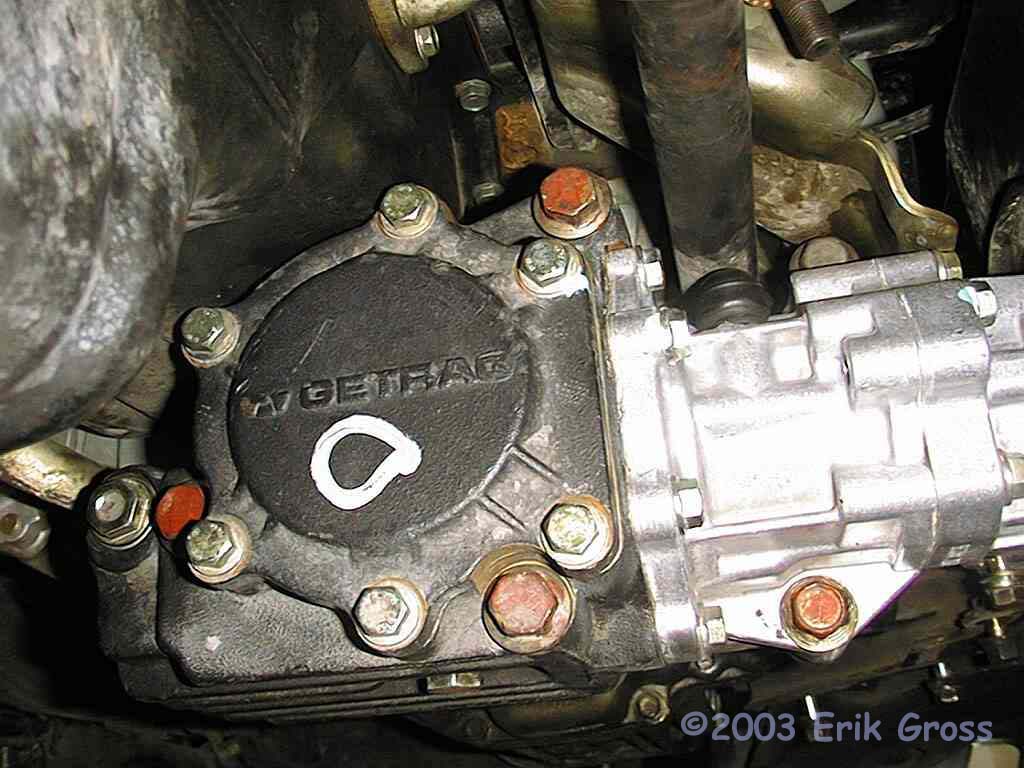
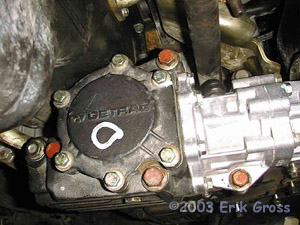
There are five 17mm ('91-'93: 61-65ft*lbs '94+: 18-22ft*lbs)
bolts that attach the transfer case to the transaxle. You can
see four of them with their red heads in the picture. The fifth
one is above and to the right of the rightmost red one. Once
you remove these bolts, insert a large screwdriver or pry bar between
the transfer case and the transaxle. Gently pry the
transfer case toward the driver's side. Once you break it
loose, it should slide off the transaxle output shaft with little
resistance. Remove the front end first, rotate the front
downward, and then slide the transfer case off of the rear
driveshaft. Be careful not to drop the transfer case
on your head :-) It's heavier than I first thought.
Also, there will be some oil left in the splines of the rear
driveshaft, so put a paper towel or rag under there to catch the oil.
|
|
|
|
Remove Transfer Case
|
|
|

|
|
|
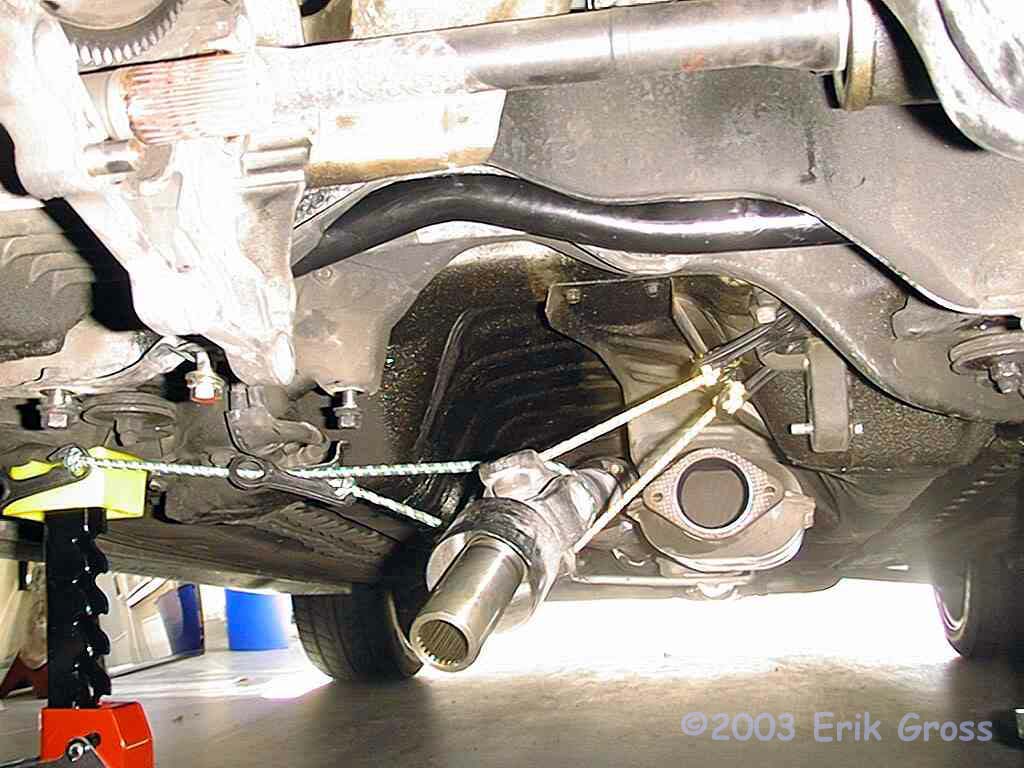
Here's a picture of the supported driveshaft after the transfer
case has been removed.
|
|
|
|
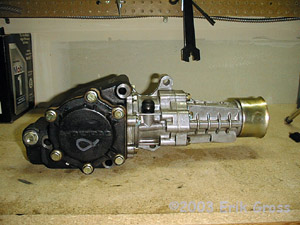
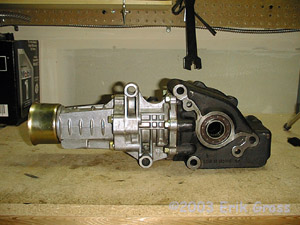
Transfer Case, As Removed
|
|
|
|
|
|
|
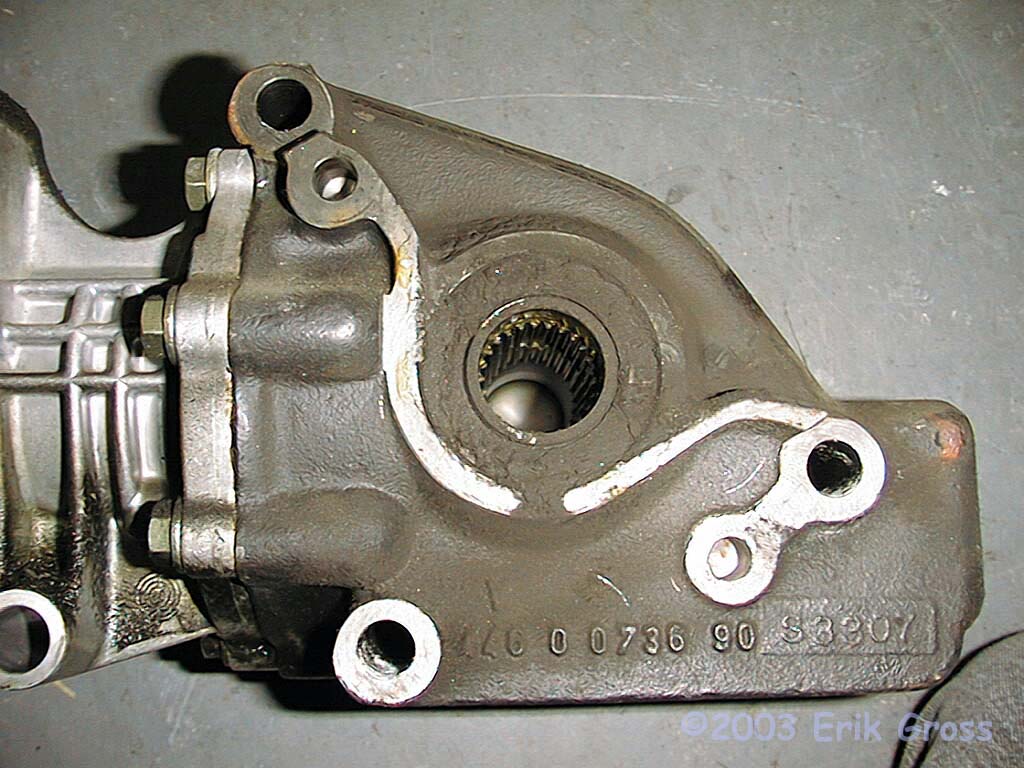
Close-up of Female Input Shaft Connection
|
|
|

|
|
|
Note the caked-on dirt and clutch dust on the seal around the shaft.
That's probably an indication of a leaking seal, but the leak
doesn't look that bad.
|
|
|
|
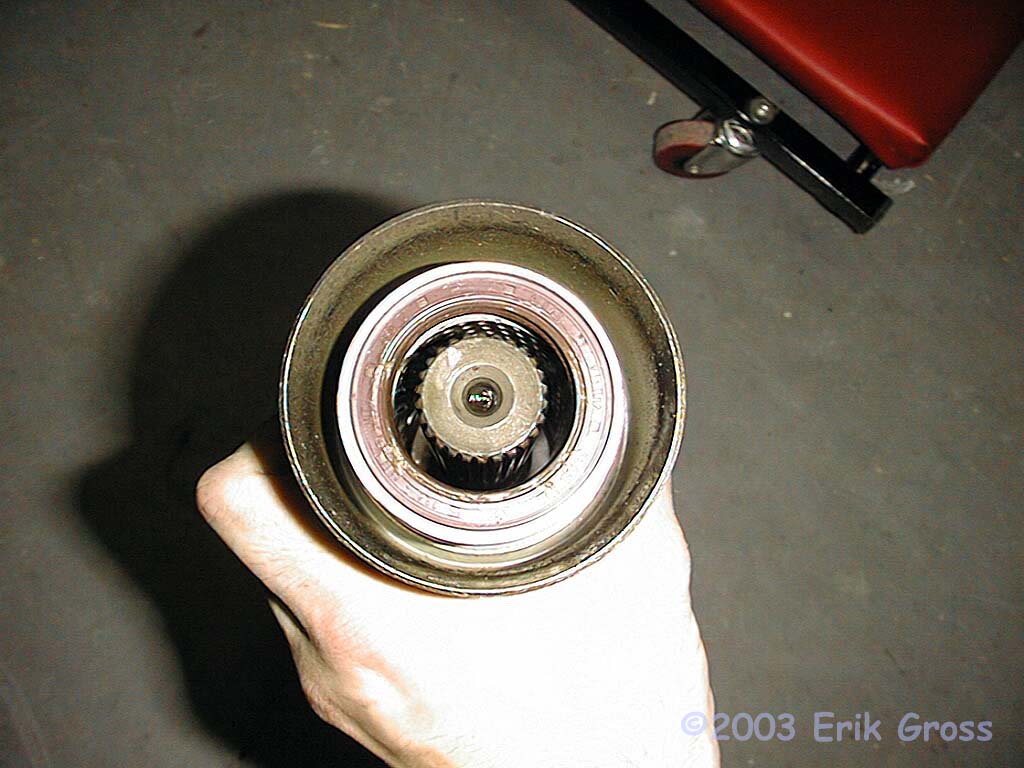
Output Shaft Seal and Housing
|
|
|

|
|
|
Not too much dirt buildup here. Splines look good.
|
|
|
|
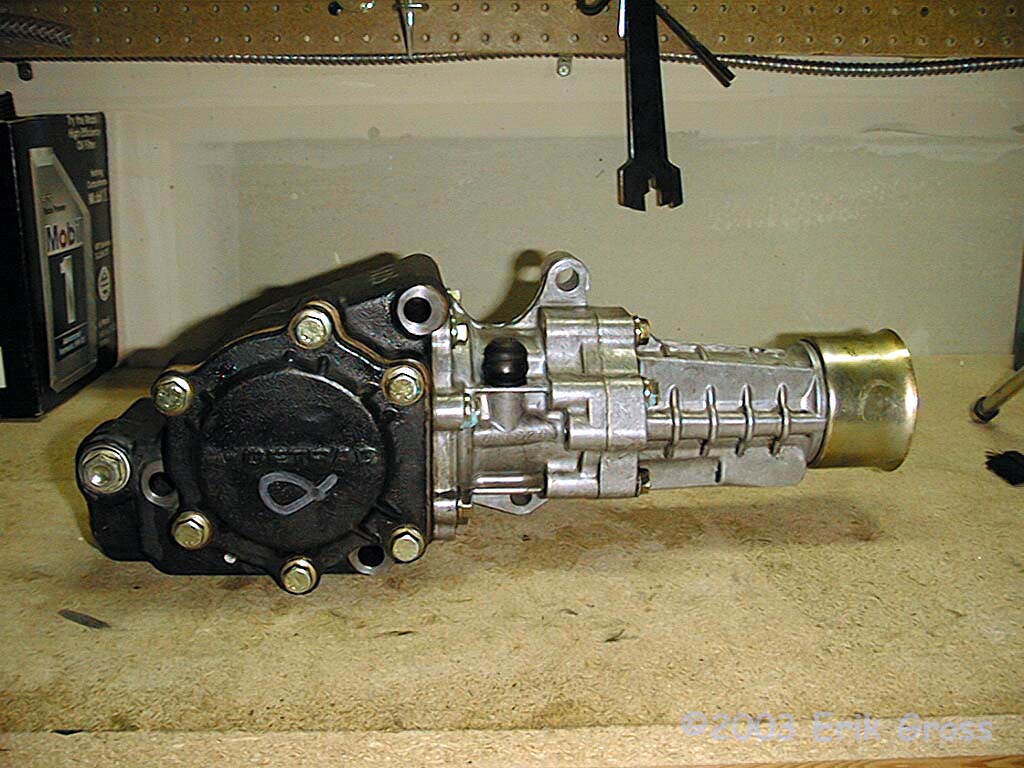
Cleaned Up
|
|
|
|
|
Note the new input shaft seal. You can remove the old
one by carefully prying it out with a screwdriver. The
new seal is pressed in with a "Special Tool" or can be
carefully done by hand. I opted to take my transfer
case to my local dealer and have them install the new seals
with the "Special Tool" for a few bucks, just so that I
would know that the new seals were seated properly.
|
|
|
|
Transaxle Housing
|
|
|
|
|
|
Here is the side of the transaxle housing where the transfer case
bolts up. The black shaft in the upper right is the driver's side
half-shaft that turns the driver's front wheel.
The splined
shaft in the middle of the picture is the transaxle output shaft
that mates to the female input shaft on the transfer case.
This shaft should have a light coating of grease (Lithium or other
high-temp) on it. If yours doesn't have much grease on it, it
wouldn't hurt to put some more on before reassembly.
|
|
|
|
Rear Driveshaft
|
|
|
|
|
|
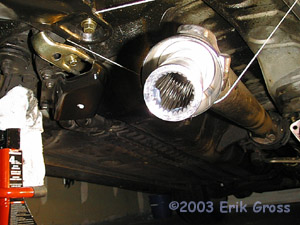
Here's a close-up of the rear driveshaft connection - this
is what connects to the output of the transfer case.
|
|
|
|
Reinstall Transfer Case
|
|
|
|
|
|
Note: If your transaxle output shaft shows any signs of rust
or if the lube on the shaft doesn't seem to be able to do its job
anymore, you'll want to put a light layer of grease on the shaft
before you put the transfer case back on. Use a grease that's
compatible with the existing lube or if you're not sure, clean off
the shaft and the receiving shaft of the transfer case and then
re-lube them. I used a high-quality lithium-based high-temperature
grease I got at the local auto-parts store. If you've had the
transfer case off for more than a few days, you might want to
spread some transfer oil onto the splines of the rear driveshaft
to make sure that is well-lubricated as well.
Align the transfer case with the rear drive shaft and slide them
together. Then rotate the assembly upward and slide the transfer
case onto the transaxle output shaft. You may need to rotate
the driveshaft or the wheels at this point to get the splines to
line up. Tighten all 5 bolts down to spec: ('91-'93:
61-65ft*lbs '94+: 18-22ft*lbs).
|
|
|
|
Replace Transfer Case Drain Plug
|
|
|
|
|
Replace the drain plug on the transfer case, and be sure to use a
a new crush washer (gasket). The torque spec on the 17mm drain plug
is 22 ft*lbs.
|
|
|
|
Refill Transfer Case Fluid
|
|
|
|
|
Loosen the fill plug on the transfer case. In the above picture,
it's the 17mm bolt toward the front of the transfer case, just
to the left of the red bolt head. Refill the transfer case
with the appropriate amount of fluid for your model year. If the
car is level, you can just fill until it drips out of the fill hole
on the '94+ models. Replace the fill plug on the transfer case, and be sure to use a
a new crush washer (gasket). The torque spec on the 17mm fill plug
is 22 ft*lbs.
|
|