BMWACA Performance Driving School

Portland International Raceway

September 23, 2003


Summary


Contents


Event Description

This event was a very well-run driving school, with participation from drivers of all skill levels. The morning started with a driver's meeting covering track rules, passing rules, and flag meanings. From there, the Novice drivers (drivers with little or no track experience) were herded into a classroom in the tower where we went over some of the fundamentals of driving on a racetrack. The instructors talked about "the line" through corners, weight transfer during driving, and the friction circle. We also went over the flag colors and their meanings once again. By this time, the Intermediate group was on the track, so it was time for the Novice group to head to the pits to get our cars ready to head to pre-grid.

Though I was familiar with most of the track flags and most of the driving concepts mentioned in the classroom discussion from my previous (one) track day and many autocrosses, it was good to refresh my memory. If I'd had no experience at a track before, I think I still would have felt comfortable with the pre-track preparation provided by BMWACA - kudos to the event organizers and instructors.

Once we were in pre-grid, the instructors appeared and hopped into the front passenger seats of the Novices' cars. After a brief chat with our instructors, we headed out onto the track. During the first session, there was no passing allowed in the Novice group. The focus during this time was to learn the track at a comfortable speed and get used to the car. Subsequent sessions allowed passing on the front straight only and speeds increased as drivers got more comfortable with the track and honed their skills. By the final session, my instructor thought that I was ready to head out solo. I agreed, as I was starting to feel pretty good about most of the track and about my car's performance.

Overall, this event was absolutely a blast. PIR is a really fun track, and seems pretty forgiving as one is learning to drive the line. BMWACA ran the event very well, keeping things going smoothly, providing excellent instruction to those of us in the Novice group, and making it a point to test the skills they were teaching. You'll definitely see me at BMWACA events next season.


Pictures and Video Highlights


Session2-External-10-11-12.JPG
Session2-External-10-11-12.JPG (64KB)
Small Video (360x240) (817KB)
Large Video (720x480) (2785KB)
This is during the second session of the day, when passing was allowed and most of us were getting a decent feel for the track. Speeds were gradually increasing with every lap. This video shows me coming through turn 10 around 55-60mph, braking at the entry to turn 11, maintaining speed through 12, and full acceleration on the exit of 12, probably around 60-65mph. I shift to 3rd and head down the front straight. The video was shot from atop the tower located near turn 12 ("B" on the map).
Session4-External-No-Traffic.JPG
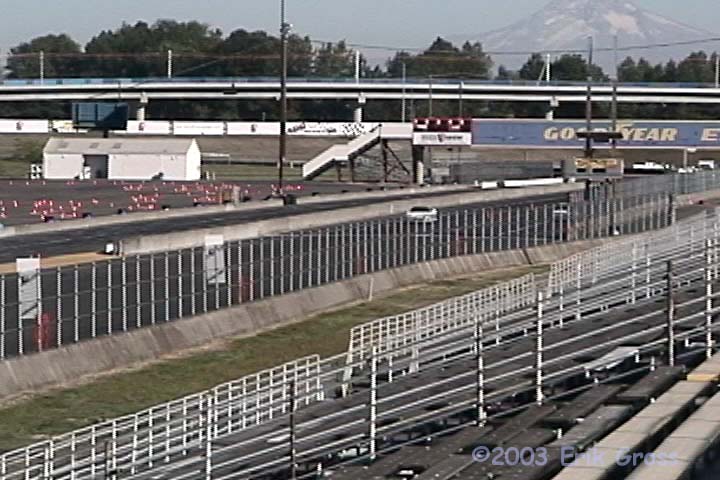
Session4-External-No-Traffic.JPG (78KB)
Small Video (360x240) (2426KB)
Large Video (720x480) (7692KB)
This clip was shot from the bleachers on the outside of turn 1. I come down the front straight in the right (passing lane), complete my pass of the white 3-Series, and get back on line for the entry to turn 1. Before braking, I probably hit 105-110mph. I think I was entering turn 1 around 50mph and then slowing do maybe 30 or so at turn 2. I then exit turn 2 and pass through turn 3 under full throttle, shifting from 2nd to 3rd around 5500RPM (55MPH) before entering turn 3. The rest shows turns 5, 6, and the entry to turn 7. This is where I started to catch up to the black WRX STI in the later clips.
Session4-Internal-STI.JPG
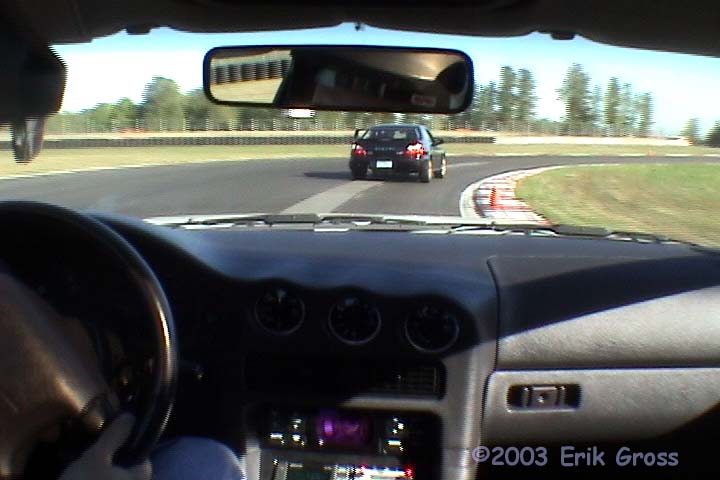
Session4-Internal-STI.JPG (50KB)
Small Video (360x240) (7428KB)
Large Video (720x480) (23506KB)
This clip was shot from inside my car, and was the one bit of "drama" for the day for me; other than the HP driver's s/c M3 getting friendly with the RH wall on the back straight. It picks up pretty much where the previous clip left off - starting at the exit to turn 7, we head through 8, down the back straight, and on to 10-11-12. As we round turn 12, the starter gives the STI the blue flag, indicating that he should allow me to pass. The STI heads to the left lane and I take the right (passing) lane. Either the STI driver didn't see the blue flag, didn't see me, or thought that I wouldn't keep up. He drag raced me down the front straight. We hit around 115mph, and over the course of the whole straight, I gained maybe 2 car lengths on him. It looks like I was starting to pull on him a little as we passed 100mph (my shift to 4th), but I realized that I wasn't going to make it by him safely, so I just got back on line behind him. I think the STI was relatively stock, so I guess that shows that at least from 50-110mph, the STI has as much grunt as a BPU VR-4. Certainly a nice car. Anyway... I was a little frustrated at this point (admittedly, probably not the best attitude), so I decided to make sure I stayed with him through the rest of the lap in hopes that he would let me pass next time. That didn't happen because the guy in the STI wanted to pass a slower car in front of him by the time we made it around to the front straight again. Oh well. After that, I just pulled off at turn 11 and requested a restart to avoid the congestion.
Session4-External-STI.JPG
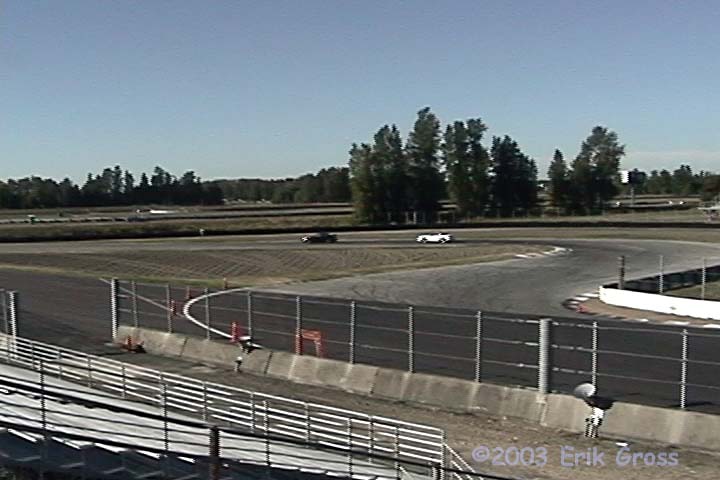
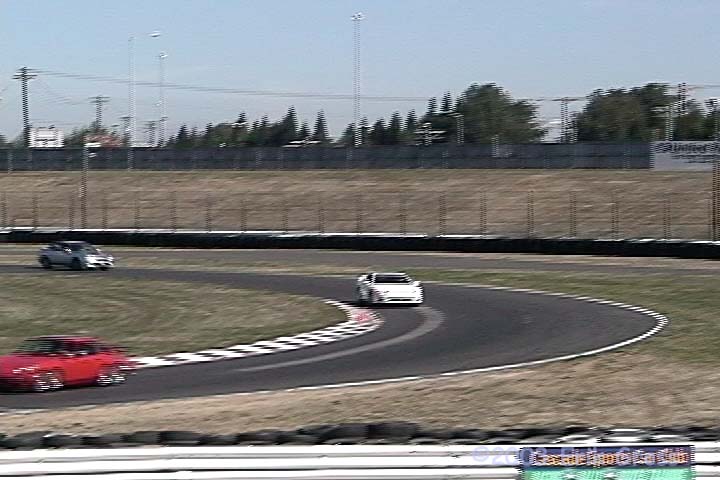
Session4-External-STI.JPG (55KB)
Small Video (360x240) (2661KB)
Large Video (720x480) (8661KB)
This clip was shot from the bleachers on the outside of turn 1. This is the external version of the "STI Drama" internal clip above. As you can hear, one of my friends was far more upset with the STI driver for not letting me pass than I was. He drives in the Advanced group and gets really frustrated with people who drag race him down the straights and then stifle him in the corners. My take on the whole thing is that it was a school, and a novice session at that; I lost 30 seconds of driving time by pulling off and restarting in a non-congested area, so it's all good. Also, you can see here that the in-car video seems to make the car ahead look a bit further away than it actually is - perhaps the wide-angle lens has that effect.


Track Map

PIR Track Map


Track Report

This was my first outing to Portland International, so in addition to learning about driving on a racetrack in general, I had to learn the layout of this particular track. After the first session, I knew the entry, apex, and exit points of all the corners, even if I didn't actually get my car to take exactly the right line every time. As the day progressed, I got more consistent and stepped up the speeds a bit. I did manage to scare myself slightly while entering 10 from the back straight - I decided to go a faster down the back straight, and I mis-judged the braking distance required. I came out ok, but I realized that going from a consistent 95mph on the back straight to 110mph was too large a "step up" for me. Eventually, I got the speeds up, but jumping 15mph at once is a bit much :-)

Detailed comments:

  1. The entry for turn 1 comes after the very long front straight, where I was hitting speeds of 110-115mph when I was pushing it. Turn 1 was where I felt the most uneasy about my lines. My instructor had me almost completely sacrifice turn 2 by entering turn1 a little early, clipping the apex, and heading toward the extreme inside of turn 2. That allowed me to enter turn 1 a lot hotter than if I had turned in later and sharper, but it never felt really good in turn 2. On my first lap, I took a line that was slower on the entry to 1, stayed more in the middle of the track between 1 and 2, and then turned in where the line between 2 and 3 was almost straight. That felt more comfortable to me, but my instructor had just a few more laps' experience than I. Thus I took my instructor's suggested line. I got better at it as the day progressed, but it never really felt fast. By the end of the day, I was turning into 1 around 50mph in 2nd gear and slowing slightly as I approached the turn-in for turn 2.
  2. My line through 2 was very much affected by the line I took through turn 1. I was turning in at the very left-most part of the track after exiting 1 really wide. This made for a very sharp turn-in for 2, probably around 30-35mph. I would then let it drift out as necessary to maintain traction under full throttle in 2nd gear. As I got faster, I found it was better to shift to 3rd between turns 2 and 3 (around 5500RPM); otherwise I would run out of revs by the exit of 3. Shifting in the middle of turn 3 upset the handling of the car too much for my liking.
  3. Upon exiting 2 in 3rd gear under full throttle, turn 3 was easy - just keep your right foot in it and drift toward track out naturally. After exiting 3, head along the left side of the track toward the turn-in for 4.
  4. The apex for 4 is pretty late, so I generally used a later turn-in. I stayed in the middle of the track through the first half of 4 and, clipped the apex cone, and then feathered the throttle to allow the car to drift toward the track out under power. The track-out for 4 is basically the turn-in for 5.
  5. Just before turn-in for 5, I'd stab the brakes briefly to settle the car. As the day progressed, I was carrying more and more speed into 5, so the braking duration decreased. Turn-in was pretty sharp and I was back on the throttle almost immediately. In this corner, the car responded to throttle application very well - the rear end would rotate nicely as I turned in, and it just planted and stuck as I got on the throttle. I'd try to get my outside tires on the concrete patch on the track as I clipped the apex, as that felt like a pretty good line.
  6. In turn 6, I felt like I did it "ok," but it never felt "good." On the exit to 5, I was rarely carrying enough speed that I actually had to go to the track out, so I kept the exit to 5 a little tighter and headed right toward the turn-in for 6. I'd turn in for 6 at the cone and clip the apex, but the car felt a little "floaty," so I wasn't too aggressive there. Again, I almost never carried enough speed to justify going all the way to the track-out cone for 6, and thus I tightened it up a bit to the left in preparation for 7. I think there is a lot of room for improvement through 5-6-7 for me.
  7. In turn 7, things started feeling better, I'd turn in at the cone and get on a path toward the apex cone. Almost immediately I'd be back on the throttle, with it being floored in 3rd well before the apex. The track-out for 7 was almost a throw-away cone (according to my instructor) since the track is wide and the ensuing turn is pretty gentle. I'd still head pretty much for the cone anyway. Early on in the day, I kept wondering why 7 felt "weird" when I was driving it. After talking with some people in the pits between sessions, I realized that it's an off-camber turn... that'd do it :-)
  8. Upon exiting 7, I was at full throttle in 3rd, probably cresting 80mph. As I got faster, I found it a little more stable to shift into 4th a little early (5500 RPM) before setting up for the gentle right-hand turn on the back "straight." Going through 8, I found it much nicer to hug the wall on the right side, since the left side of the track is a bit off-camber and made me uneasy.
  9. Approaching the end of the back straight at the end of the day, I was hitting 110-115 when I was pushing it, and I'd start braking at the 400ft mark. I'd slow down to 65-70mph and then downshift into 2nd.
  10. After grabbing 2nd, I'd gently turn in for 10, run over the curbing (as I was instructed) at the apex, and set up for turn 11.
  11. Turn 11 was pretty much a sacrificed corner as I just tried to carry speed to the turn-in point for turn 12. I'd brake somewhat at the entry to 12, but as the day progressed, the amount of braking there kept getting smaller. In retrospect, I probably could have used 3rd through 10 and not slowed so much at the end of the back straight. That would allow me to carry more speed through 10 and 11.
  12. I used 2nd through 12 most of the day. It was pretty straight forward - turn in at the cone, point toward the apex, and get on the throttle as soon as the car allows. By the end of the day, I was at the very top-end of 2nd at the exit for 12, and I think it'd probably be better to use 3rd through 12 next time.


  13. Erik's Car Setup


    Equipment Report

    Numbers and Data


    All this stuff is ©1999-2004 Erik Gross
    This website brought to you by picture_page, and the letter 4.

    A good buddy of mine put it well: "Unauthorized duplication, while sometimes necessary, is never as good as the real thing. And it could be bad for the pixels." As I've put a lot of time and effort into creating this webpage and website, I would prefer that you not redistribute, sell, or claim as yours any of the content of this site. I know I can't stop you if that's what you're going to do, but I'm asking nicely. If you would like to publish some of the content of this site in your own work (printed, electronic, or otherwise), please e-mail me and we can work something out.
     
    Disclaimer
    Feedback


    Last Modified Tue Sep 30 2003 21:33:23 PDT